modding-guide
Tutorial 3 - Making a new production chain
For our next mod we are taking another step in a more advanced mod. We are going to make a new production chain and a new good. We are not going to make it that complex for now and start with a basic production chain and one new product.
What are we going to do?
We are going to make wooden toys which could have a use in the game for the lower population tiers as a need.
We are going to use an already existing good (wood) to create a new good (wooden toys).
We will be creating:
- The icon for wooden toys
- All translations
- Product (Wooden toys)
- Taking product lists into account
- Building that produces our good (Toy maker)
- Taking ItemEffectTargetPools into account for our building
- Production chain (Wooden toys production chain)
- Citizen needs (Wooden toys as a Luxury Need for Farmers, Workers and Artisans)
- Triggers to activate everything ingame
- Building texture. No 3D-modelling yet, just the texture
- This can be a big step because it has a lot of small steps we need to take. But do not worry, we are going to do this step by step.
Our mod structure
Compared to the previous mod we will now have some more folders and files we need to create. We will call our mod “Tutorial Wooden Toys” and use again the [Gameplay] category.
The structure now will look like this:
[Gameplay] Tutorial Wooden Toys
- data
- config
- export
- main
- asset
- assets.xml which contains all the logic for your mod.
- asset
- main
- gui
- xml files containing the translations for text in every language
- texts_english.xml
- texts_french.xml
- texts_german.xml
- …
- xml files containing the translations for text in every language
- export
- graphics
- icons
- Custom graphics we use in our mod as icons for the specialist
- buildings
- production
- wooden_toys
- Contains wooden_toys files that describes the new building.
- maps
- Contains maps which are the materials/textures of our building. diff, mask, metal and norm file.
- wooden_toys
- icons
- config
- modinfo.json
Start with the icons
We only need an icon for Wooden Toys. If we look at what is already available in the game we have a lot of icons that are not used but are in the gamefiles. Other assets are used for other things.
If we look at the museum icons that are available, we have a base image we can manipulate a bit and make a wooden toy from.
For the base of the Wooden Toys icon we go to data2.rda\data\ui\2kimages\main\3dicons\museum\icon_statue_stone_0.dds and convert the dds to a png.
![]()
We do some image corrections to give it a more wooden look or you could also just use another icon or the existing icon. We can now add this icon in the right location in our mod folder structure: /data/graphics/icons
![]()
Our GUIDS
Let’s start with defining all the GUIDs we need for this mod. We ended with GUID 1742008802 in our previous tutorial. Remember that you need unique identifiers (GUIDs) for every asset in every mod. The GUIDs taken here are from my range. Go back to the second tutorial to learn more about the GUIDs and the range and how you can claim your own range for yourself.
- 1742008803 (Wooden toys - Good)
- 1742008804 (Wooden toys - Good description)
- 1742008805 (Wooden toys - Production chain)
- 1742008806 (Wooden toys - Production chain description)
- 1742008807 (Toy maker - Building)
- 1742008808 (Toy maker - Building description)
- 1742008809 (Trigger - Unhide)
- 1742008810 (Trigger - Unlock)
Translations
Do you still know how to create all the translations for the new assets?
Those translations are all stored in the files in the location data\config\gui
There we have the files:
- texts_english.xml
- texts_french.xml
- texts_german.xml
- …
Lets start again with our texts_english.xml
<ModOps>
  <ModOp Type="add" Path="/TextExport/Texts">
    <Text>
      <GUID>1742008803</GUID> <!-- Wooden toys - Good -->
      <Text>Wooden Toys</Text>
    </Text>
    <Text>
      <GUID>1742008804</GUID> <!-- Wooden toys - Good - Description -->
      <Text>Basic wooden toys made from wood that is safe for kids to play with.</Text>
    </Text>
    <Text>
      <GUID>1742008805</GUID> <!-- Wooden toys - Production chain -->
      <Text>Wooden Toys</Text>
    </Text>
    <Text>
      <GUID>1742008806</GUID> <!-- Wooden toys - Production chain - Description -->
      <Text>Basic wooden toys made from wood that is safe for kids to play with.</Text>
    </Text>
    <Text>
      <GUID>1742008807</GUID> <!-- Wooden toys - Building -->
      <Text>Toy maker</Text>
    </Text>
    <Text>
      <GUID>1742008808</GUID> <!-- Toy maker - Building - Description -->
      <Text>Naking Wooden Toys, safe and the best quality you will get.</Text>
    </Text>
  </ModOp>
</ModOps>
We can also do all the other languages if needed.
Wooden toys, the new good
Time to create our new good. We already have the icon for it. The rest is also not that complicated. A good has not that many proporties.
addNextSibling, Template, GUID, name, description, text
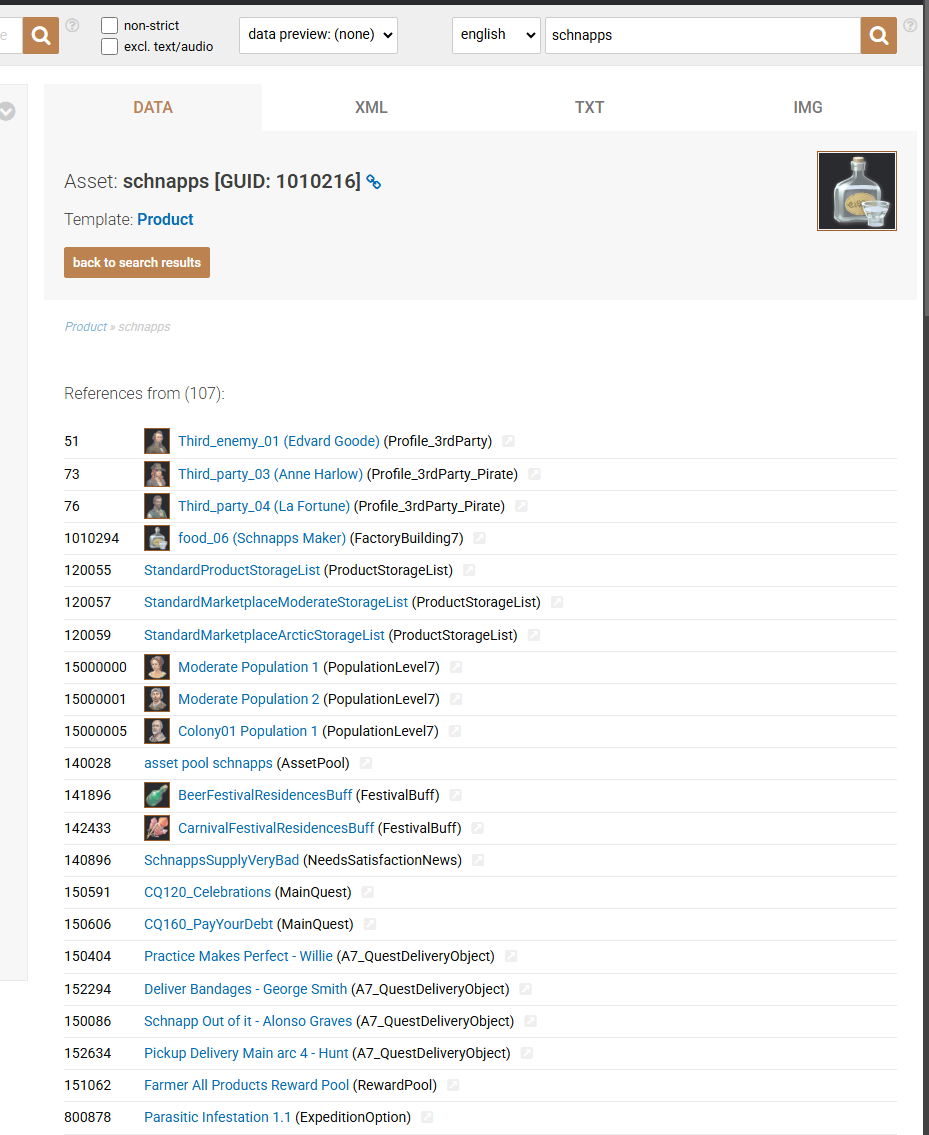
We will be adding this new good to the list of goods right after for example schnapps (GUID 1010216).
The template we use for this new good and new asset is <Template>Product</Template>.
At this point I assume you already know the drill about making your main assets.xml in the “data/config/export/main/asset/” folder. Again, in this main assets.xml we will be writing all our mod operations and we start with creating our wrapper <ModOps> with the also the closing tag so we can place all our mod operations (<ModOp>) inside this.
Looking for an example
As mentioned in the previous tutorial, the best way to learn is looking at examples and how those are created. For that, the game itself is a gold mine, ready to be excavated.
Go to https://a1800.net/ and look for a similar good from similar population value, for example schnapps (GUID 1010216). This is also a luxury good, but does not give to much money because the input goods you need are relatively easy compared to other more complex luxury goods.
If we have a look at the structure of the <Template>Product</Template>, we see a similar structure of our specialists asset.
<Asset>
	<Template>Product</Template>
	<Values>
		<Standard>
			<GUID>1010216</GUID>
			<Name>schnapps</Name>
			<IconFilename>data/ui/2kimages/main/3dicons/icon_schnapps_4.png</IconFilename>
			<InfoDescription>11754</InfoDescription>
			<!--Product Description Schnapps-->
		</Standard>
		<Text>
			<LocaText>
				<English>
					<Text>Schnapps</Text>
					<Status>Exported</Status>
				</English>
			</LocaText>
			<LineID>5357</LineID>
		</Text>
		<Locked/>
		<Product>
			<StorageLevel>Building</StorageLevel>
			<ProductCategory>11705</ProductCategory>
			<!--Product Category Happiness Good-->
			<BasePrice>25</BasePrice>
			<CivLevel>1</CivLevel>
			<AssociatedRegion>Moderate;Arctic</AssociatedRegion>
			<ProductionRegions>
				<Item>
					<RegionType>Moderate</RegionType>
				</Item>
				<Item>
					<RegionType>Colony01</RegionType>
					<RequiredDLCs>
						<Item>
							<RequiredDLC>24961</RequiredDLC>
							<!--Anno 1800 DLC - Seeds of Change-->
						</Item>
					</RequiredDLCs>
				</Item>
			</ProductionRegions>
		</Product>
		<ExpeditionAttribute>
			<BaseMorale>15</BaseMorale>
			<ExpeditionAttributes>
				<Item>
					<Attribute>Medicine</Attribute>
					<Amount>20</Amount>
				</Item>
			</ExpeditionAttributes>
			<FluffText>12832</FluffText>
			<!--Schnapps-->
		</ExpeditionAttribute>
	</Values>
</Asset>
It has some differences offcourse, but you will now realise, once you understand the structure of an asset, it is easier to understand most of the assets just by logical thinking and reading the different properties of the template and asset.
We see the same <Standard>, <Text>, <ExpeditionAttribute> parts which contain the same properties we already know from the specialist. Apart from those, all of the other properties are new and have a specific function within this <Template>Product</Template>.
<Template>, <Standard> and <Text>
Let’s start with the first parts we already know, the <Template>, <Standard> and <Text> parts.
Add the template for the product, the correct GUID we decided to use for our good (1742008803), the name of the good, the description for the good (1742008804), the correct path to the icon we already added to the correct location in our mod folder structure and to top it off, the fallback text.
<!-- START ADD GOOD - Wooden toys -->
  <ModOp Type="addNextSibling" GUID='1010216'>
    <Asset>
      <Template>Product</Template>
      <Values>
        <Standard>
          <GUID>1742008803</GUID>
          <Name>Wooden toys</Name>
          <IconFilename>data/graphics/icons/icon_wooden_toys.png</IconFilename>
          <InfoDescription>1742008804</InfoDescription>
        </Standard>
        <Text>
          <LocaText>
            <English>
              <Text>Wooden toys</Text>
              <Status>Exported</Status>
              <ExportCount>1</ExportCount>
            </English>
          </LocaText>
        </Text>
      </Values>
    </Asset>
  </ModOp>
<!-- END ADD GOOD - Wooden toys -->
Locked
<Locked/>
The same as any other asset, we also lock products from the beginning of the game. That way the new product will only show in the warehouse when it is unlocked.
Because the locked property is determined on a higher level in the template, we can just use a selfclosing locked tag here. The properties are taken over from the template. Only if we want a different value then what is defined in the template, we change the value. In this case we do want to good to be locked, so we do not change it.
Product
Next is the important part of the product. It defines the most important proporties of the product.
StorageLevel
This can be:
- Building
- Area
Building is used for alle production goods. Area is used for all workforce products. So, not the case here. In our case it is a production good so, building.
ProductCategory
Products are categorised. We have different categories:
- 11702 - Product Category Resource
- 11703 - Product Category Intermediate Good
- 11704 - Product Category Supply Good
- 11705 - Product Category Happiness Good
- 11706 - Product Category Money Good
- 11707 - Product Category Construction Material
- 11708 - Product Category Public Supply
- 11709 - Product Category Public Happiness
- 11710 - Product Category Public Money
- 134777 - Product Category Bus Need
- 135875 - Product Category Commercial Supply
In our case, it is the Product Category Happiness (Luxury) Good (GUID 11705), the same as we can see with the Schnapps.
BasePrice
We define a basprice for our good. This will be used as a price to sell and buy the good. Schnapps had a baseprice of 25. Let’s use 20 for our wooden toys. You could make a complete calculation here to determine the baseprice based on the maintenance cost and more. But we kindoff eye-balling it here.
For the ratio in Docklands this is also partially taken into account, but that is only a small part. Apart from this some other parameters are used to determine the docklands ratio. More about that later.
CivLevel
This will define on which lowest citizen level the good is used. In our case it will be used for farmers, workers and artisans. So, CivLevel 1.
AssociatedRegion
Define where this good is assosiated with. There are a couple of regions we can choose from:
- Moderate (Old World)
- Colony01 (New World)
- Arctic (Arctic)
- Africa (Enbesa)
We can combine multiple regions. For example we could also add the wooden toys to some New World population tiers so we have 2 regions where the good is being used. So both are associated with our good.
ProductionRegions
RegionType
Define where this good will be produced. There are a couple of regions we can choose from:
- Moderate (Old World)
- Colony01 (New World)
- Arctic (Arctic)
- Africa (Enbesa)
We can also combine multiple regions. But we only need 1 in this case. It will only be produced in the Old World.
RequiredDLCs
Lock the good if the required DLC is not available. We already saw this list before but here it is again:
- 116630 - CDLC 01 - Holiday
- 410079 - CDLC 02 - Amusement Park
- 410081 - CDLC 03 - City Lights
- 319 - CDLC 04 - Vehicle Liveries
- 410100 - CDLC 05 - Pedestrian Zone
- 522 - CDLC 06 - Vibrant City
- 25149 - CDLC 07 - Seasonal Decorations
- 24964 - CDLC 08 - Industrial Zone
- 24965 - CDLC 09 - Old Town
- 10114 - CDLC 10 - Dragon Garden
- 21049 - CDLC 11 - Fiesta Time
- 23718 - CDLC 12 - National Park
- 23719 - CDLC 13 - Eldritch
- 33032 - CDLC 14 - Steampunk
- 41533 - CDLC 15 - Pirate
- 51147 - CDLC 16 - Celebration
- 410041 - DLC - Botanica
- 410070 - DLC - Bright Harvest
- 24331 - DLC - Charity Tree
- 410083 - DLC - Docklands
- 24962 - DLC - Empire of the Skies
- 410085 - DLC - HighLife
- 410071 - DLC - Land of Lions
- 24963 - DLC - New World Rising
- 24961 - DLC - Seeds of Change
- 410040 - DLC - Sunken Treasure
- 4100010 - DLC - The Anarchist
- 410059 - DLC - The Palace
- 410042 - DLC - The Passage
- 410084 - DLC - Tourism
We do not need this in our case. The good is not locked behind a content restriction.
<Product>
    <StorageLevel>Building</StorageLevel>
    <ProductCategory>11705</ProductCategory> <!-- Happiness Good -->
    <BasePrice>20</BasePrice>
    <CivLevel>1</CivLevel>
    <AssociatedRegion>Moderate;Colony01</AssociatedRegion>
    <ProductionRegions>
        <Item>
            <RegionType>Moderate</RegionType>
        </Item>
    </ProductionRegions>
</Product>
ExpeditionAttribute
Define a flat base amount for morale and a flat amount if you want to add a specific attribute to the good.
We already saw the list but here it is again:
- Crafting
- Diplomacy
- Melee (Force)
- Might (Naval Power)
- Navigation
- Medicine
- Faith
- Hunting
In our case we add 5 base morale and extra attribute of 10 diplomacy.
<ExpeditionAttribute>
    <BaseMorale>5</BaseMorale>
    <ExpeditionAttributes>
        <Item>
            <Attribute>Diplomacy</Attribute>
            <Amount>10</Amount>
        </Item>
    </ExpeditionAttributes>
</ExpeditionAttribute>
If we combine all this we get:
<!-- START ADD GOOD - Wooden toys -->
  <ModOp Type="addNextSibling" GUID='1010216'>
    <Asset>
      <Template>Product</Template>
      <Values>
        <Standard>
          <GUID>1742008803</GUID>
          <Name>Wooden toys</Name>
          <IconFilename>data/graphics/icons/icon_wooden_toys.png</IconFilename>
          <InfoDescription>1742008804</InfoDescription>
        </Standard>
        <Text>
          <LocaText>
            <English>
              <Text>Wooden toys</Text>
              <Status>Exported</Status>
              <ExportCount>1</ExportCount>
            </English>
          </LocaText>
        </Text>
		<Locked/>
        <Product>
          <StorageLevel>Building</StorageLevel>
          <ProductCategory>11705</ProductCategory> <!-- Luxury Need -->
          <BasePrice>20</BasePrice>
          <CivLevel>1</CivLevel>
          <AssociatedRegion>Moderate;Colony01</AssociatedRegion>
          <ProductionRegions>
            <Item>
              <RegionType>Moderate</RegionType>
            </Item>
          </ProductionRegions>
        </Product>
        <ExpeditionAttribute>
          <BaseMorale>5</BaseMorale>
          <ExpeditionAttributes>
            <Item>
              <Attribute>Diplomacy</Attribute>
              <Amount>10</Amount>
            </Item>
          </ExpeditionAttributes>
        </ExpeditionAttribute>
      </Values>
    </Asset>
  </ModOp>
<!-- END ADD GOOD - Wooden toys -->
ProductStorageLists & ProductList
We have created the good. The next step in the process is telling the game to which ProductStorageList and ProductList we want to add the good. If we go to the warehouse or harbour, the goods are divided in different categories. We have to add our good to all the lists we want so they become visible in those lists.
There are a lot of ProductStorageList and ProductList available, and it is hard in the beginning to find the right lists you need.
We could again use schnapps as an example. Our good is a similar good so we could add our Wooden toys to the same lists to get the similar result.
If we go to https://a1800.net/ and search for schnapps again, and open the product, in the data view we can again see all the references where that asset is being use.
ProductStorageList
If we look at the fifth result, we see “120055 StandardProductStorageList (ProductStorageList)”, one of the ProductStorageLists. If we open this list by clicking on it, we can see this list includes every good available.
<Asset>
  <Template>ProductStorageList</Template>
  <Values>
      <Standard>
          <GUID>120055</GUID>
          <Name>StandardProductStorageList</Name>
      </Standard>
      <ProductStorageList>
          <ProductList>
              <Item>
                  <Product>120008</Product>
              </Item>
              <Item>
                  <Product>1010196</Product>
              </Item>
              <Item>
                  <Product>1010200</Product>
              </Item>
              <Item>
                  <Product>1010195</Product>
              </Item>
              ...
          </ProductList>
      </ProductStorageList>
  </Values>
</Asset>
This is definitely a list where we want to add our good to.
Under this list, we have another ProductStorageList called “120057 StandardMarketplaceModerateStorageList (ProductStorageList)”. If we try to understand this list based on the name, we could figure out this is the list of goods we see when we open the marketplace and where we can activate or restrict the population from consuming the goods. This is also a list where we want to add our new good to.
If we go to the template ProductStorageList to see all the assets created from this template we get the complete list of those ProductStorageList.

- 4269 - AllArcticMails
- 4254 - AllColonyMails
- 745 - AllModerateMails
- 120060 - EmptyStorageList
- 120061 - StandardCoalStoneStorageList
- 122362 - StandardMarketplaceAfricaStorageList
- 120059 - StandardMarketplaceArcticStorageList
- 120058 - StandardMarketplaceColonyStorageList
- 120057 - StandardMarketplaceModerateStorageList
- 120056 - StandardOilHarborStorageList
- 120055 - StandardProductStorageList
- As you can see this is a high level storagelist used for high level categories of goods.
ProductList
If we scroll down more in the references and expand the results we have for schnapps, at some point we also see some ProductList references.
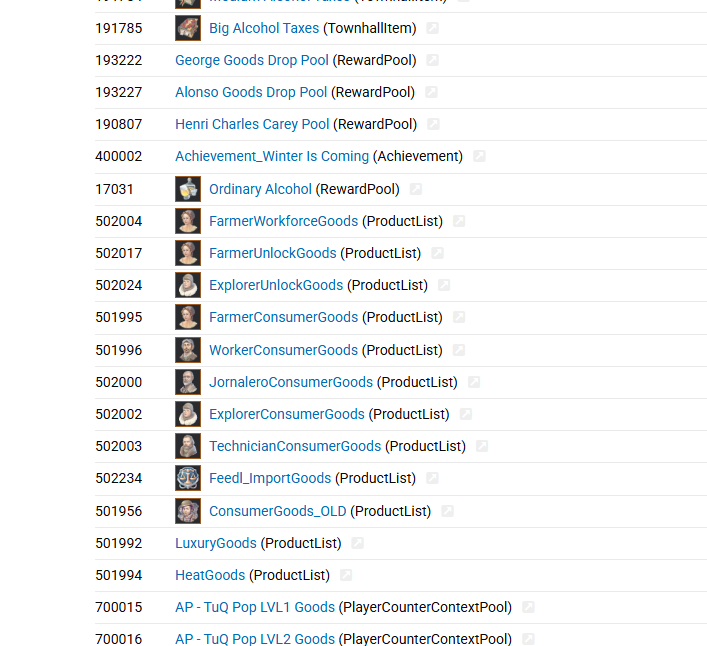
There are a couple of StandardProductStorageListhere.
- 502004 FarmerWorkforceGoods (ProductList)
- 502017 FarmerUnlockGoods (ProductList)
- 502024 ExplorerUnlockGoods (ProductList)
- 501995 FarmerConsumerGoods (ProductList)
- 501996 WorkerConsumerGoods (ProductList)
- …
Just by the name we could understand what those lists are meant for. The WorkforceGoods ProductList defines a list of goods that that workforce type (farmers for example) produce. That list is used to for example boost productivity with the additional system that then costs happiness. We see this is only used for farmers for schnapps because that is the population tier that is used as workforce for schnapps. We will decide to which corresponding WorkforceGoods ProductList we will add our good when we made the decision which population tier will me used as workforce in our production building, probably artisans.
The next list we see is the UnlockGoods ProductList. This is the list that is used in different references to define what goods are unlocked at that population level. In this case at farmers. In our case because we probably will be using artisans as workforce, we will use that UnlockGoods ProductList.
Next one in those list types is the ConsumerGoods ProductList. If we look a bit down we also see ConsumerGoods_OLD. At one point the developers decided to split up all the ConsumerGoods ProductLists. We only use the splitted lists and ignore the _OLD list. Those lists will define the goods that population type consume. The consumption itself is not determined there but only the reference which is then used on multiple places like the statistics screen.
Last one is the LuxuryGoods ProductList. Like we have the ConsumerGoods we also have this for luxury. For some reason they decided to not split this list up apart from a heat variant used for the arctic.
If we go to the template ProductList we will see this template has a lot more (107) lists compared to the previous.
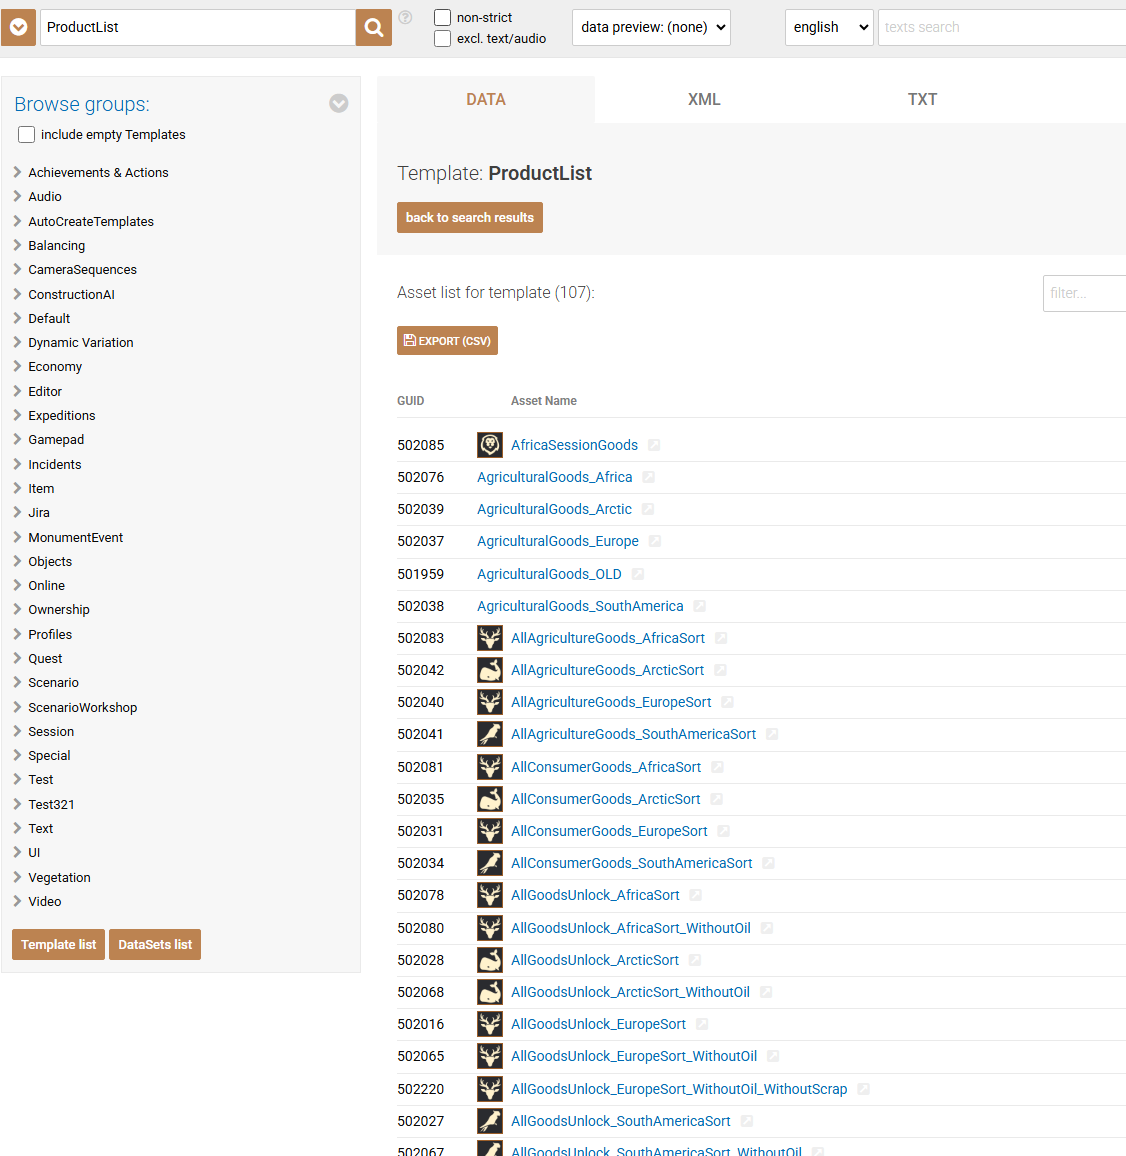
Go to https://a1800.net/ and search for the template to get to the references if you want to see the whole list. I’m not going to list all 107 lists here.
We see lists for alle regions, all population types, different categories of goods like intermediate or raw materials, ect. In our case, we said we were going to use the Artisans as workforce so we will be using 502019 ArtisanUnlockGoods and 502006 ArtisanWorkforceGoods.
Add good to lists
For the ProductStorageList we decided to take 120055 (StandardProductStorageList) and 120057 (StandardMarketplaceModerateStorageList). If we look at that structure and determine the path we need to use we get the following mod operation:
<!-- START ADD GOOD TO StandartProductStorageList -->
  <ModOp Type="add" GUID='120055,120057' Path="/Values/ProductStorageList/ProductList">
    <Item>
      <Product>1742008803</Product> <!-- GOOD - Wooden toys  -->
    </Item>
  </ModOp>
<!-- END ADD GOOD TO StandartProductStorageList -->
Important to know here, is with “add” we add our new good at the end of the list. Visually that would also mean that the good would be at the end of the list. This could be fine but what if we want to add this good right after for example schnapps so it is somewhat grouped together with the earlier population type goods.
addNextSibling
To add a good after another good we can use the mod operation type we already used for adding new assets in the assets list, addNextSibling.
In this case we do have to take into account that we will be adding this good after another good that we define. If we add this good after for example schnapps, then we have to make sure every list we add our good to also has the good schnapps in it. Otherwise our good will not be added because it can not find the good it is supposed to be added after.
If we look at 120055 and 120057 we know that schnapps is in both lists so we can safely add our Wooden toys after it. Now, how do we do this within our mod operation?
We change the type to addNextSibling and tweak the path. In the path we will reference the asset where the new asset (in this case the good) will be added after.
<!-- START ADD GOOD TO StandartProductStorageList -->
  <ModOp Type="addNextSibling" GUID='120055,120057' Path="/Values/ProductStorageList/ProductList/Item[Product='1010216']">
    <Item>
      <Product>1742008803</Product> <!-- GOOD - Wooden toys  -->
    </Item>
  </ModOp>
<!-- END ADD GOOD TO StandartProductStorageList -->
If we take a closer look, we see we added “Item[Product=’1010216’]” to our path. addNextSibling will add the content on the same level as a sibling. If we not would have added “Item[Product=’1010216’]” and just changed the different type of mod operation, then our new Item would have been added on the same level as ProductList. Which is one level to high. By defining the actual item where it needs to be added after it will be added on the same level as this item and right after this.
Warning!
Using an asset as a reference to add or change something could cause problems. When another mod removes or relocates certain assets those assets are not there anymore which would result in your mod operation not being able to find that asset and being broken. Removing things should never be done unless really good reasons to minimize those problems.
For the ProductList we decided to go with the artisans. Also farmers, workers and artistas will be consuming this good as a luxury need. This good will be in the Old World and the New World. The list we need are:
- 501997 - ArtisansConsumerGoods
- 502019 - ArtisanUnlockGoods
- 502006 - ArtisanWorkforceGoods
- 501995 - FarmerConsumerGoods
- 501996 - WorkerConsumerGoods
- 7398 - ArtistaConsumerGoods
- 501992 - LuxuryGoods
We do not need to add our good to for example “502031 - AllConsumerGoods_EuropeSort”. If we look into this list, we see that this actually contains the lists of the population consumer goods.
For those lists, we can not add this good after a specific good that would cover all lists together. Not all lists have the same goods. We could look for a good that is in as many lists as possible and then add separate ones for the missing lists. But for most lists in this case it does not really matter so we will just add the new good at the end of every list.
We compare all the lists to make sure the structure of all those lists is the same so we can be sure we can use the same Path for all of them in the mod operation.
Example:
<Asset>
	<Template>ProductList</Template>
	<Values>
		<Standard>
			<GUID>501997</GUID>
			<Name>ArtisansConsumerGoods</Name>
			<IconFilename>data/ui/2kimages/main/3dicons/resident/icon_resident_artisan.png</IconFilename>
		</Standard>
		<ProductList>
			<List>
				<Item>
					<Product>1010238</Product>
					<!--sausage-->
				</Item>
				<Item>
					<Product>1010213</Product>
					<!--bread-->
				</Item>
				<Item>
					<Product>1010203</Product>
					<!--soap-->
				</Item>
				<Item>
					<Product>1010214</Product>
					<!--beer-->
				</Item>
				<Item>
					<Product>1010217</Product>
					<!--canned food-->
				</Item>
				<Item>
					<Product>1010206</Product>
					<!--sewing machines-->
				</Item>
				<Item>
					<Product>1010257</Product>
					<!--rum-->
				</Item>
				<Item>
					<Product>1010247</Product>
					<!--fur coats-->
				</Item>
			</List>
		</ProductList>
	</Values>
</Asset>
Now use the path in our final mod operation to add the good to all lists.
<!-- START ADD GOOD TO ProductLists -->
  <ModOp Type="add" GUID="501997,502019,502006,7398,501995,501996,501992" Path="/Values/ProductList/List">
    <Item>
      <Product>1742008803</Product> <!-- GOOD - Wooden toys  -->
    </Item>
  </ModOp>
<!-- END ADD GOOD TO ProductLists -->
Production building Wooden toys: Toy maker
Now that we have our product and we made sure the product is visible in our kontor, it is time to make the building that will actually produce our new product.
The code of the building
We are going to make a production building. This building can have different templates based on the type of factory we will be making. For now we are not going to deep into that and we decide we will be using the more general template, <Template>FactoryBuilding7</Template>.
A quick and easy way to actually determine what code to use is using an existing production building as an example and use that as a base to start from. If we look at our building we want to make we have some sort of carpentery but a more advanced one. If we think about it, it is somewhat like the Wood veneers production in the Old World. Let’s take that building as the base to start from.
Go to https://a1800.net and search for this production building by using keywords in the text search on the right. For example, by using “Wood veneers”.
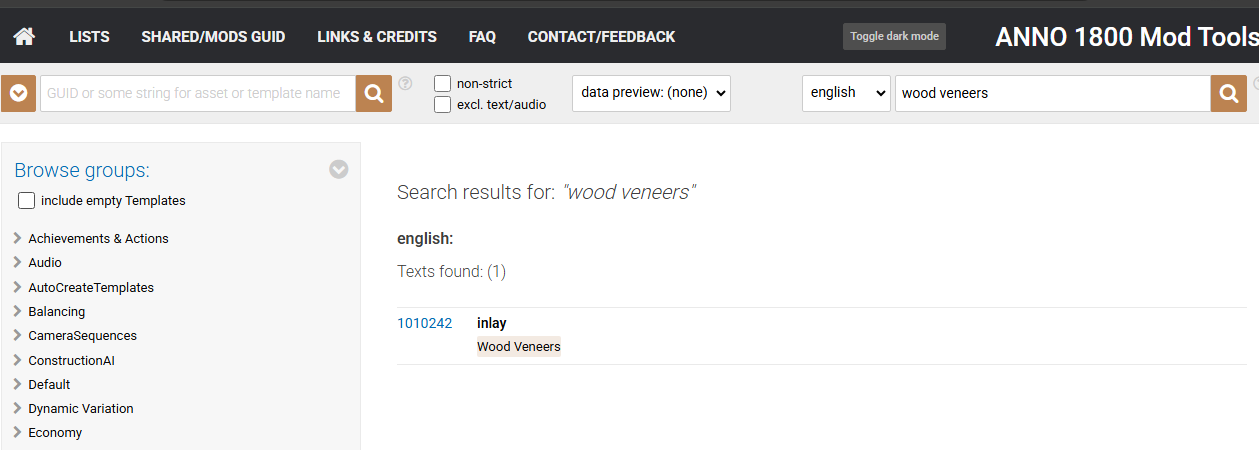
We did not find the production building, but we did find the good that is produced in that building. If we click through on the good, we get all references where this good is used, which also continas the production building we are looking for, 1010320 processing_07 (Inlay Processing) (FactoryBuilding7).
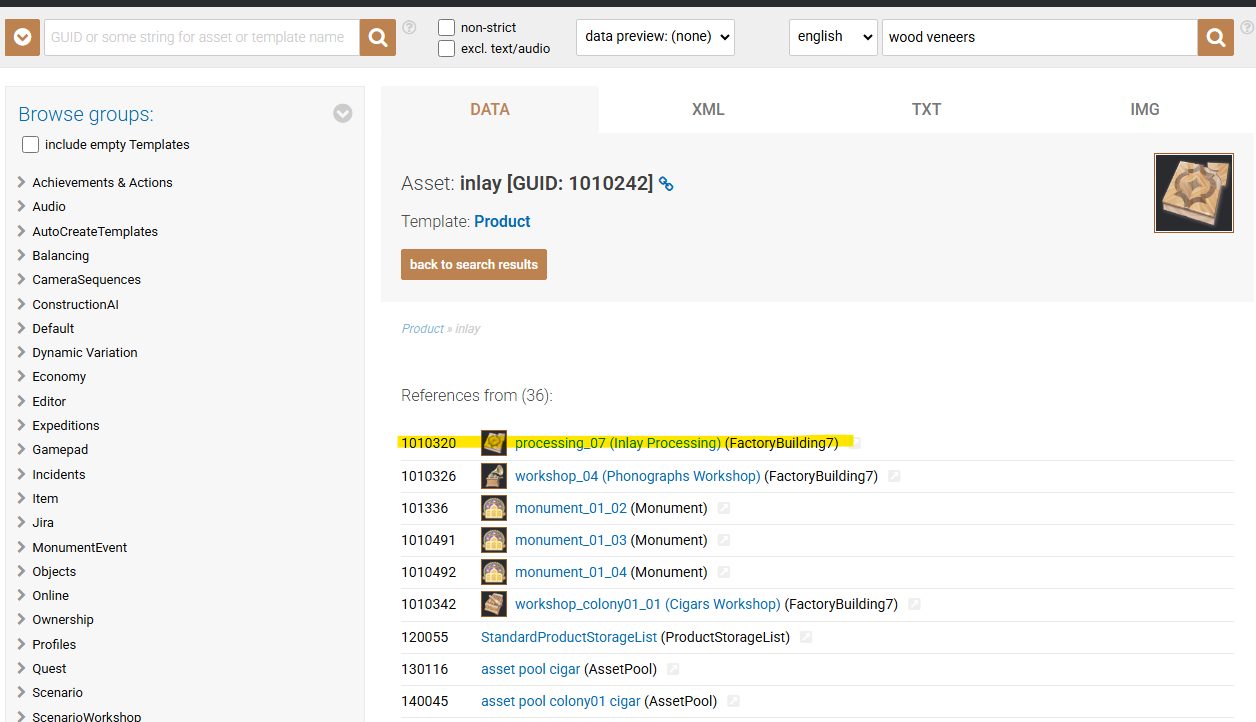
If we open this building we have everything we need if we switch to the XML view.
<Asset>
	<Template>FactoryBuilding7</Template>
	<Values>
		<Standard>
			<GUID>1010320</GUID>
			<Name>processing_07 (Inlay Processing)</Name>
			<IconFilename>data/ui/2kimages/main/3dicons/icon_inlay.png</IconFilename>
		</Standard>
		<Building>
			<BuildModeRandomRotation>90</BuildModeRandomRotation>
			<AssociatedRegions>Moderate</AssociatedRegions>
		</Building>
		<Blocking/>
		<Cost>
			<Costs>
				<Item>
					<Ingredient>1010017</Ingredient>
					<!--Money-->
					<Amount>22000</Amount>
				</Item>
				<Item>
					<Ingredient>1010196</Ingredient>
					<!--timber-->
					<Amount>10</Amount>
				</Item>
				<Item>
					<Ingredient>1010205</Ingredient>
					<!--bricks-->
					<Amount>20</Amount>
				</Item>
				<Item>
					<Ingredient>1010218</Ingredient>
					<!--beams-->
					<Amount>16</Amount>
				</Item>
				<Item>
					<Ingredient>1010207</Ingredient>
					<!--window-->
					<Amount>15</Amount>
				</Item>
				<Item>
					<Ingredient>1010202</Ingredient>
					<!--concrete-->
					<Amount>15</Amount>
				</Item>
			</Costs>
		</Cost>
		<Object>
			<Variations>
				<Item>
					<Filename>data/graphics/buildings/production/processing_07/processing_07.cfg</Filename>
				</Item>
			</Variations>
			<Skins>
				<DefaultSkinName>1010320</DefaultSkinName>
				<DefaultSkinDescription>23853</DefaultSkinDescription>
				<!--ChangeBuildingSkin_toDefaultSkinDesc-->
				<DefaultSkinCategoryName>7312</DefaultSkinCategoryName>
				<!--Classic-->
			</Skins>
		</Object>
		<Mesh/>
		<Selection>
			<OnSelection>
				<IsBaseAutoCreateAsset>1</IsBaseAutoCreateAsset>
				<Values>
					<ActionList/>
				</Values>
			</OnSelection>
			<ParticipantMessageArcheType>Resident_tier04_atWork</ParticipantMessageArcheType>
			<Colors>
				<WeakSelectionColorType>NoColor</WeakSelectionColorType>
			</Colors>
		</Selection>
		<Text>
			<LocaText>
				<English>
					<Text>Marquetry Workshop</Text>
					<Status>Exported</Status>
				</English>
			</LocaText>
			<LineID>5285</LineID>
		</Text>
		<Constructable/>
		<Locked/>
		<SoundEmitter>
			<ActiveSounds>
				<Item>
					<Sound>216883</Sound>
					<!--wwe_sfx_bld_processing_typeCluster_tag-->
				</Item>
				<Item>
					<Sound>235835</Sound>
					<!--wwe_sfx_bld_processing_07-->
				</Item>
			</ActiveSounds>
			<IncidentSounds>
				<InfectedFire>
					<Item>
						<Sound>214659</Sound>
						<!--wwe_sfx_bld_inc_burn-->
					</Item>
				</InfectedFire>
			</IncidentSounds>
		</SoundEmitter>
		<FeedbackController/>
		<Infolayer/>
		<UpgradeList/>
		<Factory7/>
		<FactoryBase>
			<FactoryInputs>
				<Item>
					<Product>120008</Product>
					<!--wood-->
					<Amount>1</Amount>
					<StorageAmount>8</StorageAmount>
				</Item>
			</FactoryInputs>
			<FactoryOutputs>
				<Item>
					<Product>1010242</Product>
					<!--inlay-->
					<Amount>1</Amount>
					<StorageAmount>2</StorageAmount>
				</Item>
			</FactoryOutputs>
			<CycleTime>60</CycleTime>
			<IsMainFactory>1</IsMainFactory>
		</FactoryBase>
		<LogisticNode/>
		<AmbientMoodProvider>
			<Murmur>Factory</Murmur>
			<DynamicEnvironmentType>None</DynamicEnvironmentType>
		</AmbientMoodProvider>
		<Maintenance>
			<Maintenances>
				<Item>
					<Product>1010017</Product>
					<!--Money-->
					<Amount>750</Amount>
					<InactiveAmount>375</InactiveAmount>
				</Item>
				<Item>
					<Product>1010117</Product>
					<!--moderate workforce 4-->
					<Amount>150</Amount>
				</Item>
			</Maintenances>
		</Maintenance>
		<Attackable>
			<AttackableType>IslandBuilding</AttackableType>
			<MaximumHitPoints>3500</MaximumHitPoints>
			<SelfHealPerHealTick>4</SelfHealPerHealTick>
		</Attackable>
		<Pausable/>
		<IncidentInfectable>
			<Infectable>
				<Explosion>
					<Base>0</Base>
					<Escalated>0</Escalated>
				</Explosion>
			</Infectable>
			<Explosion>
				<ExplosionCoreDamage>1000</ExplosionCoreDamage>
			</Explosion>
			<IncidentInfectionChanceFactors>
				<Fire>
					<DensityDistance>20</DensityDistance>
					<FactoryProductivityFactor>0.1</FactoryProductivityFactor>
					<FactoryUndertimeFactor>0.05</FactoryUndertimeFactor>
				</Fire>
				<Riot>
					<FactoryOvertimeFactor>0.4</FactoryOvertimeFactor>
					<FactoryUndertimeFactor>0.2</FactoryUndertimeFactor>
					<FactoryHappinessFactor>0.2</FactoryHappinessFactor>
					<HappinessThreshold>20</HappinessThreshold>
				</Riot>
			</IncidentInfectionChanceFactors>
		</IncidentInfectable>
		<Industrializable/>
		<Culture>
			<CultureType>Culture</CultureType>
		</Culture>
		<QuestObject/>
		<Electrifiable/>
		<EcoSystemProvider/>
	</Values>
</Asset>
There is a lot of information in asset. Everything of the building is defined here. Know that this is just a grasp of this specific building and what this building has to offer. There are other buildings with slightly or even completely different properties. The best way is again to look for a similar building and start from there to understand everything by looking at the properties. We will be going over most of it step by step to give a better understanding of the different properties.
Template
As mentioned before, the <Template>FactoryBuilding7</Template> is what defines this building is a production building. You could have a look at the template and see what it contains and what every building using this template enherits by using this template. Things like productivity, incidents, maintenance,ect are all defined there with basic values. We will be using this template for our production building.
<!-- START PRODUCTION - Wooden toys --><ModOp Type="addNextSibling" GUID='1010320'>
    <Asset>
        <Template>FactoryBuilding7</Template>
    </Asset>
</ModOp><!-- END PRODUCTION - Wooden toys -->
Standard
This part should not have any secrets anymore for us. We can easily fill this in with all our info. Make sure to use the right GUIDs like we determined at the beginning.
<!-- START PRODUCTION - Wooden toys -->
<ModOp Type="addNextSibling" GUID='1010320'>
    <Asset>
        <Template>FactoryBuilding7</Template>
        <Values>
			<Standard>
				<GUID>1742008807</GUID>
				<Name>Toy Maker</Name>
				<IconFilename>data/graphics/icons/icon_wooden_toys.png</IconFilename>
				<InfoDescription>1742008808</InfoDescription>
			</Standard>
        </Values>
    </Asset>
</ModOp><!-- END PRODUCTION - Wooden toys -->
Building
This part contains a couple of different parts. We will only use the 2 for this building that are also used in our base building.
BuildModeRandomRotation
<BuildModeRandomRotation>90</BuildModeRandomRotation>
Define how many degrees you can rotate the building when placing the building.
- 90
- 180
We choose for rotation 90 degrees.
AssociatedRegions
<AssociatedRegions>Moderate</AssociatedRegions>
Defines in which region we can build this building.
- Moderate
- Colony01
- Arctic
- Africa
In our case Moderate. Because it is only buildable in the Old World.
So we get:
<!-- START PRODUCTION - Wooden toys -->
<ModOp Type="addNextSibling" GUID='1010320'>
    <Asset>
        <Template>FactoryBuilding7</Template>
        <Values>
			<Standard>
				<GUID>1742008807</GUID>
				<Name>Toy Maker</Name>
				<IconFilename>data/graphics/icons/icon_wooden_toys.png</IconFilename>
				<InfoDescription>1742008808</InfoDescription>
			</Standard>
			<Building>
                <BuildModeRandomRotation>90</BuildModeRandomRotation>
                <AssociatedRegions>Moderate</AssociatedRegions>
            </Building>
        </Values>
    </Asset>
</ModOp><!-- END PRODUCTION - Wooden toys -->
Blocking
In this case we are not changing anything to it. This property is used to block certain tiles or to give certain blocking behaviour to tiles the building is build on. For example used by coastal buildings to block certain parts of the harbour.
Cost
Every building has a building cost. Depending on what you need you can add the different building materials. You can add whatever you want. Not only normal building materials can be used. For example weapons or even consumer goods can be used. As long as it is a product.
We will be using building materials fitting for the artisans level, so timber. bricks, steal Beams and windows. Buildings also have a coin cost, so we also add that.
<!-- START PRODUCTION - Wooden toys -->
<ModOp Type="addNextSibling" GUID='1010320'>
    <Asset>
        <Template>FactoryBuilding7</Template>
        <Values>
			<Standard>
				<GUID>1742008807</GUID>
				<Name>Toy Maker</Name>
				<IconFilename>data/graphics/icons/icon_wooden_toys.png</IconFilename>
				<InfoDescription>1742008808</InfoDescription>
			</Standard>
			<Building>
                <BuildModeRandomRotation>90</BuildModeRandomRotation>
                <AssociatedRegions>Moderate</AssociatedRegions>
            </Building>
			<Blocking/>
			<Cost>
				<Costs>
					<Item>
						<Ingredient>1010017</Ingredient> <!-- Coins -->
						<Amount>18000</Amount>
					</Item>
					<Item>
						<Ingredient>1010196</Ingredient> <!-- Timber -->
						<Amount>20</Amount>
					</Item>
					<Item>
						<Ingredient>1010205</Ingredient> <!-- Bricks -->
						<Amount>15</Amount>
					</Item>
					<Item>
						<Ingredient>1010218</Ingredient> <!-- Steal Beams -->
						<Amount>10</Amount>
					</Item>
					<Item>
						<Ingredient>1010207</Ingredient> <!-- Windows -->
						<Amount>8</Amount>
					</Item>
				</Costs>
			</Cost>
        </Values>
    </Asset>
</ModOp>
<!-- END PRODUCTION - Wooden toys -->
Object
Within the object we can define the model of the building we are creating. For now let’s just use the link to the original building of the wood veneers production building. We link to a .cfg file. This is a file that references to model, the textures, ect. But more about that later in this tutorial.
We can add multiple variations for the building if we add more
Skins
We will ignore skins for now. With that you could add multiple versions of your building with different skins.
<!-- START PRODUCTION - Wooden toys -->
<ModOp Type="addNextSibling" GUID='1010320'>
    <Asset>
        <Template>FactoryBuilding7</Template>
        <Values>
			<Standard>
				<GUID>1742008807</GUID>
				<Name>Toy Maker</Name>
				<IconFilename>data/graphics/icons/icon_wooden_toys.png</IconFilename>
				<InfoDescription>1742008808</InfoDescription>
			</Standard>
			<Building>
                <BuildModeRandomRotation>90</BuildModeRandomRotation>
                <AssociatedRegions>Moderate</AssociatedRegions>
            </Building>
			<Blocking/>
			<Cost>
				<Costs>
					<Item>
						<Ingredient>1010017</Ingredient> <!-- Coins -->
						<Amount>18000</Amount>
					</Item>
					<Item>
						<Ingredient>1010196</Ingredient> <!-- Timber -->
						<Amount>20</Amount>
					</Item>
					<Item>
						<Ingredient>1010205</Ingredient> <!-- Bricks -->
						<Amount>15</Amount>
					</Item>
					<Item>
						<Ingredient>1010218</Ingredient> <!-- Steal Beams -->
						<Amount>10</Amount>
					</Item>
					<Item>
						<Ingredient>1010207</Ingredient> <!-- Windows -->
						<Amount>8</Amount>
					</Item>
				</Costs>
			</Cost>
			<Object>
				<Variations>
					<Item>
						<Filename>data/graphics/buildings/production/processing_07/processing_07.cfg</Filename>
					</Item>
				</Variations>
			</Object>
        </Values>
    </Asset>
</ModOp>
<!-- END PRODUCTION - Wooden toys -->
Selection
There are a couple of properties but for this we only going to change ParticipantMessageArcheType and take over the rest.
ParticipantMessageArcheType
ParticipantMessageArcheType defines which portrait we will show in the menu at the bottom right that pops up when selecting the building.
- [NONE]
- Resident_tier01 - Farmers
- Resident_tier02 - Workers
- Resident_tier03 - Artisan
- Resident_tier04 - Engineers
- Resident_tier05 - Investors
- Resident_tier01_atWork - Farmers
- Resident_tier02_atWork - Workers
- Resident_tier03_atWork - Artisan
- Resident_tier04_atWork - Engineers
- Resident_tier04_atWork - Investors
- SA_Resident_tier01 - Jornaleros
- SA_Resident_tier02 - Obreros
- SA_Resident_tier03 - Artistas
- SA_Resident_tier01_atWork - Jornaleros
- SA_Resident_tier02_atWork - Obreros
- SA_Resident_tier03_atWork - Artistas
- Arctic_Resident_tier01 - Explorers
- Arctic_Resident_tier02 - Technicians
- Arctic_Resident_tier01_atWork - Explorers
- Arctic_Resident_tier02_atWork - Technicians
- Africa_Resident_tier01 - Shepherds
- Africa_Resident_tier02 - Elders
- Africa_Resident_tier03 - Scholars
- Resident_Tourist
- Campaign_character_01_demolition_expert
- Void_Trader
- Third_party_05_Sarmento
- GGJ_Yaosca
For this building, we will use the Old World Artisan workforce, so Resident_tier03_atWork.
<!-- START PRODUCTION - Wooden toys -->
<ModOp Type="addNextSibling" GUID='1010320'>
    <Asset>
        <Template>FactoryBuilding7</Template>
        <Values>
			<Standard>
				<GUID>1742008807</GUID>
				<Name>Toy Maker</Name>
				<IconFilename>data/graphics/icons/icon_wooden_toys.png</IconFilename>
				<InfoDescription>1742008808</InfoDescription>
			</Standard>
			<Building>
                <BuildModeRandomRotation>90</BuildModeRandomRotation>
                <AssociatedRegions>Moderate</AssociatedRegions>
            </Building>
			<Blocking/>
			<Cost>
				<Costs>
					<Item>
						<Ingredient>1010017</Ingredient> <!-- Coins -->
						<Amount>18000</Amount>
					</Item>
					<Item>
						<Ingredient>1010196</Ingredient> <!-- Timber -->
						<Amount>20</Amount>
					</Item>
					<Item>
						<Ingredient>1010205</Ingredient> <!-- Bricks -->
						<Amount>15</Amount>
					</Item>
					<Item>
						<Ingredient>1010218</Ingredient> <!-- Steal Beams -->
						<Amount>10</Amount>
					</Item>
					<Item>
						<Ingredient>1010207</Ingredient> <!-- Windows -->
						<Amount>8</Amount>
					</Item>
				</Costs>
			</Cost>
			<Object>
				<Variations>
					<Item>
						<Filename>data/graphics/buildings/production/processing_07/processing_07.cfg</Filename>
					</Item>
				</Variations>
			</Object>
			<Selection>
				<OnSelection>
					<IsBaseAutoCreateAsset>1</IsBaseAutoCreateAsset>
					<Values>
						<ActionList/>
					</Values>
				</OnSelection>
				<ParticipantMessageArcheType>Resident_tier03_atWork</ParticipantMessageArcheType>
				<Colors>
					<WeakSelectionColorType>NoColor</WeakSelectionColorType>
				</Colors>
			</Selection>
        </Values>
    </Asset>
</ModOp>
<!-- END PRODUCTION - Wooden toys -->
Text
We have again some basic fallback localization text.
<!-- START PRODUCTION - Wooden toys -->
<ModOp Type="addNextSibling" GUID='1010320'>
    <Asset>
        <Template>FactoryBuilding7</Template>
        <Values>
			<Standard>
				<GUID>1742008807</GUID>
				<Name>Toys Maker</Name>
				<IconFilename>data/graphics/icons/icon_wooden_toys.png</IconFilename>
				<InfoDescription>1742008808</InfoDescription>
			</Standard>
			<Building>
                <BuildModeRandomRotation>90</BuildModeRandomRotation>
                <AssociatedRegions>Moderate</AssociatedRegions>
            </Building>
			<Blocking/>
			<Cost>
				<Costs>
					<Item>
						<Ingredient>1010017</Ingredient> <!-- Coins -->
						<Amount>18000</Amount>
					</Item>
					<Item>
						<Ingredient>1010196</Ingredient> <!-- Timber -->
						<Amount>20</Amount>
					</Item>
					<Item>
						<Ingredient>1010205</Ingredient> <!-- Bricks -->
						<Amount>15</Amount>
					</Item>
					<Item>
						<Ingredient>1010218</Ingredient> <!-- Steal Beams -->
						<Amount>10</Amount>
					</Item>
					<Item>
						<Ingredient>1010207</Ingredient> <!-- Windows -->
						<Amount>8</Amount>
					</Item>
				</Costs>
			</Cost>
			<Object>
				<Variations>
					<Item>
						<Filename>data/graphics/buildings/production/processing_07/processing_07.cfg</Filename>
					</Item>
				</Variations>
			</Object>
			<Selection>
				<OnSelection>
					<IsBaseAutoCreateAsset>1</IsBaseAutoCreateAsset>
					<Values>
						<ActionList/>
					</Values>
				</OnSelection>
				<ParticipantMessageArcheType>Resident_tier03_atWork</ParticipantMessageArcheType>
				<Colors>
					<WeakSelectionColorType>NoColor</WeakSelectionColorType>
				</Colors>
			</Selection>
			<Text>
				<LocaText>
					<English>
						<Text>Toy Maker</Text>
						<Status>Exported</Status>
						<ExportCount>2</ExportCount>
					</English>
				</LocaText>
			</Text>
        </Values>
    </Asset>
</ModOp>
<!-- END PRODUCTION - Wooden toys -->
SoundEmitter
This will define which sounds will be played when clicking the building or zoom in to the building. We will just take over the sounds from the veneers production building. Those are fitting in this case.
<!-- START PRODUCTION - Wooden toys -->
<ModOp Type="addNextSibling" GUID='1010320'>
    <Asset>
        <Template>FactoryBuilding7</Template>
        <Values>
			<Standard>
				<GUID>1742008807</GUID>
				<Name>Toys Maker</Name>
				<IconFilename>data/graphics/icons/icon_wooden_toys.png</IconFilename>
				<InfoDescription>1742008808</InfoDescription>
			</Standard>
			<Building>
                <BuildModeRandomRotation>90</BuildModeRandomRotation>
                <AssociatedRegions>Moderate</AssociatedRegions>
            </Building>
			<Blocking/>
			<Cost>
				<Costs>
					<Item>
						<Ingredient>1010017</Ingredient> <!-- Coins -->
						<Amount>18000</Amount>
					</Item>
					<Item>
						<Ingredient>1010196</Ingredient> <!-- Timber -->
						<Amount>20</Amount>
					</Item>
					<Item>
						<Ingredient>1010205</Ingredient> <!-- Bricks -->
						<Amount>15</Amount>
					</Item>
					<Item>
						<Ingredient>1010218</Ingredient> <!-- Steal Beams -->
						<Amount>10</Amount>
					</Item>
					<Item>
						<Ingredient>1010207</Ingredient> <!-- Windows -->
						<Amount>8</Amount>
					</Item>
				</Costs>
			</Cost>
			<Object>
				<Variations>
					<Item>
						<Filename>data/graphics/buildings/production/processing_07/processing_07.cfg</Filename>
					</Item>
				</Variations>
			</Object>
			<Selection>
				<OnSelection>
					<IsBaseAutoCreateAsset>1</IsBaseAutoCreateAsset>
					<Values>
						<ActionList/>
					</Values>
				</OnSelection>
				<ParticipantMessageArcheType>Resident_tier03_atWork</ParticipantMessageArcheType>
				<Colors>
					<WeakSelectionColorType>NoColor</WeakSelectionColorType>
				</Colors>
			</Selection>
			<Text>
				<LocaText>
					<English>
						<Text>Toy Maker</Text>
						<Status>Exported</Status>
						<ExportCount>2</ExportCount>
					</English>
				</LocaText>
			</Text>
			<SoundEmitter>
				<ActiveSounds>
					<Item>
						<Sound>216883</Sound>
						<!--wwe_sfx_bld_processing_typeCluster_tag-->
					</Item>
					<Item>
						<Sound>235835</Sound>
						<!--wwe_sfx_bld_processing_07-->
					</Item>
				</ActiveSounds>
				<IncidentSounds>
					<InfectedFire>
						<Item>
							<Sound>214659</Sound>
							<!--wwe_sfx_bld_inc_burn-->
						</Item>
					</InfectedFire>
				</IncidentSounds>
			</SoundEmitter>
        </Values>
    </Asset>
</ModOp>
<!-- END PRODUCTION - Wooden toys -->
FactoryBase
This is an important part of the building. This will define what the building will process as input goods (FactoryInputs) and produce as output good (FactoryOutputs), the time it will take to process the good in seconds (CycleTime) and if this building is the main factory that produces this good. If you create a building that produces the same good as a vanilla building or another building that already produces this good you set the IsMainFactory to 0 and not 1.
FactoryInputs & FactoryOutputs
Both have the same structure inside. We add one or more items for the input and one item for the output. Output is limited by 1 product.
Both items contain a product (
CycleTime
This defines how long a production cycle takes to produce the set amount of goods. This is defined in seconds.
Important to know is that the streetrange for the production building to be reachable for the carts from warehouses is defined by a combination of the cycletime and the StorageAmount. If you would have a CycleTime of 5 seconds and a storage of 100 your range would be only a couple of tiles and it will not reach a warehouse! Always make sure those values are balanced.
IsMainFactory
This could be a hard one to understand but is actually an important one to know and understand. This property tells the game this is the main building that is producing this output good. In this case Wooden Toys. If we would also make another production building in another region, we would then have 2 production buildings that produce the same good. Only 1 of those 2 can be the main production building. The one where the value is set to 1 is the main factory. Other production buildings that produce the same good needs to have this value set to 0.
Why is this important? IsMainFactory is used to calculate the value for Docklands. The ratio to define how expensive or cheap a good is is defined by the complexity of the production building. For that, we need to make it clear which building has to be taken into account to calculate this complexity. That is why we can only have 1 building that produces a good with the value 1. The calculation is based on the maintenance cost of the production building, the used and the amount of workforce, the cycletime of one production cycle and the region this building is in. The higher those are the more expensive that good would be. That is why we love to trade advanced weapons and motors in Docklands because they have a really expensive ratio compared to for example potatoes.
To conclude, we have Wood as an input good. We process 1 ton every cycle and we can store 6 tons. Every cycle we produce/output 1 ton of Wooden toys. We can also store 10 tons of it. A cycle takes 60 seconds. This building is the main factory that produces Wooden toys.
<!-- START PRODUCTION - Wooden toys -->
<ModOp Type="addNextSibling" GUID='1010320'>
    <Asset>
        <Template>FactoryBuilding7</Template>
        <Values>
			<Standard>
				<GUID>1742008807</GUID>
				<Name>Toys Maker</Name>
				<IconFilename>data/graphics/icons/icon_wooden_toys.png</IconFilename>
				<InfoDescription>1742008808</InfoDescription>
			</Standard>
			<Building>
                <BuildModeRandomRotation>90</BuildModeRandomRotation>
                <AssociatedRegions>Moderate</AssociatedRegions>
            </Building>
			<Blocking/>
			<Cost>
				<Costs>
					<Item>
						<Ingredient>1010017</Ingredient> <!-- Coins -->
						<Amount>18000</Amount>
					</Item>
					<Item>
						<Ingredient>1010196</Ingredient> <!-- Timber -->
						<Amount>20</Amount>
					</Item>
					<Item>
						<Ingredient>1010205</Ingredient> <!-- Bricks -->
						<Amount>15</Amount>
					</Item>
					<Item>
						<Ingredient>1010218</Ingredient> <!-- Steal Beams -->
						<Amount>10</Amount>
					</Item>
					<Item>
						<Ingredient>1010207</Ingredient> <!-- Windows -->
						<Amount>8</Amount>
					</Item>
				</Costs>
			</Cost>
			<Object>
				<Variations>
					<Item>
						<Filename>data/graphics/buildings/production/processing_07/processing_07.cfg</Filename>
					</Item>
				</Variations>
			</Object>
			<Selection>
				<OnSelection>
					<IsBaseAutoCreateAsset>1</IsBaseAutoCreateAsset>
					<Values>
						<ActionList/>
					</Values>
				</OnSelection>
				<ParticipantMessageArcheType>Resident_tier03_atWork</ParticipantMessageArcheType>
				<Colors>
					<WeakSelectionColorType>NoColor</WeakSelectionColorType>
				</Colors>
			</Selection>
			<Text>
				<LocaText>
					<English>
						<Text>Toy Maker</Text>
						<Status>Exported</Status>
						<ExportCount>2</ExportCount>
					</English>
				</LocaText>
			</Text>
			<SoundEmitter>
				<ActiveSounds>
					<Item>
						<Sound>216883</Sound>
						<!--wwe_sfx_bld_processing_typeCluster_tag-->
					</Item>
					<Item>
						<Sound>235835</Sound>
						<!--wwe_sfx_bld_processing_07-->
					</Item>
				</ActiveSounds>
				<IncidentSounds>
					<InfectedFire>
						<Item>
							<Sound>214659</Sound>
							<!--wwe_sfx_bld_inc_burn-->
						</Item>
					</InfectedFire>
				</IncidentSounds>
			</SoundEmitter>
			<FactoryBase>
				<FactoryInputs>
					<Item>
						<Product>120008</Product> <!-- Wood -->
						<Amount>1</Amount>
						<StorageAmount>6</StorageAmount>
					</Item>
				</FactoryInputs>
				<FactoryOutputs>
					<Item>
						<Product>1742008803</Product> <!-- Wooden toys -->
						<Amount>1</Amount>
						<StorageAmount>6</StorageAmount>
					</Item>
				</FactoryOutputs>
				<CycleTime>60</CycleTime>
				<IsMainFactory>1</IsMainFactory>
			</FactoryBase>
        </Values>
    </Asset>
</ModOp>
<!-- END PRODUCTION - Wooden toys -->
LogisticNode
This can contain properties that define logistics of the building. For example, the parallell amount of carts the building can use, which asset is used for the carts (if you would like to customize this) and other logistic related things.
We will just take over the self closing tag so we take the global properties from the template which are the same for almost all production buildings.
<LogisticNode/>
AmbientMoodProvider
This defines the sounds and murmur around the building. In this case something production/factory related.
We will just take over the one that is defined by our wood veneers production building.
<AmbientMoodProvider>
	<Murmur>Factory</Murmur>
	<DynamicEnvironmentType>None</DynamicEnvironmentType>
</AmbientMoodProvider>
Maintenance
Every building has an upkeep. For production buildings in most cases those are coins and workforce.
Workforce
Workforce is a key mechanic from anno 1800. We have a workforce for almost all population tiers expect those lazy Investors who only think about money.
Workforce is a product just like our Wooden Toys. It has some different properties but in the core it is a product. You can look at a1800.net to find all the workforce products in the list of products.
- 1010052 - Farmer Workforce
- 1010115 - Worker Workforce
- 1010116 - Artisan Workforce
- 1010117 - Engineer Workforce
- 1010128 - Investor Workforce
- 1010366 - Jornalero Workforce
- 1010367 - Obrero Workforce
- 5406 - Artista Workforce
- 112653 - Explorer Workforce
- 112654 - Technician Workforce
- 114340 - Shepherd Workforce
- 114341 - Elder Workforce
- 124478 - Scholar Workforce
Coins
Apart from the workforce we also have a maintenance cost based on coins. This is a flat money value we can define. We can have an amount that is used when the building is active (<Amount>) and also when we paused the building (<InactiveAmount>).
<!-- START PRODUCTION - Wooden toys -->
<ModOp Type="addNextSibling" GUID='1010320'>
    <Asset>
        <Template>FactoryBuilding7</Template>
        <Values>
			<Standard>
				<GUID>1742008807</GUID>
				<Name>Toys Maker</Name>
				<IconFilename>data/graphics/icons/icon_wooden_toys.png</IconFilename>
				<InfoDescription>1742008808</InfoDescription>
			</Standard>
			<Building>
                <BuildModeRandomRotation>90</BuildModeRandomRotation>
                <AssociatedRegions>Moderate</AssociatedRegions>
            </Building>
			<Blocking/>
			<Cost>
				<Costs>
					<Item>
						<Ingredient>1010017</Ingredient> <!-- Coins -->
						<Amount>18000</Amount>
					</Item>
					<Item>
						<Ingredient>1010196</Ingredient> <!-- Timber -->
						<Amount>20</Amount>
					</Item>
					<Item>
						<Ingredient>1010205</Ingredient> <!-- Bricks -->
						<Amount>15</Amount>
					</Item>
					<Item>
						<Ingredient>1010218</Ingredient> <!-- Steal Beams -->
						<Amount>10</Amount>
					</Item>
					<Item>
						<Ingredient>1010207</Ingredient> <!-- Windows -->
						<Amount>8</Amount>
					</Item>
				</Costs>
			</Cost>
			<Object>
				<Variations>
					<Item>
						<Filename>data/graphics/buildings/production/processing_07/processing_07.cfg</Filename>
					</Item>
				</Variations>
			</Object>
			<Selection>
				<OnSelection>
					<IsBaseAutoCreateAsset>1</IsBaseAutoCreateAsset>
					<Values>
						<ActionList/>
					</Values>
				</OnSelection>
				<ParticipantMessageArcheType>Resident_tier03_atWork</ParticipantMessageArcheType>
				<Colors>
					<WeakSelectionColorType>NoColor</WeakSelectionColorType>
				</Colors>
			</Selection>
			<Text>
				<LocaText>
					<English>
						<Text>Toy Maker</Text>
						<Status>Exported</Status>
						<ExportCount>2</ExportCount>
					</English>
				</LocaText>
			</Text>
			<SoundEmitter>
				<ActiveSounds>
					<Item>
						<Sound>216883</Sound>
						<!--wwe_sfx_bld_processing_typeCluster_tag-->
					</Item>
					<Item>
						<Sound>235835</Sound>
						<!--wwe_sfx_bld_processing_07-->
					</Item>
				</ActiveSounds>
				<IncidentSounds>
					<InfectedFire>
						<Item>
							<Sound>214659</Sound>
							<!--wwe_sfx_bld_inc_burn-->
						</Item>
					</InfectedFire>
				</IncidentSounds>
			</SoundEmitter>
			<FactoryBase>
				<FactoryInputs>
					<Item>
						<Product>120008</Product> <!-- Wood -->
						<Amount>1</Amount>
						<StorageAmount>6</StorageAmount>
					</Item>
				</FactoryInputs>
				<FactoryOutputs>
					<Item>
						<Product>1742008803</Product> <!-- Wooden toys -->
						<Amount>1</Amount>
						<StorageAmount>6</StorageAmount>
					</Item>
				</FactoryOutputs>
				<CycleTime>60</CycleTime>
				<IsMainFactory>1</IsMainFactory>
			</FactoryBase>
			<LogisticNode/>
			<AmbientMoodProvider>
				<Murmur>Factory</Murmur>
				<DynamicEnvironmentType>None</DynamicEnvironmentType>
			</AmbientMoodProvider>
			<Maintenance>
				<Maintenances>
					<Item>
						<Product>1010017</Product> <!-- Amount of coins upkeep -->
						<Amount>100</Amount>
						<InactiveAmount>50</InactiveAmount>
					</Item>
					<Item>
						<Product>1010116</Product> <!-- Amount of Workforce - Artisans -->
						<Amount>40</Amount>
					</Item>
				</Maintenances>
			</Maintenance>
        </Values>
    </Asset>
</ModOp>
<!-- END PRODUCTION - Wooden toys -->
Attackable
Can the building be attacked? What is the relation with taking damage?
Most island buildings can not be attacked and do not take damage from airships or normal ships. The only way they could take damage is for example with incidents like explosions or fires.
AttackableType
This defines if the building is attackable or not. Setting this to IslandBuilding like the veneers production building wil make sure the building can not be attacked in the normal way. It can only be destroyed by incidents.
The different options for this are:
- Ship
- Airship
- HarbourBuilding
- IslandBuilding
- Seamine
As you can see only 2 relevant options are available for buildings. As we know all harbourbuildings can be attacked to lower the morale to be able to take over an island.
MaximumHitPoints
To give the building some time when it is burning, we can define an amount of hitpoints. We can compare the amount with other buildings to balance this out. For our new building 3000 should be fine.
SelfHealPerHealTick
Once a building is free of incidents it can restore its hitpoints. We can define here how much hitpoints will increase with every “tick”.
We just take over the value of 4.
<!-- START PRODUCTION - Wooden toys -->
<ModOp Type="addNextSibling" GUID='1010320'>
    <Asset>
        <Template>FactoryBuilding7</Template>
        <Values>
			<Standard>
				<GUID>1742008807</GUID>
				<Name>Toys Maker</Name>
				<IconFilename>data/graphics/icons/icon_wooden_toys.png</IconFilename>
				<InfoDescription>1742008808</InfoDescription>
			</Standard>
			<Building>
                <BuildModeRandomRotation>90</BuildModeRandomRotation>
                <AssociatedRegions>Moderate</AssociatedRegions>
            </Building>
			<Blocking/>
			<Cost>
				<Costs>
					<Item>
						<Ingredient>1010017</Ingredient> <!-- Coins -->
						<Amount>18000</Amount>
					</Item>
					<Item>
						<Ingredient>1010196</Ingredient> <!-- Timber -->
						<Amount>20</Amount>
					</Item>
					<Item>
						<Ingredient>1010205</Ingredient> <!-- Bricks -->
						<Amount>15</Amount>
					</Item>
					<Item>
						<Ingredient>1010218</Ingredient> <!-- Steal Beams -->
						<Amount>10</Amount>
					</Item>
					<Item>
						<Ingredient>1010207</Ingredient> <!-- Windows -->
						<Amount>8</Amount>
					</Item>
				</Costs>
			</Cost>
			<Object>
				<Variations>
					<Item>
						<Filename>data/graphics/buildings/production/processing_07/processing_07.cfg</Filename>
					</Item>
				</Variations>
			</Object>
			<Selection>
				<OnSelection>
					<IsBaseAutoCreateAsset>1</IsBaseAutoCreateAsset>
					<Values>
						<ActionList/>
					</Values>
				</OnSelection>
				<ParticipantMessageArcheType>Resident_tier03_atWork</ParticipantMessageArcheType>
				<Colors>
					<WeakSelectionColorType>NoColor</WeakSelectionColorType>
				</Colors>
			</Selection>
			<Text>
				<LocaText>
					<English>
						<Text>Toy Maker</Text>
						<Status>Exported</Status>
						<ExportCount>2</ExportCount>
					</English>
				</LocaText>
			</Text>
			<SoundEmitter>
				<ActiveSounds>
					<Item>
						<Sound>216883</Sound>
						<!--wwe_sfx_bld_processing_typeCluster_tag-->
					</Item>
					<Item>
						<Sound>235835</Sound>
						<!--wwe_sfx_bld_processing_07-->
					</Item>
				</ActiveSounds>
				<IncidentSounds>
					<InfectedFire>
						<Item>
							<Sound>214659</Sound>
							<!--wwe_sfx_bld_inc_burn-->
						</Item>
					</InfectedFire>
				</IncidentSounds>
			</SoundEmitter>
			<FactoryBase>
				<FactoryInputs>
					<Item>
						<Product>120008</Product> <!-- Wood -->
						<Amount>1</Amount>
						<StorageAmount>10</StorageAmount>
					</Item>
				</FactoryInputs>
				<FactoryOutputs>
					<Item>
						<Product>1742008803</Product> <!-- Wooden toys -->
						<Amount>1</Amount>
						<StorageAmount>10</StorageAmount>
					</Item>
				</FactoryOutputs>
				<CycleTime>60</CycleTime>
				<IsMainFactory>1</IsMainFactory>
			</FactoryBase>
			<LogisticNode/>
			<AmbientMoodProvider>
				<Murmur>Factory</Murmur>
				<DynamicEnvironmentType>None</DynamicEnvironmentType>
			</AmbientMoodProvider>
			<Maintenance>
				<Maintenances>
					<Item>
						<Product>1010017</Product> <!-- Amount of coins upkeep -->
						<Amount>100</Amount>
						<InactiveAmount>50</InactiveAmount>
					</Item>
					<Item>
						<Product>1010116</Product> <!-- Amount of Workforce - Artisans -->
						<Amount>40</Amount>
					</Item>
				</Maintenances>
			</Maintenance>
			<Attackable>
				<AttackableType>IslandBuilding</AttackableType>
				<MaximumHitPoints>3500</MaximumHitPoints>
				<SelfHealPerHealTick>4</SelfHealPerHealTick>
			</Attackable>
        </Values>
    </Asset>
</ModOp>
<!-- END PRODUCTION - Wooden toys -->
Pausable
We can change if the building is pausable or not. All production buildings have this option. This is defined in the template. We do not change this and just add the selfclosing tag for this.
IncidentInfectable
As you can see in the example of the veneers production, this building is prone to a couple of the incidents. We will just take over the same logic for our building and copy paste this part.
Industrializable & Electrifiable
When we electrify and industrialise a building we can boost those buildings with a 100%. This is done by those properties. When this value is set to 1 a building can be electrified and industrialized. This is already defined inside the template, and that is why we just see a self closing tags here. We will just take those over.
Industrializable will take care of the change that change the pickup carts also with cars and increase the piuckup time in that way to almost instant.
Electrifiable will take care of the 100% production boost.
Culture, QuestObject, EcoSystemProvider
Those can all just be taken over and we will not go deeper into those for now.
We are now done with our building. This part of the code should look like this:
<!-- START PRODUCTION - Wooden toys -->
<ModOp Type="addNextSibling" GUID='1010320'>
    <Asset>
        <Template>FactoryBuilding7</Template>
        <Values>
			<Standard>
				<GUID>1742008807</GUID>
				<Name>Toys Maker</Name>
				<IconFilename>data/graphics/icons/icon_wooden_toys.png</IconFilename>
				<InfoDescription>1742008808</InfoDescription>
			</Standard>
			<Building>
                <BuildModeRandomRotation>90</BuildModeRandomRotation>
                <AssociatedRegions>Moderate</AssociatedRegions>
            </Building>
			<Blocking/>
			<Cost>
				<Costs>
					<Item>
						<Ingredient>1010017</Ingredient> <!-- Coins -->
						<Amount>18000</Amount>
					</Item>
					<Item>
						<Ingredient>1010196</Ingredient> <!-- Timber -->
						<Amount>20</Amount>
					</Item>
					<Item>
						<Ingredient>1010205</Ingredient> <!-- Bricks -->
						<Amount>15</Amount>
					</Item>
					<Item>
						<Ingredient>1010218</Ingredient> <!-- Steal Beams -->
						<Amount>10</Amount>
					</Item>
					<Item>
						<Ingredient>1010207</Ingredient> <!-- Windows -->
						<Amount>8</Amount>
					</Item>
				</Costs>
			</Cost>
			<Object>
				<Variations>
					<Item>
						<Filename>data/graphics/buildings/production/processing_07/processing_07.cfg</Filename>
					</Item>
				</Variations>
			</Object>
			<Selection>
				<OnSelection>
					<IsBaseAutoCreateAsset>1</IsBaseAutoCreateAsset>
					<Values>
						<ActionList/>
					</Values>
				</OnSelection>
				<ParticipantMessageArcheType>Resident_tier03_atWork</ParticipantMessageArcheType>
				<Colors>
					<WeakSelectionColorType>NoColor</WeakSelectionColorType>
				</Colors>
			</Selection>
			<Text>
				<LocaText>
					<English>
						<Text>Toy Maker</Text>
						<Status>Exported</Status>
						<ExportCount>2</ExportCount>
					</English>
				</LocaText>
			</Text>
			<SoundEmitter>
				<ActiveSounds>
					<Item>
						<Sound>216883</Sound>
						<!--wwe_sfx_bld_processing_typeCluster_tag-->
					</Item>
					<Item>
						<Sound>235835</Sound>
						<!--wwe_sfx_bld_processing_07-->
					</Item>
				</ActiveSounds>
				<IncidentSounds>
					<InfectedFire>
						<Item>
							<Sound>214659</Sound>
							<!--wwe_sfx_bld_inc_burn-->
						</Item>
					</InfectedFire>
				</IncidentSounds>
			</SoundEmitter>
			<FactoryBase>
				<FactoryInputs>
					<Item>
						<Product>120008</Product> <!-- Wood -->
						<Amount>1</Amount>
						<StorageAmount>6</StorageAmount>
					</Item>
				</FactoryInputs>
				<FactoryOutputs>
					<Item>
						<Product>1742008803</Product> <!-- Wooden toys -->
						<Amount>1</Amount>
						<StorageAmount>6</StorageAmount>
					</Item>
				</FactoryOutputs>
				<CycleTime>60</CycleTime>
				<IsMainFactory>1</IsMainFactory>
			</FactoryBase>
			<LogisticNode/>
			<AmbientMoodProvider>
				<Murmur>Factory</Murmur>
				<DynamicEnvironmentType>None</DynamicEnvironmentType>
			</AmbientMoodProvider>
			<Maintenance>
				<Maintenances>
					<Item>
						<Product>1010017</Product> <!-- Amount of coins upkeep -->
						<Amount>100</Amount>
						<InactiveAmount>50</InactiveAmount>
					</Item>
					<Item>
						<Product>1010116</Product> <!-- Amount of Workforce - Artisans -->
						<Amount>40</Amount>
					</Item>
				</Maintenances>
			</Maintenance>
			<Attackable>
				<AttackableType>IslandBuilding</AttackableType>
				<MaximumHitPoints>3500</MaximumHitPoints>
				<SelfHealPerHealTick>4</SelfHealPerHealTick>
			</Attackable>
			<Pausable/>
			<IncidentInfectable>
				<Infectable>
					<Explosion>
						<Base>0</Base>
						<Escalated>0</Escalated>
					</Explosion>
				</Infectable>
				<Explosion>
					<ExplosionCoreDamage>1000</ExplosionCoreDamage>
				</Explosion>
				<IncidentInfectionChanceFactors>
					<Fire>
						<DensityDistance>20</DensityDistance>
						<FactoryProductivityFactor>0.1</FactoryProductivityFactor>
						<FactoryUndertimeFactor>0.05</FactoryUndertimeFactor>
					</Fire>
					<Riot>
						<FactoryOvertimeFactor>0.4</FactoryOvertimeFactor>
						<FactoryUndertimeFactor>0.2</FactoryUndertimeFactor>
						<FactoryHappinessFactor>0.2</FactoryHappinessFactor>
						<HappinessThreshold>20</HappinessThreshold>
					</Riot>
				</IncidentInfectionChanceFactors>
			</IncidentInfectable>
			<Industrializable/>
			<Electrifiable/>
			<Culture>
				<CultureType>Culture</CultureType>
			</Culture>
			<QuestObject/>
			<EcoSystemProvider/>
        </Values>
    </Asset>
</ModOp>
<!-- END PRODUCTION - Wooden toys -->
We now have our building ready to use!
ItemEffectTargetPool
In the game we have items that can boost buildings. Those items use pools of buildings to have an effect on. To be able to boost those buildings we need to add those buildings to the pools where those items are depending on.
For example in our current situation, we have a carpenter building that processes wood. In the game we have multiple pools related to wood production / carpentery.
As we have seen in the previous tutorial, there are a lot of different pools. But this time, we are using a different type of pool, the ItemEffectTargetPool. We can add our building to those pools.
To know which pools exist we can go again to https://a1800.net and search for ItemEffectTargetPool. We will then find the template for this with 194 references. We can click through on this list and see which pools could be interesting to add our building to.
The first one we encounter is “190914 - all carpentry works”. If we click through on that pool, we can see which references all depend on that pool.

We see 9 references that all are GuildhouseItems related to carpentery. If we add our building to this pool, all those items will have an effect on our building, which would be amazing!
Now, let’ see which other pools we find in that list of 194 pools.
The final list:
- 190914 - all carpentry works
- 6000018 - all production
- 193875 - all production boosted by electricity
- 193856 - all production except powerplant
- 25599 - AllProductionBuildings
We choose the add type, and add our new building to the right GUIDs of those pools and the correct path within the pool.
If we take a look at one of the pools to check the path we need in our mod operation, it looks like this:
<Asset>
	<Template>ItemEffectTargetPool</Template>
	<Values>
		<Standard>
			<GUID>190914</GUID>
			<Name>all carpentry works</Name>
		</Standard>
		<Text>
			<LocaText>
				<English>
					<Text>All Carpentry Works</Text>
					<Status>Exported</Status>
				</English>
			</LocaText>
			<LineID>15261</LineID>
		</Text>
		<ItemEffectTargetPool>
			<EffectTargetGUIDs>
				<Item>
					<GUID>100451</GUID>
					<!--factory_03 (Timber Factory)-->
				</Item>
				<Item>
					<GUID>1010285</GUID>
					<!--factory_07 (Window Factory)-->
				</Item>
				...
			</EffectTargetGUIDs>
		</ItemEffectTargetPool>
	</Values>
</Asset>
The path we need is: /Value/ItemEffectTargetPool/EffectTargetGUIDs
The GUIDs are all the GUIDs from the different pools we listed above.
The Type of operation will be “add” because we will just add it to the list at the end. That is totally ok.
To be sure we could check all pools to make sure the structure is the same for all.
If we have done this we will get the following mod operation:
<!-- START ADD BUILDING TO ALL ITEMEFFECTTARGETPOOLS  -->
<ModOp Type="add" GUID='190914,6000018,193875,193856,25599' Path="/Values/ItemEffectTargetPool/EffectTargetGUIDs">
    <Item>
        <GUID>1742008807</GUID> <!-- BUILDING - Toy Maker -->
    </Item>
</ModOp><!-- END ADD BUILDING TO ALL ITEMEFFECTTARGETPOOLS -->
Productionchain
Create productionchain
When we want to build our new building that produces our new product, we go to the building menu and we can see the production chain of the product we want to produce. In our case the good Wooden toys, and the chain where we want the lumberjacks hut with an arrow to the new building, the Toy Maker.
To do this we need to tell the game to create that productionchain. We will be creating a <Template>ProductionChain</Template>.
Search for this template to see an example.
We could search for the one for wood veneers, but we will actually not find that one, because wood veneers does not have its own production chain, it is always part of another chain that has and end product. For example Gramophones or Telephones.
Let us take the example of the Gramophones:
<Asset>
	<Template>ProductionChain</Template>
	<Values>
		<Standard>
			<GUID>500020</GUID>
			<Name>phonographs chain</Name>
			<IconFilename>data/ui/2kimages/main/3dicons/icon_phonographs.png</IconFilename>
		</Standard>
		<ProductionChain>
			<Building>1010326</Building>
			<!--workshop_04 (Phonographs Workshop)-->
			<Tier1>
				<Item>
					<Building>1010320</Building>
					<!--processing_07 (Inlay Processing)-->
					<Tier2>
						<Item>
							<Building>1010266</Building>
							<!--agriculture_05 (Timber Yard)-->
						</Item>
					</Tier2>
				</Item>
				<Item>
					<Building>1010282</Building>
					<!--heavy_09 (Brass Heavy Industry)-->
					<Tier2>
						<Item>
							<Building>1010307</Building>
							<!--mining_04 (Zinc Mine)-->
						</Item>
						<Item>
							<Building>1010308</Building>
							<!--mining_05 (Copper Mine)-->
						</Item>
					</Tier2>
				</Item>
			</Tier1>
			<InfoTipHeight>600</InfoTipHeight>
		</ProductionChain>
		<Locked/>
		<Text>
			<LocaText>
				<English>
					<Text>Gramophones</Text>
					<Status>Exported</Status>
				</English>
			</LocaText>
			<LineID>14910</LineID>
		</Text>
	</Values>
</Asset>
Template
The way this asset is structured is again with the template being declared, ProductionChain.
Standard
After that we have again our
ProductionChain
After that we have the property <ProductionChain> which will actually define what the buildings will be that are included in our chain. This is done with different levels with a maximum of 4 levels. In extreme cases and with complex production chains you sometimes will even need more levels. But sadly we can not. This is a restriction we have to live with.
If we have a closer look at the example and try to understand the structure and different levels:
<ProductionChain>
	<Building>118735</Building><!--final_moderate_LoL_03 (Telephones)-->
	<Tier1>
		<Item>
			<Building>1010321</Building> <!--processing_08 (Carbon Filament Processing)-->
			<Tier2>
				<Item>
					<Building>1010304</Building><!--mining_01 (Coal Mine)-->
				</Item>
			</Tier2>
		</Item>
		<Item>
			<Building>1010320</Building><!--processing_07 (Inlay Processing)-->
			<Tier2>
				<Item>
					<Building>1010266</Building><!--agriculture_05 (Timber Yard)-->
				</Item>
			</Tier2>
		</Item>
	</Tier1>
</ProductionChain>
If we look at the structure we see it contains different <Item> nodes which contain <Building> nodes.
It starts with the building that produces telephones, so the end of the production chain. We then create a <Tier1> node which contains two <Item> nodes. This item node contains a <Buidling> node and can then again contain other <Tier2> nodes which then again contain <Item> nodes, and so on.
If we use this logic we can make our structure like the following:
<ProductionChain>
	<Building>1742008807</Building> <!-- BUILDING - Toy Maker  -->
	<Tier1>
		<Item>
			<Building>1010266</Building> <!--agriculture_05 (Timber Yard)-->
		</Item>
	</Tier1>
</ProductionChain>
Locked
Just like a lot of the assets, a productionchain is also something we lock and do not show until a certain condition is met. For example, we only will show this production chain when reaching for example 500 artisans.
We just have a selfclosing tag here because the standard value defined in the parent template is that the value is set to 1 which means this is locked.
Text
Just like the other assets, the productionchain also has a fallback text node.
If we then combine all those different properties we get the following:
<!-- START PRODUCTION CHAIN - Wooden toys -->
<ModOp Type="addNextSibling" GUID='500091'>
    <Asset>
        <Template>ProductionChain</Template>
        <Values>
            <Standard>
                <GUID>1742008805</GUID> <!-- CHAIN - Wooden toys  -->
                <Name>Wooden toys</Name>
                <IconFilename>data/graphics/icons/icon_wooden_toys.png</IconFilename>
                <InfoDescription>1742008806</InfoDescription>
            </Standard>
			<ProductionChain>
				<Building>1742008807</Building> <!-- BUILDING - Toy Maker  -->
				<Tier1>
					<Item>
						<Building>1010266</Building> <!--agriculture_05 (Timber Yard)-->
					</Item>
				</Tier1>
			</ProductionChain>
            <Locked />
            <Text>
                <LocaText>
                    <English>
                        <Text>Wooden Toys</Text>
                        <Status>Exported</Status>
                        <ExportCount>2</ExportCount>
                    </English>
                </LocaText>
            </Text>
        </Values>
    </Asset>
</ModOp><!-- END PRODUCTION CHAIN - Wooden toys -->
Add to building menu
Now that we have our productionchain, we need to add this chain to our buildingmenu. Otherwise the game will not show it and you will not be able to build the building and not produce the goods.
There are different buildingmenus. Search for ConstructionCategory on https://a1800.net to find all the different constructioncategories.
The 2 big categories are the one where the buildings are grouped based on the citizen tier, and the other one is the one where it is grouped based on the function. They are also grouped per session type.
We will be using:
- 25000191 - moderate construction menu 3 (tier) > Artisans
- 500945 - moderate construction menu needs (category)
We add the chain as a next sibling to both ConstructionCategories at the right path.
Lets open both 25000191 and 500945 on a1800.net and see the structure and the different entries to the menu. Because we want to add our chain at a specific location after a specific other chain we need to see where and which chains.
We will put our chain after the canned food chain for both menus.
This will result in the following code:
<!-- START ADD CHAIN TO BUILDING MENU ConstructionCategory - Artisans / moderate construction menu 3 (tier) (25000191) -->
<ModOp Type="addNextSibling" GUID='25000191' Path="/Values/ConstructionCategory/BuildingList/Item[Building='500008']">
    <Item>
        <Building>1742008805</Building> <!-- CHAIN - Wooden toys  -->
    </Item>
</ModOp><!-- END ADD CHAIN TO BUILDING MENU -->

<!-- START ADD CHAIN TO BUILDING MENU ConstructionCategory - Consumables / moderate construction menu needs (category) (500945) -->
<ModOp Type="addNextSibling" GUID='500945' Path="/Values/ConstructionCategory/BuildingList/Item[Building='500008']">
    <Item>
        <Building>1742008805</Building> <!-- CHAIN - Wooden toys  -->
    </Item>
</ModOp><!-- END ADD CHAIN TO BUILDING MENU CATEGORY -->
Add consumption
We created our new good, created the building that produces the good but still need to link this new good to our actual population who we want to consume the good. The Wooden toys will be a luxury good for farmers, workers, artisans and artistas.
PopulationLevel7
Every citizen tier has a list of goods they consume or need. This list can be found in the <Template>PopulationLevel7</Template> for the specific citizen tier.
Search for PopulationLevel7 at https://a1800.net. You will find 14 population tiers.
Open Moderate Population 3, those are the Artisans.
PopulationInputs
If we go down the structure we see <PopulationLevel7> followed by <PopulationInputs>. We then have a list of <Item> nodes. All those <Item> nodes are inputs the Artisans require. For example, the first we see is GUID 1010238, which are sausages.
Apart from the GUID for the required product, we see some other things depending on the product. For some of the products we see a Amount, SupplyWeight, MoneyValue, HappinessValue, FullWeightPopulationCount or NoWeightPopulationCount.
Amount
This wil determine the amount that will be consumed by this population tier. Be aware of balancing this value. This value seems really weird and is not that easy to understand.
Example for Coffee for Engineers:
The value we see there is 0.000784314. This is the amount what 1 resident consumes every second. So, to know how much 1 residence (so 1 building of that citizen) consumes every minute we need to multiply that amount by 60 and then by the amount of max residents a residence can house.
0.000784314 x 60 x 40 = 1,8823536 ton/min
Example for Penny Farthings Investors:
0.000833333 x 60 x 50 = 2,499999 ton/min
SupplyWeight
This defines how many residents that good or service if being fully supplied attracts to the residence. This is used for basic needs. For example if SupplyWeight is set to 5, when fully supplied the good or service, 5 extra residents will be added to that residence. This is in most cases used for normal needs and lifestyle needs.
MoneyValue
This defines the amount of money you will get by providing this good or service to this citizen tier. The amount is multiplied by the amount of citizen that is inside this residence divided by 100. If you want 10 extra coins with a farmers good, you use 100, because there are 10 farmers (10=100/100x10).
Example for engineers: There are 40 engineers. Canned food has a MoneyValue of 40. So, ingame you will get 40*40/100, so 16 coins.
HappinessValue
Same as for the MoneyValue, but for happiness. Basic needs provide money and add extra citizen. Luxury goods mostly give money and happiness. This HappinessValue is a flat amount.
The game mostly balances the total amount of happiness around 20. So if you add more luxury goods you could decrease the happiness for other goods to balance it out again around 20 max happiness.
FullWeightPopulationCount
FullWeightPopulationCount defines the max population for which you could get a penalty for happiness for not fullfulling this luxury need.
NoWeightPopulationCount
NoWeightPopulationCount defines at which citizen level we unlock this good or service and it will start have an impact on this citizen tier.
AdditionalGlobalUnlockRequirement
Add additional requirements to unlock this good. For example if the good is only available at a lter stage you can still lock it.
IsConsideredByAI
Adding new goods can be tricky! AI has some other logic of making buildings and progressing through the game. If you add new goods to upgrade you could potentially block the AI from upgrading if they do not build the building that is needed to progress and upgrade. In our case now it will not be the case because we add a luxury good, but take that into account if you would add a normal need.
Adding our product to the population tiers
Let’s see what we want now for our 4 citizen tiers. We will be adding extra goods to the alreay existing PopulationInputs. We look at the structure of the citizen tier for the path where we have to add our new good. Then we decide the values for amount, happiness and money. We do not take the other into account for now and will just place it at the end of all tiers.
We could have a look at the citizen tiers (farmers - 15000000, workers - 15000001, artisans 15000002, artista - 5403) where we are adding the new goods and take similar values as other goods they already have, that way we know they are kindoff balanced. For the Old World tiers let’s balance it again around Schnapps and beer and for the Artista’s.
<!-- START ADD TO CONSUMED GOODS - Farmers -->
  <ModOp Type="add" GUID='15000000' Path="/Values/PopulationLevel7/PopulationInputs">
    <Item>
      <Product>1742008803</Product> <!-- GOOD - Wooden toys -->
	  <Amount>0.000555556</Amount>
	  <HappinessValue>8</HappinessValue>
	  <MoneyValue>30</MoneyValue>
	  <AdditionalGlobalUnlockRequirement>
		  <Population>15000002</Population>
		  <MinPopulationAmount>500</MinPopulationAmount>
	  </AdditionalGlobalUnlockRequirement>
    </Item>
  </ModOp>
<!-- END ADD TO CONSUMED GOODS - Farmers -->

<!-- START ADD TO CONSUMED GOODS - Workers -->
  <ModOp Type="add" GUID='15000001' Path="/Values/PopulationLevel7/PopulationInputs">
    <Item>
      <Product>1742008803</Product> <!-- GOOD - Wooden toys -->
	  <Amount>0.001111112</Amount>
	  <HappinessValue>4</HappinessValue>
	  <MoneyValue>30</MoneyValue>
	  <AdditionalGlobalUnlockRequirement>
		  <Population>15000002</Population>
		  <MinPopulationAmount>500</MinPopulationAmount>
	  </AdditionalGlobalUnlockRequirement>
    </Item>
  </ModOp>
<!-- END ADD TO CONSUMED GOODS - Workers -->

<!-- START ADD TO CONSUMED GOODS - Artisans -->
  <ModOp Type="add" GUID='15000002' Path="/Values/PopulationLevel7/PopulationInputs">
    <Item>
      <Product>1742008803</Product> <!-- GOOD - Wooden toys -->
	  <Amount>0.000512821</Amount>
	  <HappinessValue>3</HappinessValue>
	  <MoneyValue>60</MoneyValue>
	  <AdditionalGlobalUnlockRequirement>
		  <Population>15000002</Population>
		  <MinPopulationAmount>500</MinPopulationAmount>
	  </AdditionalGlobalUnlockRequirement>
    </Item>
  </ModOp>
<!-- END ADD TO CONSUMED GOODS - Artisans -->

<!-- START ADD TO CONSUMED GOODS - Artistas -->
  <ModOp Type="add" GUID='5403' Path="/Values/PopulationLevel7/PopulationInputs">
    <Item>
      <Product>1742008803</Product> <!-- GOOD - Wooden toys -->
	  <Amount>0.000196079</Amount>
	  <HappinessValue>4</HappinessValue>
	  <MoneyValue>80</MoneyValue>
	  <AdditionalGlobalUnlockRequirement>
		  <Population>15000002</Population>
		  <MinPopulationAmount>500</MinPopulationAmount>
	  </AdditionalGlobalUnlockRequirement>
    </Item>
  </ModOp>
<!-- END ADD TO CONSUMED GOODS - Artistas -->
Boostable factories
Another extra addition we can do is make sure the new building, the Toy Maker has boostable working conditions. We can add the new building to that BoostableFactories list.
To know where this actually is or which template this actually is is a bit hard if you do not know where to look. The boostalble factories are a part of the WorkforceMenu. This menu contains multiple assets and functionalities.
Search for it on https://a1800.net
If you scroll down, you will see <BoostableFactories> at some point. This contains the list of factories that can be boosted and based on the workforce assigned to it it will be put in the correct category.
In this long list of buildings, we add our building. At this point I would expect you to understand how we do this.
What do we need for this mod operation? The GUID of the WorkforceMenu, the type of mod operation we want to do and the path to this BoostableFactories.
<!-- START ADD TO WORKING CONDITIONS - Artisans -->
  <ModOp Type="add" GUID="25000087" Path="/Values/WorkforceMenu/BoostableFactories">
    <Item>
      <Factory>1742008807</Factory> <!-- BUILDING -  BUILDING - Toy Maker -->
    </Item>
  </ModOp>
<!-- END ADD TO WORKING CONDITIONS - Artisans -->
Triggers
We have made all our assets but now they are still locked. We need to unhide and unlock them at the right moment with a correct trigger.
In this case we will make 2 triggers, one to unhide the new assets so we can already see it locked but visible from 1 artisan and then another unlock trigger at 500 artisans to make the assets available an unlocked.
We can follow the same logic as with the previous tutorial. But now, we will first use a list of <UnhideAssets> and then one with <UnlockAssets>.
<!-- START TRIGGER -->
  <ModOp Type="addNextSibling" GUID="130248">
    <!--UNHIDE - 1 Artisans -->
    <Asset>
      <Template>Trigger</Template>
      <Values>
        <Standard>
          <GUID>1742008809</GUID>
          <Name>MOD Trigger</Name>
        </Standard>
        <Trigger>
          <TriggerCondition>
            <Template>ConditionPlayerCounter</Template>
            <Values>
              <Condition />
              <ConditionPlayerCounter>
                <PlayerCounter>PopulationByLevel</PlayerCounter>
                <Context>15000002</Context> <!-- Artisans -->
                <CounterAmount>1</CounterAmount>
              </ConditionPlayerCounter>
            </Values>
          </TriggerCondition>
          <TriggerActions>
            <Item>
              <TriggerAction>
                <Template>ActionUnlockAsset</Template>
                <Values>
                  <Action />
                  <ActionUnlockAsset>
                    <UnhideAssets>
                      <Item>
                        <Asset>1742008803</Asset> <!-- GOOD - Wooden toys -->
                      </Item>
                      <Item>
                        <Asset>1742008805</Asset> <!-- CHAIN - Wooden toys -->
                      </Item>
                      <Item>
                        <Asset>1742008807</Asset> <!-- BUILDING - Toy Maker  -->
                      </Item>
                    </UnhideAssets>
                  </ActionUnlockAsset>
                </Values>
              </TriggerAction>
            </Item>
          </TriggerActions>
        </Trigger>
        <TriggerSetup />
      </Values>
    </Asset>
  </ModOp>
  <ModOp Type="addNextSibling" GUID="130248">
    <!--UNLOCK - 500 Artisans -->
    <Asset>
      <Template>Trigger</Template>
      <Values>
        <Standard>
          <GUID>1742008810</GUID>
          <Name>MOD Trigger</Name>
        </Standard>
        <Trigger>
          <TriggerCondition>
            <Template>ConditionPlayerCounter</Template>
            <Values>
              <Condition />
              <ConditionPlayerCounter>
                <PlayerCounter>PopulationByLevel</PlayerCounter>
                <Context>15000002</Context> <!-- Artisans -->
                <CounterAmount>500</CounterAmount>
              </ConditionPlayerCounter>
            </Values>
          </TriggerCondition>
          <TriggerActions>
            <Item>
              <TriggerAction>
                <Template>ActionUnlockAsset</Template>
                <Values>
                  <Action />
                  <ActionUnlockAsset>
                    <UnlockAssets>
                      <Item>
                        <Asset>1742008803</Asset> <!-- GOOD - Wooden toys -->
                      </Item>
                      <Item>
                        <Asset>1742008805</Asset> <!-- CHAIN - Wooden toys -->
                      </Item>
                      <Item>
                        <Asset>1742008807</Asset> <!-- BUILDING - Toy Maker  -->
                      </Item>
                    </UnlockAssets>
                  </ActionUnlockAsset>
                </Values>
              </TriggerAction>
            </Item>
          </TriggerActions>
        </Trigger>
        <TriggerSetup />
      </Values>
    </Asset>
  </ModOp>
<!-- END TRIGGER -->
The creation of the building
The last step we need to take is the creation of the building for our Toy Maker. For this tutorial we are not going to create a new building, but change some textures of an existing building.
We can have a look at the wood veneers production building ingame and see what we could potentially change to make it a bit different compared to the wood veneers version.
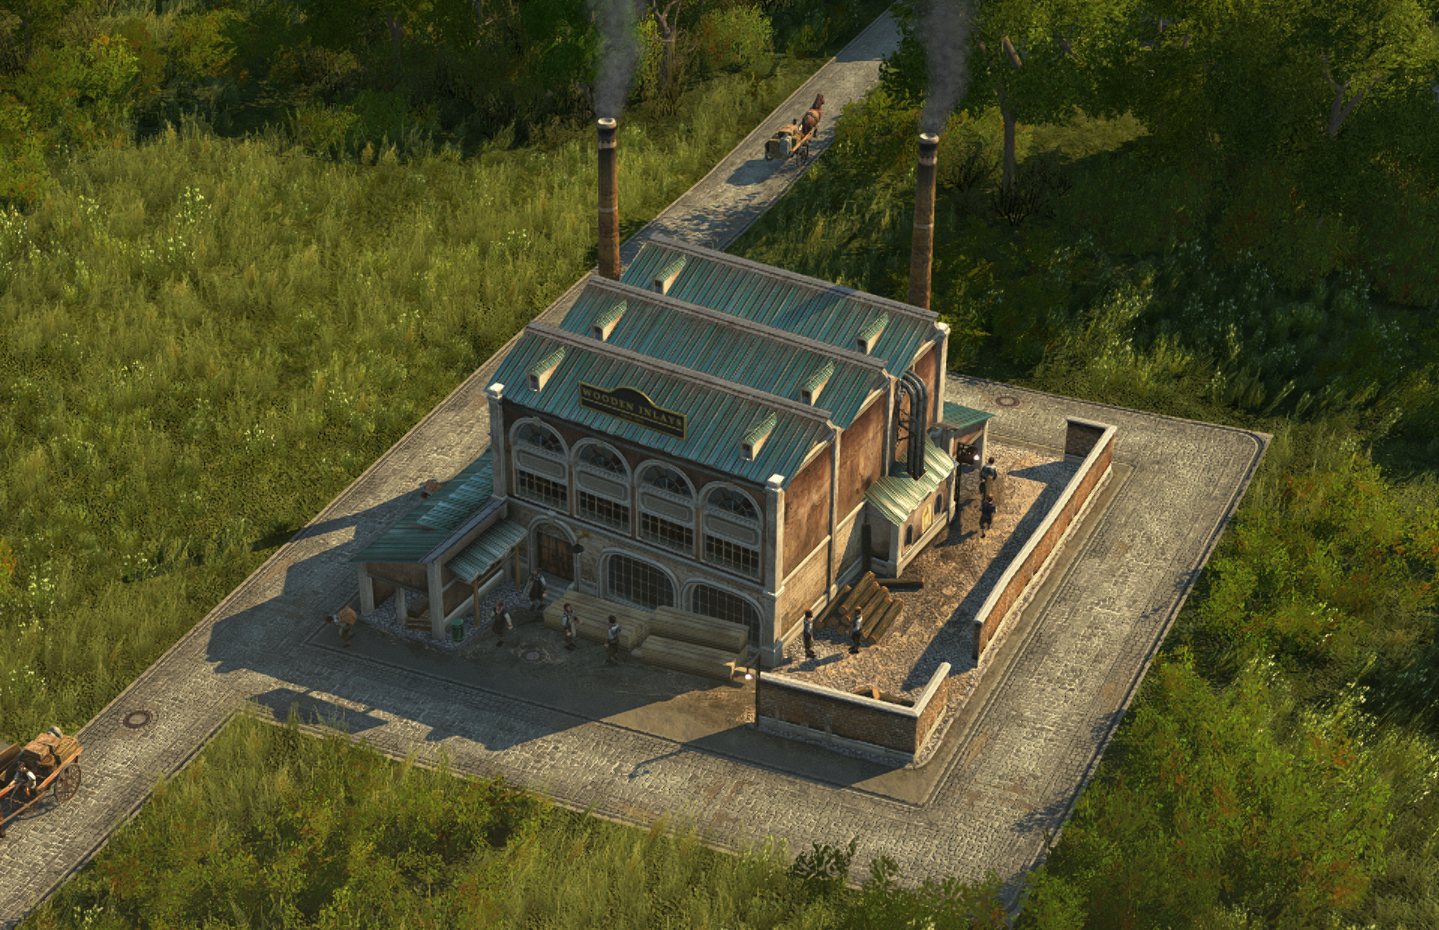
We do not have to many apportunities here to change things, but what we could do it change some color shading of the rood and maybe change the billboard text.
Where to find the original building
First of all we need the original files for the “Marquetry Workshop”. To find the location of those files, we can search for the building on https://a1800.net and then look for the path to the cfg file in the <Object> property.
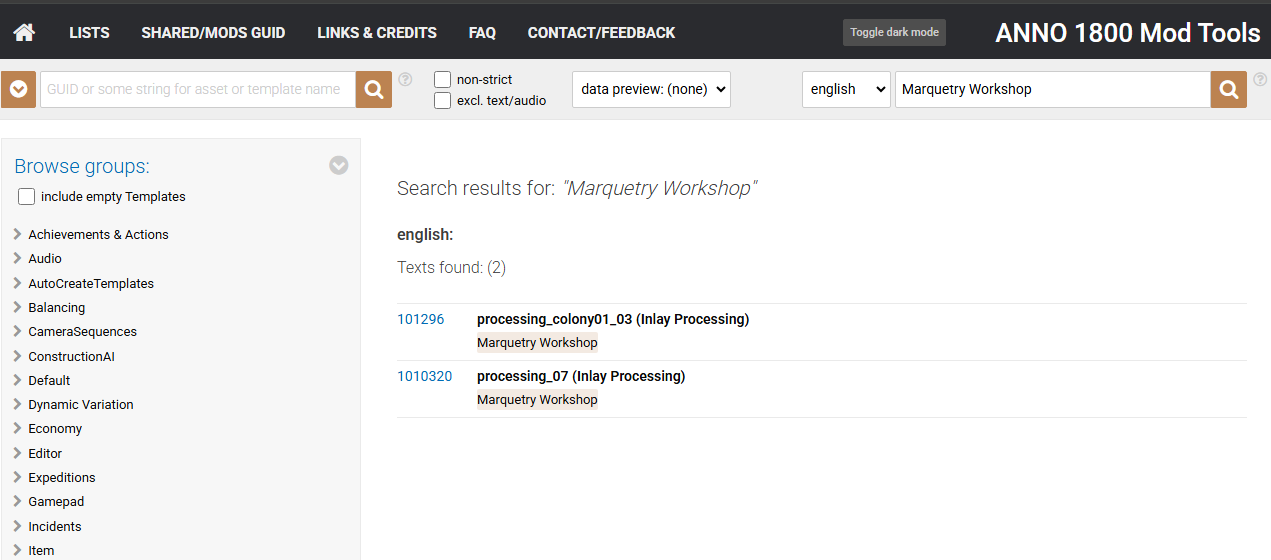
We make sure to take the version from the Old World and then look at the <Object> property.
We could also see this link in our own building, because we actually also still used the link to that building for now.
<Object>
	<Variations>
		<Item>
			<Filename>data/graphics/buildings/production/processing_07/processing_07.cfg</Filename>
		</Item>
	</Variations>
</Object>
The Marquetry Workshop was released in the original game, because of that we know we can find this building inside the data8.rda. We also have the path to this cfg file so with the RDAExplorer, we should be able to extract this building.
In the next tutorial we will see why it is important to extract all the rda files to one central folder because we will be diving into those files more and more in future tutorials. For now, we just look for this specific file.
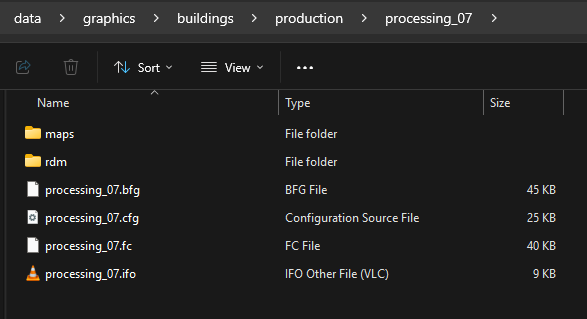
Copy the original building folder and rename
Now go to the extracted data8.rda folder and follow the path to find this specific cfg file. We actually need the complete folder data/graphics/buildings/production/processing_07.
Copy this folder to your location of this mod with the correct folder structure like you created and rename processing_07 to production_wooden_toys.
If we have a look what is inside this folder we can see some different folders and files.
rdm
The first folder we will have a look at is the rdm folder. This contains the models of our building. All those files are in the .rdm format. We can not open this format with a standard program. If you want to have a look at the model you can use a rdm converter to convert to a more accessible format like glTF. This format can be opened by a standard Windows program.
Use this amazing plugin to convert the rdm files:
- https://github.com/lukts30/rdm4 - Follow the instructions on the Github page to install the plugin. Or watch this video how to install it: https://youtu.be/uW-O8Z8oxT0?feature=shared
For now we will just convert the processing_07_lod0.rdm to processing_07_lod0.glb so you can have a look at the building we will be using.
Open this processing_07_lod0.glb with 3D-viewer which should be available out of the box on a windows computer.
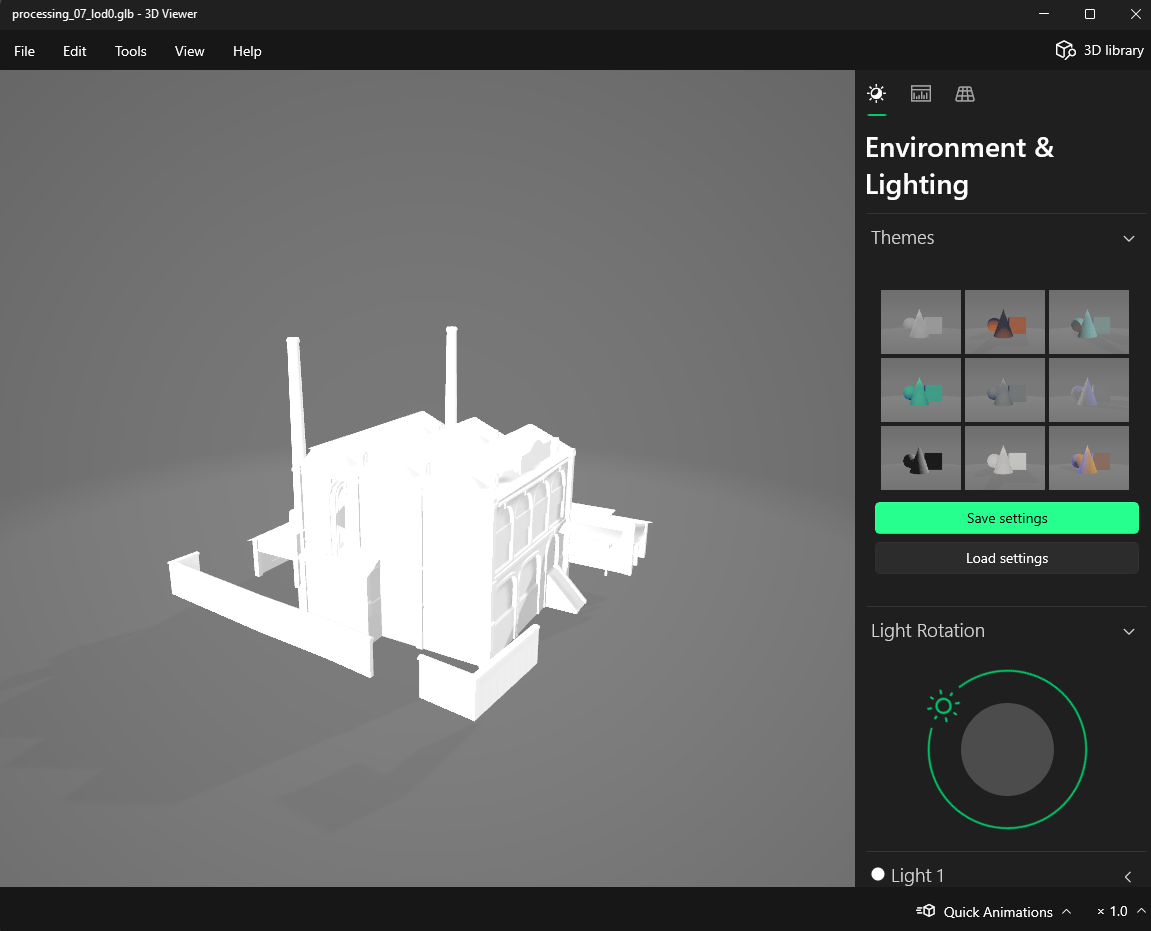
We can turn around the building in this viewer. If we look at this model we can see all the different parts of the building, but we do not see the details like the windows, or the ground, or the walls. That is because the model itself does not contain those details. The modal is the raw structure.
0, 1, 2 (3, 4)
We can see different versions of this model, with at the end a number. The number refers to a version of the building with more or less details. Every building is build out of polygons. The more polygons, the more details but the more resources it needs to be rendered by the game. It is finding the balance between a lot of polygons to get the most beautiful building and making sure the building does not keep a big pressure on the processing of the game. A solution for that is to have different versions of every building.
If we are zoomed out, we are not able to see the details of the building because it is tiny. So no need to have all those details and there is no advantage of processing all those details. For that lower detailed buildings are used. If we are zoomed in, we do want to have all those details so we have a high quality/detailed version for when we are zoomed in and this puts a lot of pressure on the performance.
0 is the zoomed in version with a lot of details. 1 is the inbetween version and the 2 is the low version for zoomed out views. If you open the processing_07_lod3 and put it next to the processing_07_lod0 you will see a big difference in details. There are even really optimized versions 3 and 4 for some buildings.
For this tutorial we are actually not going to change the model itself. So we can actually delete the rdm folder. But now you have some basic knowledge about the models used in the game.
Maps
In the maps folder we can find all the textures/maps of the building. The building is a 3D model and this modal has textures/maps wrapped around it to give it his looks and details. We will be changing those textures to give the building another look.
The maps folder contains a lot of different textures/maps. For example the textures for the building itself, the texture for the ground underneath the building,…

All those files are the .dds format, but have different functions.
0, 1, 2 (3, 4)
We can see the same files with at the end a different number. The number represents different resolutions of the same file. Those files are used for optimization. The bigger files with more detailed textures are for when we are zoomed in. The smaller resolutions and less detailed textures is for more zoomed out views. 0 is the most detailed, 2 is the smallest and so, less details. Some buildings do even get 3 and 4 versions. The same as with the model files.
diff, metal, norm, mask
diff
The way maps are wrapped around a building to give the building his look and feel is complex. I still do not completely understand everything but based on help of other people and what they told me I’ll try to explain this as good as possible. There are different layers of maps with their own function.
The first map we have is the diff version. This is the diffuse map. The diffuse map is basically the color texture of an object. It gives the model his look and feel. It is sometimes referred to as albedo or lambertian diffuse.
Example of the one for the Marquetry Workshop that we will be changing: processing_07_diff_0.dds and processing_07_walls_diff_0.dds
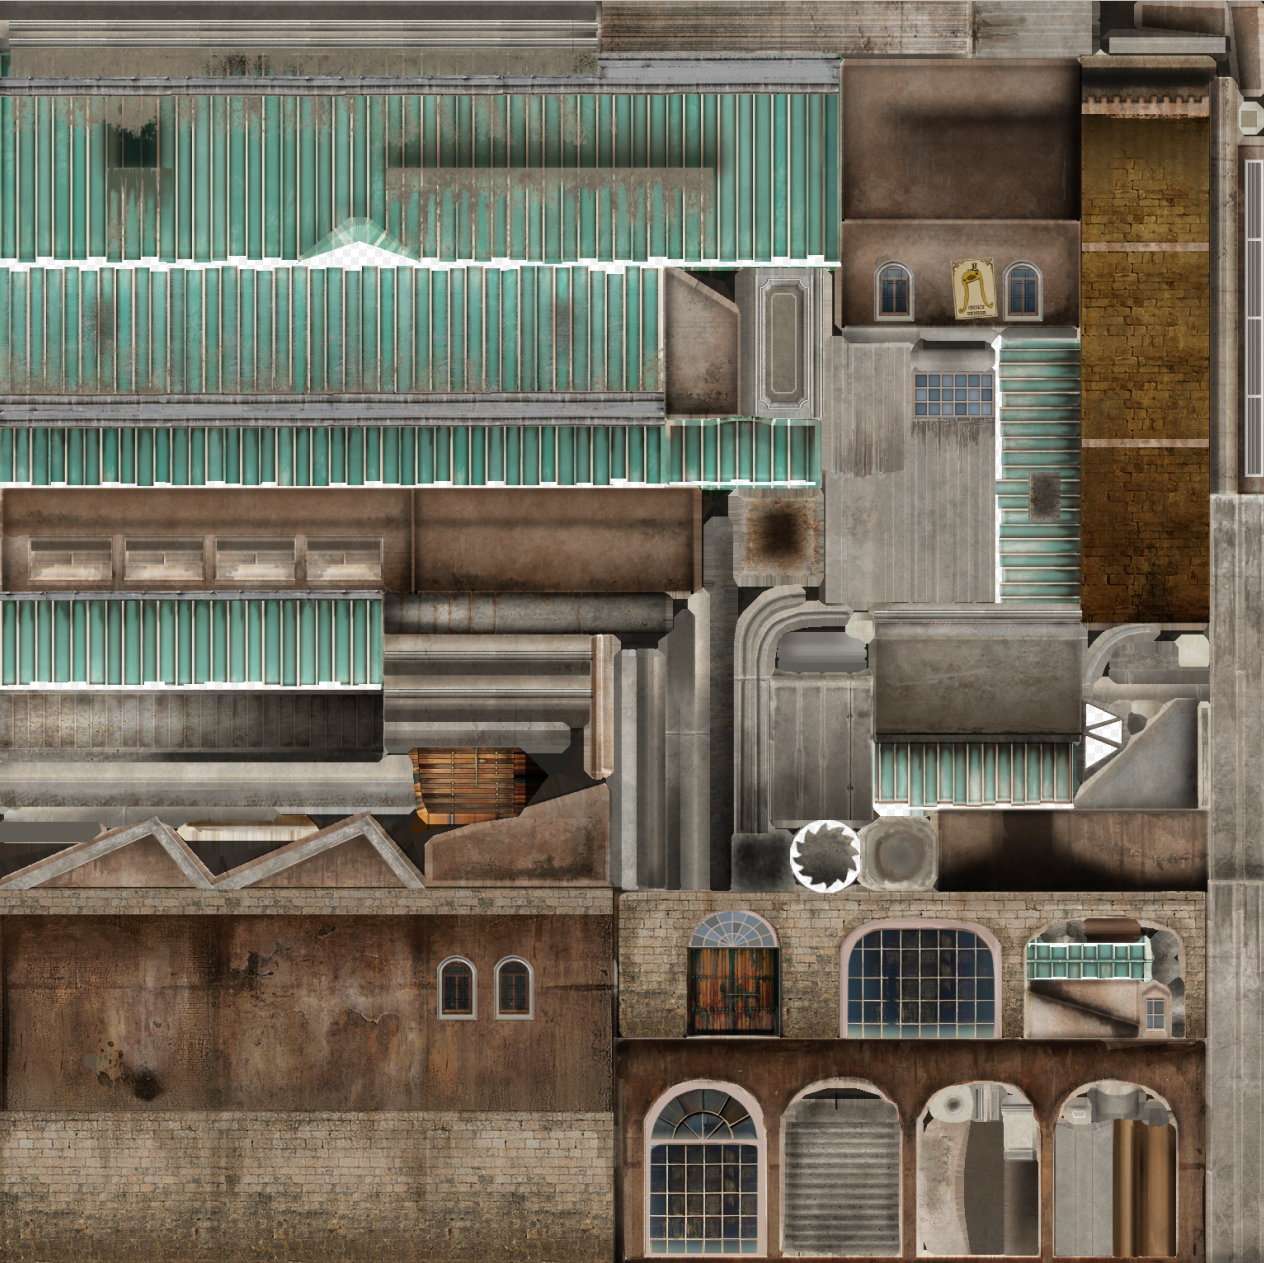
You can see all the different parts of the building stiched together. The rood, the walls, the sign, doors and windows. You can see this as a really big wrap of paper that is being glued on the model itself, piece by piece.
Every piece has coordinates, so if we want to reuse a piece multiple times to wrap on multiple places on our model we can just reuse that piece of the map and wrap it on multiple places on the model.
metal
The next map we have is the metal version. This is short for metallic map.
Example of the one for the Marquetry Workshop that we will be changing: processing_07_metal_0.dds
If we compare this with our diffuse map we can see that they are actually alike, but with huge differences. The diffuse map uses a lot of color, but the metallic map only uses black or white with the possibility to be transparent.
The way this map works is for highlighting shadows on our building. The diffuse map is a flat image. This does create some feeling of texture and 3d, but it still has a flat feeling. With the metallic map we tell the light that falls onto the map to bounce or be absorbed. Based on that we can create shadows that help giving a more 3d feeling on the building.
norm
Then we have the norm version. This is short for normal map.
Example of the one for the Marquetry Workshop that we will be changing: processing_07_norm_0.dds
This has a really weird color. The normal map reflects the smoothness or gloss of the map to give it some more realistic look.
mask
A last map is the mask version. This map doesn not look like it has a lot to offer. Not every building has this map.
It is basicly a map with black, white, red, blue or green highlighted parts. This map has an impact on the day-night cycle. It highlights parts at night or during other periods of the day to be dark or highlighted.
.bfg, .cfg, .fc, .ifo
Now that we have covered all the type of maps, we can get further into the rest of the files inside our building folder. And after that we will be performing the last steps in our new prduction chain mod and we will be creating our own look and feel for the building.
.bfg
Contains a lot of code that we will never have to adapt manually. If we reuse a building, we can just reuse this file. If we will create our own buildings in the future with 3D software like Blender, this could be generated for us.
.cfg
This is the most important file for us at the moment in this tutorial. We will be diving deeper into this file in a moment. This file contains all the references to the model, the maps, extra assets that are placed into the model like lights or wooden boxes. All those references are based on a link to the original files.
.fc
This files contains all our animations and visual feedback. For exmaple shovelers or working people doing things around the model. This file can be manually adapted but for now we will nog do anything to it. Later we will see to generate this file based on an interface.
.ifo
This file contains regions in our model that are blocked or with specific functions. For this tutorial we will not be adapting this. Later this file will be generated.
Renaming and cleanup all files
We have all the files we need but we need to rename some things to make everything more clear.
Rename all processing_07 to production_wooden_toys.
Rename the .cfg file to production_wooden_toys.cfg. Do the same for the .bfg, .ifo amd .fc file. And all the maps files.
In our building asset we put the link to our .cfg file of our building.
Changing the .cfg file
Now let’s open the production_wooden_toys.cfg file. This file contains a lot, but the code is actually not that hard to understand.
We see a lot of paths to files together with coordinates or other number references. Scroll through the file and try to understand step by step what you encounter.
You will see different paths to metal, diff, norm files. Those are all to the original folder of the Wood veneers production building and the original maps.
Examples:
...
<cModelMetallicTex>data/graphics/buildings/production/processing_07/maps/processing_07_metal.psd</cModelMetallicTex>
...
<cModelDiffTex>data/graphics/buildings/production/processing_07/maps/processing_07_diff.psd</cModelDiffTex>
...
<cModelNormalTex>data/graphics/buildings/production/processing_07/maps/processing_07_norm.psd</cModelNormalTex>
...
<cModelMetallicTex>data/graphics/buildings/production/processing_07/maps/processing_07_walls_metal.psd</cModelMetallicTex>
...
We also have the link to the original model, the .rdm file.
...
<FileName>data\graphics\buildings\production\processing_07\rdm\processing_07_lod0.rdm</FileName>
...
Underneath that we have references to .prp files. Those are all props. Extra decorations or small pieces added to the model based on other smaller 3d models from the game. There is already a huge library of props we can just put inside our model environments.
Underneath for example a wooden box. You can follow the link of the path to find all the props available. Every DLC has his extra set of available props.
...
<Config><ConfigType>PROPCONTAINER</ConfigType>
<Name></Name>
<VariationEnabled>0</VariationEnabled>
<VariationProbability>100</VariationProbability>
<Props><Config><ConfigType>PROP</ConfigType>
<FileName>data\graphics\props\storage\wooden_box_pile_01.prp</FileName>
<Position.x>1.832869</Position.x>
<Position.y>0.000000</Position.y>
<Position.z>1.866495</Position.z>
<Rotation.x>0.000000</Rotation.x>
<Rotation.y>0.000000</Rotation.y>
<Rotation.z>0.000000</Rotation.z>
<Rotation.w>1.000000</Rotation.w>
<Scale.x>1.000000</Scale.x>
<Scale.y>1.000000</Scale.y>
<Scale.z>1.000000</Scale.z>
<Flags>1</Flags>
</Config>
...
We can keep the original references for now inside this cfg. In one of the next steps we will be changing the references to our newly created visuals.
modinfo.json
Make again a basic modinfo.json and put it inside the root of the modfolder.
{
    "Version": "1.0",
    "ModID": "tutorial_wooden_toys",
    "Category": {
        "English": "Gameplay"
    },
    "ModName": {
        "English": "Tutorial Wooden Toys"
    },
    "Description": {
        "English": "Create a new production chain with a new good."
    },
    "CreatorName": "My name"
}
Checking all files
Before we go further, let’s take a look at everything we created and all files we should have created upon this point.
- We should have our modfolder with a unique name called “[Gameplay] Tutorial Wooden Toys”
- In this rootfolder folder we have our “modinfo.json”
- In this rootfolder we have a folder called “data”
- In the folder data we have 2 folders called “config” and “graphics”
- In the folder config we have 2 folders, folder “export” and “gui”.
- In the folder export we have a folder “main”
- In the folder main you have a folder “asset”
- In the folder asset we have our main file “assets.xml”
- We have our complete code with all our mod operations in our assets.xml
- In our assets.xml we have created our product
- In our assets.xml we have added our product to our StandartProductStorageList and ProductLists
- In our assets.xml we have created our production building
- In our assets.xml we have added our new building to the corresponding ItemEffectTargetPools
- In our assets.xml we have created our production chain
- In our assets.xml we have added our new production chain to the construction menus
- In our assets.xml we have added our new good as need to farmers, workers, artisans and artistas
- In our assets.xml we have added our production building to the boostable factories
- In our assets.xml we have created 2 triggers. One to unhide and one to unlock our assets
- In the graphics folder we have 2 folders “buildings” and “icons”
- In the buildings folder we have a folder called production which contains a folder called production_wooden_toys which contains our building files that we renamed.
- In the icons folder we have our icon for our new good.
That’s it for now!
Test ingame
We could already do a test ingame to see if everything is working and we did everything correct. Copy the modfolder to the mods folder in the gamedirectory and start the game to test.
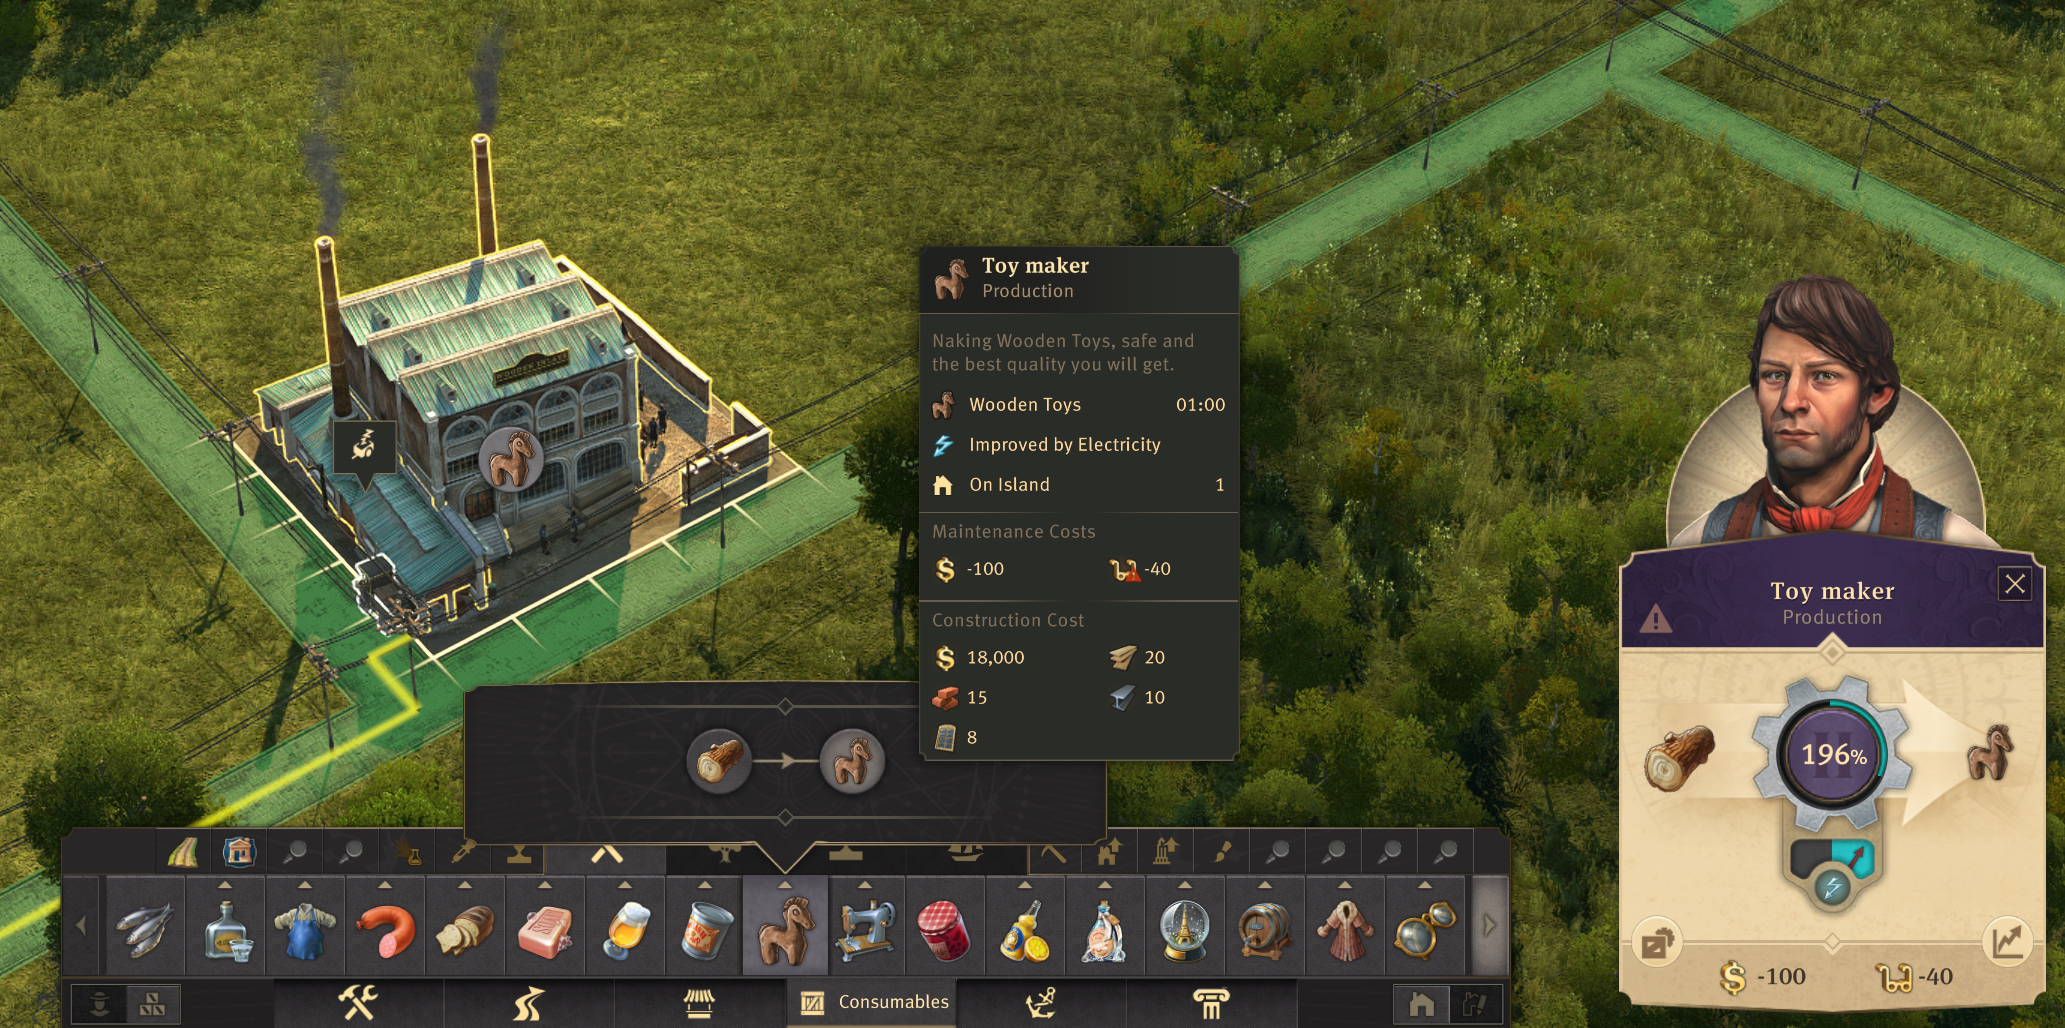
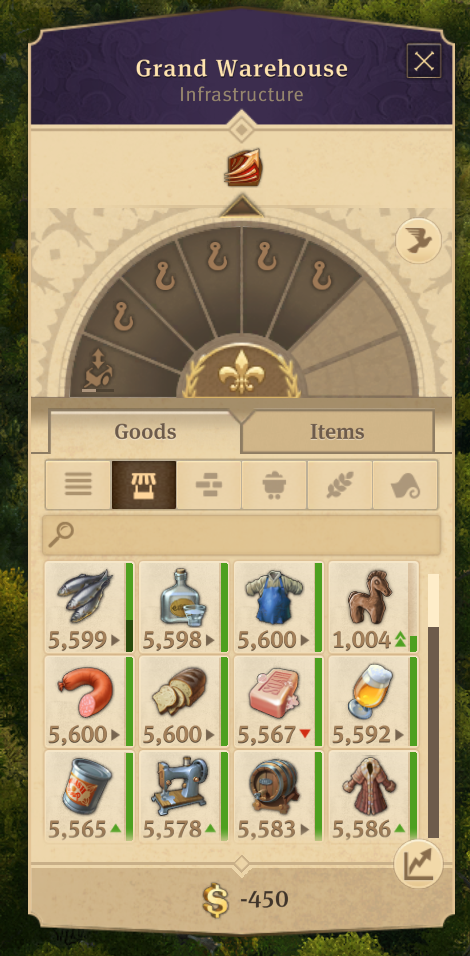
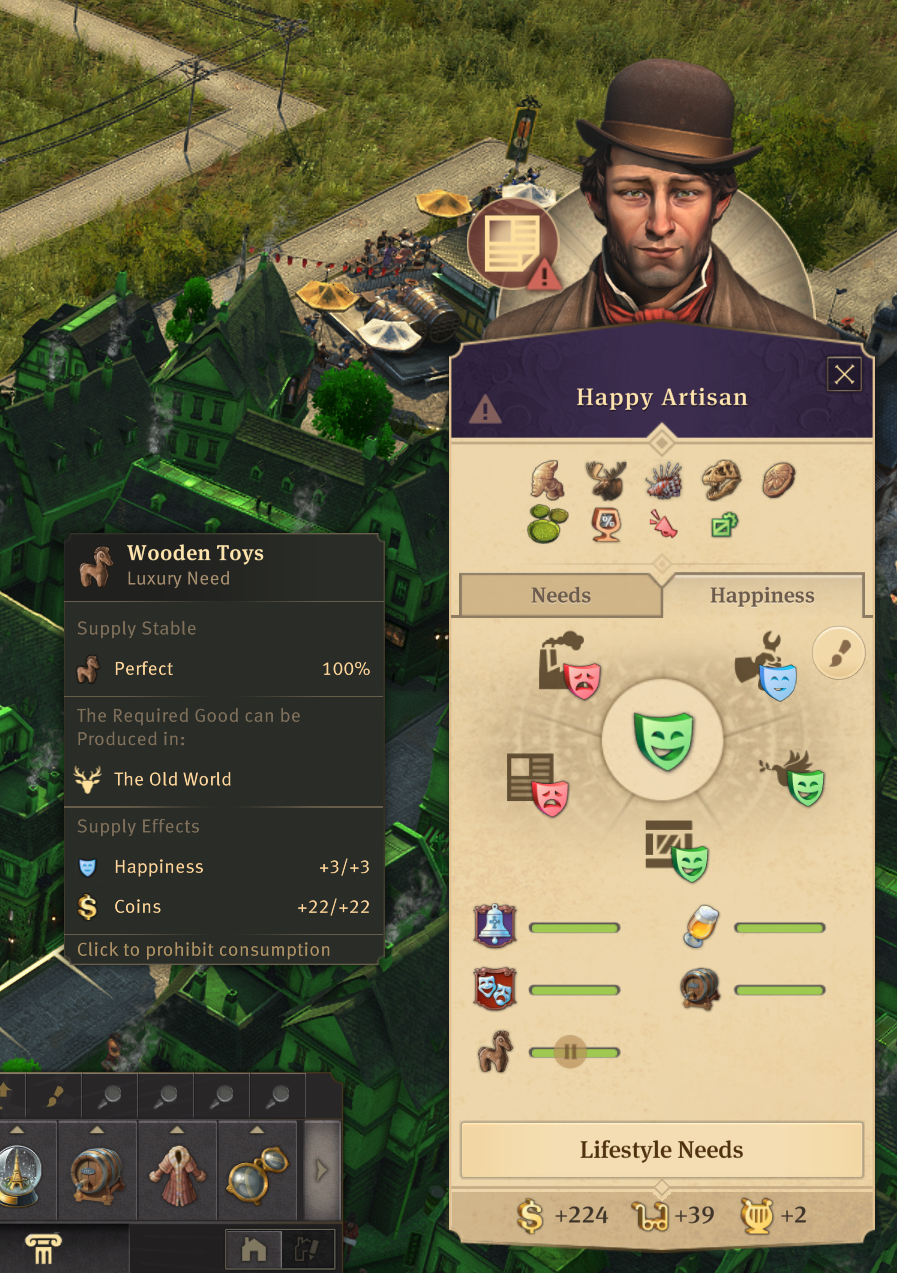
This looks good already!
Different look and feel
Only one thing left to do now: a different look for the building.
Adapt materials/maps files
Because we do not want to dive to deep into this, we will only change some colors of the diff maps and not dive into the moddeling at the moment.
Depending on your image software, convert the production_wooden_toys_diff_0.dds to a png or open the dds directly and make some changes to the image.
We changed the roof colors to something else to have some difference. Save your image again to png or directly to dds.
Also save in the different formats for _0 (1536x1536), _1 (768x768), _2 (384x384). Make sure the updated images are correctly inside your maps folder at the location of data\graphics\buildings\production\production_wooden_toys\maps.
If needed convert the png files again to dds.

We also changed the billboard text to the name of the Toy Maker in the other diff map, production_wooden_toys_walls_diff_0.dds.
Also save in the different formats for _0 (1280x1280), _1 (640x640), _2 (320x320). Make sure the updated images are correctly inside your maps folder at the location of data\graphics\buildings\production\production_wooden_toys\maps.
If needed convert the png files again to dds.
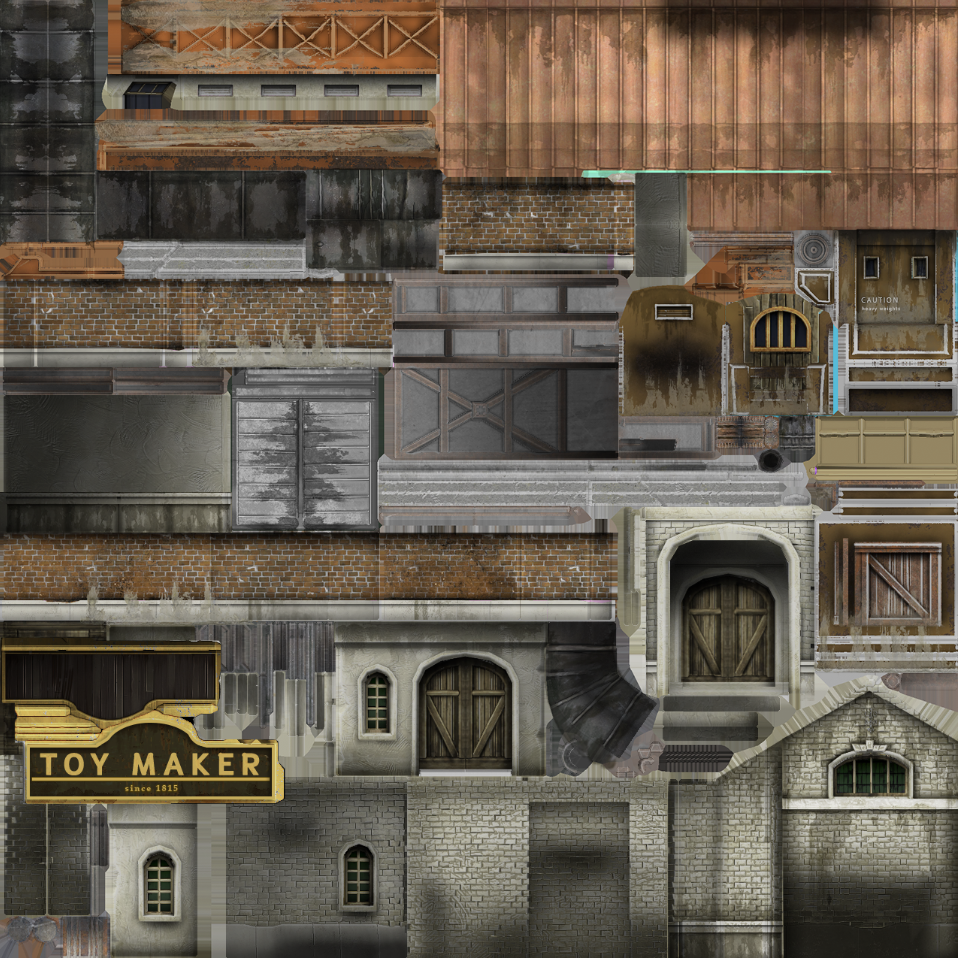
Link new material files
We now have created new material files and previously also changed all the names of those files. In our .cfg, the old files are still linked.
Open the file production_wooden_toys.cfg like we did before.
We have changed 2 material diff files, the production_wooden_toys_diff and the production_wooden_toys_walls_diff . We now need to find those files and do a find and replace of the original files with our new files.
data/graphics/buildings/production/processing_07/maps/processing_07_diff
replace with
data/graphics/buildings/production/production_wooden_toys/maps/production_wooden_toys_diff
and
data/graphics/buildings/production/processing_07/maps/processing_07_walls_diff
replace with
data/graphics/buildings/production/production_wooden_toys/maps/production_wooden_toys_walls_diff
Once we replaced those files, we can save our cfg.
We can actually remove all the other files in our maps folder. All the ground, metal and norm files can be removed. If we have a dds version of our new diff files, we can also remove the png versions.
Start the game again!
Now save all the files, make sure the updated files are copied to your mods folder and start the game again!
Test it again and see your new building ingame!

Congratulations! You have created a new production chain with a new good and a custom building!
Ready for the next one?