modding-guide
Tutorial 2 - Making new specialists
The better way
With Feras, we have changed an existing item, but that is not the best practice. Changing existing items increases potential problems. If other mods change the same item this could result in one of the two mods not working. A better way is to create our own items.
Our imagination
When modding it is up to you what kind of modder you want to be. Do you want to make things that make your game experience easier and “cheat” or do you want to keep the balance and enrich the experience. Personally I do not like the mods that give a feeling of cheating. I always go for balance and love the fact we can add stuff to the game to enrich the experience. But everything is up to you what you want to make. There are so many different people and we all play and love the game in a different way. Do not let that stop you from making amazing things the way you want.
A new specialist for gold mines
For our second mod we are going to make a new specialist. Our imagination is limitless! Maybe you always thought about a specialist missing from the game. Now is the time we are going to realise this!
We are going to create a specialist for the gold mines in the New World. This mine has a high production time of 2min30s. With an item we could boost this production without touching the mine itself and give the player the opportunity to boost the production with an trade union item and keep the game balanced.
Our mod structure
Compared to the previous mod we will now have some more folders and files we need to create. We will call our mod “Tutorial Specialists” The structure now will look like this:
- [Gameplay] Tutorial Specialists
- data
- config
- export
- main
- asset
- xml file (assets.xml) which contains all the logic for your mod.
- asset
- main
- gui
- xml files containing the translations for text in every language
- texts_english.xml
- texts_french.xml
- texts_german.xml
- …
- xml files containing the translations for text in every language
- export
- graphics
- icons
- Custom graphics we use in our mod as icons for the specialist
- icons
- config
- data
What icon do we use?
For this mod we will start with creating the graphic we need. The icon that will be used for the specialist. The game already has a lot of icons and all those icons are in the gamefiles. We need to extract those icons from the data.rda files.The icons can be found in all data.rda files.
Depending on which DLC the icons will be from that specific DLC/theme. For example the Arctic icons will be available in the data.rda from the Arctic, data13: The Passage DLC.
The location of the icons we are going to use is data2.rda/data/ui/2kimages/main/3dicons/specialists/systemic. We will be using “icon_worker_602_0.dds”. We convert this icon to a png file. We could just use the path of this icon but for best practice we use our own icon to make sure if the default icon is changed by Ubisoft, our mod will still work.
![]()
Info: See the previous tutorial (Tutorial 1 - My first mod) if you do not know how to open rda files.
Converting dds to png
To convert the dds file we can use different tools:
- https://www.xnview.com/
- https://www.aconvert.com/image/dds-to-png/
Changing the icon
We could change the icon in a image editor. For example we make her clothes black because she is working in a mine. The name of our specialist will be “Maria Lopez”.
![]()
Location of the icon
Put the icon on in the map we already created in our mod structure.
[Gameplay] Tutorial Specialists/data/graphics/icons
Time to code! Translations
Now we will be creating our translations for this mod. We do this in the translationfiles that can be found on a specific location: [Gameplay] Tutorial Specialists/data/config/gui
The translationfiles are created for different languages.
Supported languages
There are a lot of languages supported within Anno 1800. Every language file is a xml file with the ModOps structure. We have files for every language. Those files always have the same name and location.
- texts_chinese.xml
- texts_english.xml
- texts_french.xml
- texts_german.xml
- texts_italian.xml
- texts_japanese.xml
- texts_korean.xml
- texts_polish.xml
- texts_russian.xml
- texts_spanish.xml
- texts_taiwanese.xml
Structure of the file
Let’s start with the texts_english.xml and create this file in the right folder: [Gameplay] Tutorial Specialists/data/config/gui
The structure of a translationfile starts like most modding files:
<ModOps>


</ModOps>
After that we have again a specific ModOp with a type and path. In this case we will be adding new text exports to the text files. So we have the Type=”add” and we will be adding this to the Path=”/TextExport/Texts”.
<ModOps>
   <ModOp Type="add" Path="/TextExport/Texts">

   </ModOp>
</ModOps>
We will be adding text for 2 things in this mod. The name of the specialist with a tagline, and a description of the specialist. Those 2 texts need a unique identfier, a GUID. Like we saw in the previous tutorial the GUID is a number that represents something in the game. In this case it will represent the specialist and the description of the specialist.
For this first part of this mod we will be using GUID’s 1742008800 (name) and 1742008801 (description). Choose your own GUID’s to make sure you do not get conflicts with other mods.
Choosing the right GUIDs
For this tutorial, we can use the above GUIDs, but a GUID needs to be unique. You can not combine assets that have the same GUID. A GUID can only be in the game one time for an asset.
If you create a mod and want to share the mod with more people, then you need to choose GUIDs that nobody else uses. That way you can be sure that the assets you created will work with their unique GUID.
You can check more info about GUID on the Anno modding Github: https://github.com/anno-mods/GuidRanges
If you want to make mods only for your personal use, you can use the range reserved for personal use.
| Start ID | End ID | |
|---|---|---|
| Personal use | 2.001.000.000 | 2.001.009.999 |
If you are planning to make mods and publish them, you can have a look at the list of GUIDs that is already reserved by other people and choose your own range.
You can pick from the following safe GUID range: 1.337.471.142 - 2.147.483.647, choosing a range that is not reserved by someone else. See the list on the github page. Make a pull request to the repository or go to the [Anno modding discord] (https://discord.gg/VdGbJWdXKn) and ask if one of the admins want to reserve your range for you.
Now that we know which GUID’s we are going to use and we already know the name of our specialist (Maria Lopez), the only thing we need is the tagline and the description. You do not need to go fancy but it is a nice touch to put some extra effort in some nice tagline and backgroundstory for the specialist you are creating. Let’s give Maria some nice story and put that in the game as a description.The structure to put those languages in there goes as following:
<ModOps>
  <ModOp Type="add" Path="/TextExport/Texts">
    <!-- START SPECIALIST - Maria Lopez -->
    <Text>
      <GUID>1742008800</GUID>
      <Text>Maria Lopez, Mining yellow stones</Text>
    </Text>
    <Text>
      <GUID>1742008801</GUID>
      <Text>Maria is one of the few woman in the mining business. She loves working in the mines and she is really good at it. In the beginning men made fun of her. But it did not take long before they had to admit she was doing amazing work. She perfected the mining in the New World so the gold can be extracted in easier ways. She is now honored for her hard work and inventions.</Text>
    </Text>
    <!-- END SPECIALIST - Maria Lopez -->
  </ModOp>
</ModOps>
We now have our main English text. We can copy paste those texts to the other translationfiles we can create in the same folder or only use the English translation file.texts_chinese.xml
- texts_chinese.xml
- texts_french.xml
- texts_german.xml
- texts_italian.xml
- texts_japanese.xml
- texts_korean.xml
- texts_polish.xml
- texts_russian.xml
- texts_spanish.xml
- texts_taiwanese.xml
Creating the specialist, Create our assets.xml
Now the real work can start. We create again our assets.xml in the right location:
[Gameplay] Tutorial Specialists/data/config/export/main/asset/
We start again by creating our opening and closing ModOps tags.
<ModOps>


</ModOps>
Next we create our ModOp with our Type. In this case we will be adding a new asset. Because it is a complete new asset and we are not adding something to an existing asset, adding this is done a bit different.
The assets.xml is a list of all the assets. Asset after asset after asset,… If we add a new asset we just add it in that long list. To make sure it is added on the correct level, we add it right after an similar asset. In our case, another item asset. Take for example GUID 191431. I know this because I went to the main assets.xml searched for it. We will add our item right after this item in the code structure.
We declare the GUID where we want to perform the action to in the ModOp and then which action. In this case add our asset as the next sibling of the GUID 191431 (Louis Comfort Tiffany - The Experimental Window Maker).
<ModOps>
   <!-- START SPECIALIST - Maria Lopez -->
   <ModOp GUID="191431" Type="addNextSibling">

   </ModOp>
   <!-- END SPECIALIST - Maria Lopez -->
</ModOps>
Now that we have declared based on which GUID we do the action, and which action we want to do, we declare what we want to add.
First let’s add the <Asset> tag to wrap our new specialist in.
<ModOps>
   <!-- START SPECIALIST - Maria Lopez -->
   <ModOp GUID="112574" Type="addNextSibling">
      <Asset>

      </Asset>
   </ModOp>
   <!-- END SPECIALIST - Maria Lopez -->
</ModOps>
For which building?
With creating a new specialist item we can create this for every building and ship in the game. Every building and ship can be boosted or changed based on what the specialist does. A house can be boosted so it consumes for example less goods, a production building can be boosted so it produces at a higher rate, a coastal defense building can be boosted so it does more damage, a ship can also be boosted so it has a higher movement speed. All those boosts mentioned are just a fraction of what is possible. The game already has a lot of specialists with a lot of specialities. We can use those as an inspiration to create our own boosts.
Specialists can be used inside a Trade Union, Town Hall, Harbourmaster’s Office, Arctic Lodge and also in ships. We have to decide for which building we want to make the specialist. In this case for our first specialist we will be creating one for the Trade Union. The specialists for Trade Unions are the ones that boost factories and mines, so in this case the logical choice for our gold mine specialist.
<Template>
We are creating a new <Asset> that has a specific structure. A lot of the assets that are used in Anno 1800 can be categorized. This is done to make it easier to create multiple assets with the same proporties. For example all items that can be used inside the Trade Union work the same way and have the same function. So, it is good to put that logic inside a “template” we can then use again and again to save a lot of work in the end.
Now that we know it is for the Trade Union we know which <Template> we will be creating. There is a specific template for Trade Union items. This is the template “GuildhouseItem”.
Templates
- GuildhouseItem (Trade Union, Harbourmaster’s Office, Arctic Lodge)
- TownhallItem
- VehicleItem
- CultureItem
<ModOps>
   <!-- START SPECIALIST - Maria Lopez -->
   <ModOp GUID="191431" Type="addNextSibling">
      <Asset>
         <Template>GuildhouseItem</Template>

      </Asset>
   </ModOp>
   <!-- END SPECIALIST - Maria Lopez -->
</ModOps>
Go to a1800.net and search for “GuildhouseItem” in the left search field. You will find 1 result for the template “GuildhouseItem” which contains 574 assets.
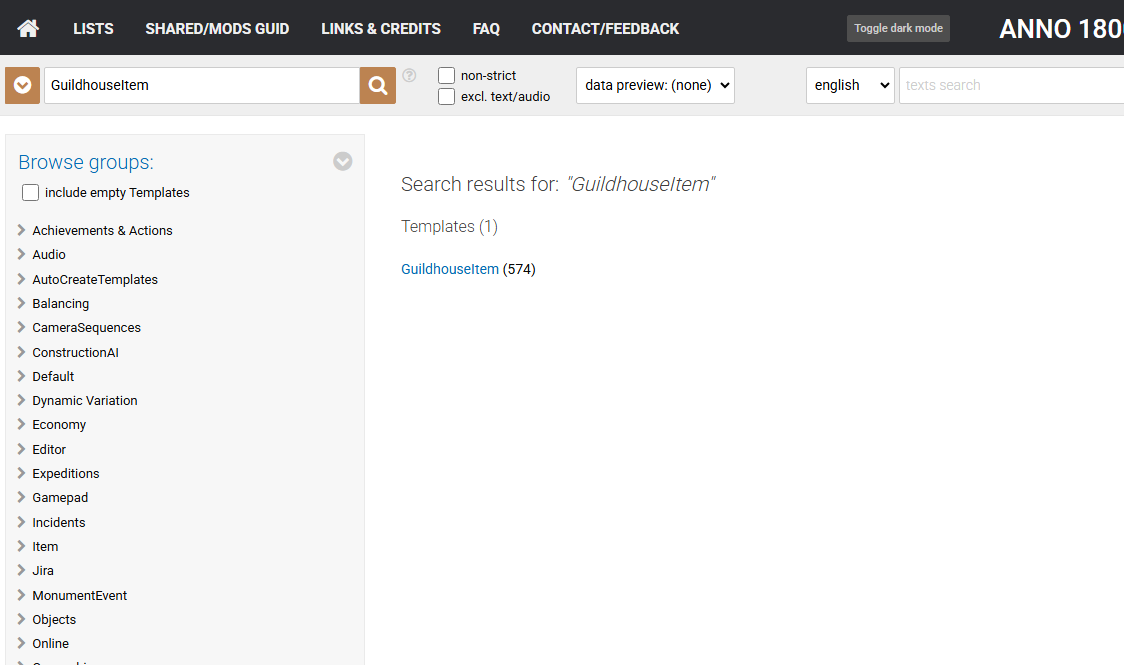
You can click on the template name to see a complete list of all the assets that use this template.

Take a moment to let that sink in… We did not even talk about the items for the Town Hall or other buildings. So, let’s appreciate the hard effort the development team and graphic team already put into creating so much content.
Take a random item and have a look at what you can see in the <Asset> structure. For example, “190690 - Arborist “. Try to go through it step by step, node after node, property after property.
<Asset>
	<Template>GuildhouseItem</Template>
	<Values>
		<Standard>
			<GUID>190690</GUID>
			<Name>Arborist</Name>
			<IconFilename>data/ui/2kimages/main/3dicons/specialists/systemic/icon_farmer_403.png</IconFilename>
			<InfoDescription>12572</InfoDescription>
			<!--item fluff Arborist-->
		</Standard>
		<Text>
			<LocaText>
				<English>
					<Text>Arborist</Text>
					<Status>Exported</Status>
				</English>
			</LocaText>
			<LineID>22048</LineID>
		</Text>
		<Item>
			<MaxStackSize>1</MaxStackSize>
			<Rarity>Rare</Rarity>
			<ItemType>Specialist</ItemType>
			<TradePrice>117000</TradePrice>
		</Item>
		<FactoryUpgrade>
			<ProductivityUpgrade>
				<Value>15</Value>
				<Percental>1</Percental>
			</ProductivityUpgrade>
			<AdditionalOutput>
				<Item>
					<Product>1010252</Product>
					<!--tobacco-->
					<AdditionalOutputCycle>5</AdditionalOutputCycle>
					<Amount>1</Amount>
				</Item>
			</AdditionalOutput>
		</FactoryUpgrade>
		<ItemEffect>
			<EffectTargets>
				<Item>
					<GUID>1010332</GUID>
					<!--agriculture_colony01_04 (Cocoa Farm)-->
				</Item>
				<Item>
					<GUID>1010333</GUID>
					<!--agriculture_colony01_05 (Caoutchouc Farm)-->
				</Item>
				<Item>
					<GUID>1010331</GUID>
					<!--agriculture_colony01_03 (Cotton Farm)-->
				</Item>
				<Item>
					<GUID>101251</GUID>
					<!--agriculture_colony01_07 (Coffee Beans Farm)-->
				</Item>
				<Item>
					<GUID>101263</GUID>
					<!--agriculture_colony01_08 (Banana Farm)-->
				</Item>
				<Item>
					<GUID>25009</GUID>
					<!--Hacienda universal farm Cocoa-->
				</Item>
				<Item>
					<GUID>25006</GUID>
					<!--Hacienda universal farm Caoutchouc-->
				</Item>
				<Item>
					<GUID>25005</GUID>
					<!--Hacienda universal farm Coffee-->
				</Item>
			</EffectTargets>
		</ItemEffect>
		<ItemAction/>
		<ExpeditionAttribute>
			<BaseMorale>0</BaseMorale>
			<ExpeditionAttributes>
				<Item>
					<Attribute>PerkFemale</Attribute>
					<Amount>1</Amount>
				</Item>
				<Item>
					<Attribute>Crafting</Attribute>
					<Amount>30</Amount>
				</Item>
				<Item>
				</Item>
				<Item>
				</Item>
				<Item>
				</Item>
			</ExpeditionAttributes>
			<ItemDifficulties>Easy;Average</ItemDifficulties>
			<FluffText>12572</FluffText>
			<!--item fluff Arborist-->
		</ExpeditionAttribute>
		<CultureUpgrade/>
		<BuildingUpgrade/>
		<ModuleOwnerUpgrade>
			<ModuleLimitPercent>-10</ModuleLimitPercent>
		</ModuleOwnerUpgrade>
		<IncidentInfluencerUpgrade/>
		<IncidentInfectableUpgrade/>
		<ResidenceUpgrade/>
		<PopulationUpgrade/>
		<IndustrializableUpgrade/>
		<Locked/>
		<Buff/>
		<CraftableItem/>
		<HeaterUpgrade/>
		<PowerplantUpgrade/>
		<IrrigationUpgrade/>
		<EcoSystemProviderUpgrade/>
	</Values>
</Asset>
We will try to build up our own asset step by step like this example asset. All assets from the same template are structured the same way with the same properties (up to some point).
<Values>
We first have another container inside the <Asset>, titled <Values>. This will contain all the values of our new asset.
<ModOps>
   <!-- START SPECIALIST - Maria Lopez -->
   <ModOp GUID="191431" Type="addNextSibling">
      <Asset>
         <Template>GuildhouseItem</Template>
         <Values>

         </Values>
      </Asset>
   </ModOp>
   <!-- END SPECIALIST - Maria Lopez -->
</ModOps>
<Standard>
The next part of the asset is the standard part. This contains our main GUID for this specialist, the name, the icon and the description.
For the GUID we take the main GUID we allocated for this specialist. In our case 1742008800.
For the Name we repeat the name we originally gave to our specialist. This will be taken as a fallback but will be overwritten with our translation file.
The IconFileName is the path to the icon we previously created.
Last is the InfoDescription. This is the reference to the description GUID we created in the translation file.
<ModOps>
   <!-- START SPECIALIST - Maria Lopez -->
   <ModOp GUID="191431" Type="addNextSibling">
      <Asset>
         <Template>GuildhouseItem</Template>
         <Values>
            <Standard>
                <GUID>1742008800</GUID>
                <Name>Maria Lopez, Mining yellow stones</Name>
                <IconFilename>data/graphics/icons/icon_maria_lopez.png</IconFilename>
                <InfoDescription>1742008801</InfoDescription>
            </Standard>
         </Values>
      </Asset>
   </ModOp>
   <!-- END SPECIALIST - Maria Lopez -->
</ModOps>
<Text>
Next is a part that does not have to be there, but is good to include. It is a fallback in case you do not have all translationfiles included for all languages. Then the text inserted there, will be used for the asset as a fallback. We can just reuse the existing label we used for the name.
<ModOps>
   <!-- START SPECIALIST - Maria Lopez -->
   <ModOp GUID="191431" Type="addNextSibling">
      <Asset>
         <Template>GuildhouseItem</Template>
         <Values>
            <Standard>
                <GUID>1742008800</GUID>
                <Name>Maria Lopez, Mining yellow stones</Name>
                <IconFilename>data/graphics/icons/icon_maria_lopez.png</IconFilename>
                <InfoDescription>1742008801</InfoDescription>
            </Standard>
            <Text>
               <LocaText>
                  <English>
                     <Text>Maria Lopez, Mining yellow stones</Text>
                     <Status>Exported</Status>
                     <ExportCount>1</ExportCount>
                  </English>
               </LocaText>
            </Text>
         </Values>
      </Asset>
   </ModOp>
   <!-- END SPECIALIST - Maria Lopez -->
</ModOps>
<Item>
The Item part is the next part and we are going to talk some more about this part. It contains global item settings.
MaxStackSize
Defines how many items you could stack together in 1 slot on a ship. Standard is 1. If you want you could change that. The standard for normal items is 1.
Rarity
We have different rarities in the game.
- Common
- Uncommon
- Rare
- Epic
- Legendary
The item we will be creating is a legendary item. Which you want to take depends on how strong the specialist/item you are creating is. Choosing a specific rarity does not make the items stronger. The strength of the item is determined by what properties you are adding and which values you add to those properties. Adding the rarity will make the items background show visually as that rarity. Like epic has purple, legendary has orange for example.
ItemType
The itemtype we are using for this specialist is “Specialist”. But there are also “Normal” used for Cultural items.
Allocation
With the Allocation we define where this item fits into. This is in some way linked to the <Template> we have choosen.
Allocation can be:
- Museum
- Zoo
- BotanicGarden
- Warship
- SailShip
- SteamShip
- Ship
- DivingVessel
- GuildHouse
- TownHall
- HarborOffice
- Lodge
This specialist will fit into the “GuildHouse”.
TradePrice & TradePriceOnlineCurrency
Defines what it will cost to buy and sell the item. Legendary items should cost more then common items. You can have a look at other items to compare prices in the same rarity range.
So, the result for <Item> will be:
<ModOps>
   <!-- START SPECIALIST - Maria Lopez -->
   <ModOp GUID="191431" Type="addNextSibling">
      <Asset>
         <Template>GuildhouseItem</Template>
         <Values>
            <Standard>
                <GUID>1742008800</GUID>
                <Name>Maria Lopez, Mining yellow stones</Name>
                <IconFilename>data/graphics/icons/icon_maria_lopez.png</IconFilename>
                <InfoDescription>1742008801</InfoDescription>
            </Standard>
            <Text>
               <LocaText>
                  <English>
                     <Text>Item Template</Text>
                     <Status>Exported</Status>
                     <ExportCount>1</ExportCount>
                  </English>
               </LocaText>
            </Text>
            <Item>
               <MaxStackSize>1</MaxStackSize>
               <Rarity>Legendary</Rarity>
               <ItemType>Specialist</ItemType>
               <Allocation>GuildHouse</Allocation>
               <TradePrice>1250000</TradePrice>
               <TradePriceOnlineCurrency>1250000</TradePriceOnlineCurrency>
            </Item>
         </Values>
      </Asset>
   </ModOp>
   <!-- END SPECIALIST - Maria Lopez -->
</ModOps>
The main modding part for specialists
The next properties are the properties that will define the specialist the most. Those properties will add production boosts, replace inputs, will define to which buildings the specialist will have effect to, ect. We will go over a lot of them but not all. If you want to know what all the properties do check more specialists on a1800.net amd have a look at their properties.
A lot of the properties do not have an opening and closing tag, but just have 1 tag with the / at the end. Those do not do anything and they are there purely as reference.
IndustrializableUpgrade
For this <IndustrializableUpgrade> we need the following structure:
<IndustrializableUpgrade>
  <ProvideIndustrialization>1</ProvideIndustrialization>
</IndustrializableUpgrade>
It contains the opening and closing tag, and within another property that is set to “1”. With putting the value “1” there with the other property, we define that this value is set to “true”. If we change this to “0” we would define it as “false”.
In this case this property means that the specialist will provide electricity within the range of the trade union.
If you do not want this, you can just not use it and remove it. You can also only use a selfclosing tag that will be ignored like <IndustrializableUpgrade/>.
FactoryUpgrade
This is a really important one that can contain multiple things.
<FactoryUpgrade>
    <ProductivityUpgrade>
        <Value>50</Value>
        <Percental>1</Percental>
    </ProductivityUpgrade>
    <AdditionalOutput>
        <Item>
            <Product>1010246</Product> <!-- Poket Watches -->
            <AdditionalOutputCycle>3</AdditionalOutputCycle>
            <Amount>1</Amount>
        </Item>
    </AdditionalOutput>
    <ReplaceInputs>
        <Item>
            <OldInput>1010204</OldInput> <!-- Brass -->
            <NewInput>120008</NewInput> <!-- Wood -->
        </Item>
    </ReplaceInputs>
</FactoryUpgrade>
In the above example (Gerhard Fuchs, of the Patent Eyeglass) we have 3 different parts who can be used apart from eachoter and do not have to be there together like in this example. If you only want to use one of the 3 it is perfectly possible.
ProductivityUpgrade
With the ProductivityUpgrade we can define a % productionboost. We put a % value inbetween the value tags. So in this example we have a productionboost of 50%. So the factory will be boosted to a production of 150%.
Good to know: This value can also be negative, for example -50%. In some cases we want to decrease the productivity. A case where it could have a benefit is for example heaters or power plants. Those buildings consume a good every cycle to give a buff in return. A longer cycle with 1 input good is positive in this case. So the negative production boost is in this case better then a positive.
AdditionalOutput
With the AdditionalOutput we can define a product that is produced extra every couple of productioncycles. We define which product with the corresponding GUID for that product. If you want to search for a product use a1800.net again, and use the right search field to search based on text. In this example we have the GUID 1010246 which is pocket watches.
We define also the number of cycles it needs to produce this good. In this case every 3 cycles a pocket watch will be produced as an extra product.
ReplaceInputs
The last part is ReplaceInputs where we replace one of the input products with another product. We do this by defining the 2 GUID’s for both products and put those in the corrects properties. In this case brass is replaced by wood.
ItemEffect
<ItemEffect>
    <EffectTargets>
        <Item>
            <GUID>1010315</GUID> <!-- Framework Knitters -->
        </Item>
        <Item>
            <GUID>1010325</GUID> <!-- Fur Dealer -->
        </Item>
        <Item>
            <GUID>118734</GUID> <!-- Tailor's Shop -->
        </Item>
    </EffectTargets>
</ItemEffect>
The ItemEffect defines to which building the specialist will have an effect on.
Good to know: This does not have to be a building. It can also be a GUID of a group of buildings. For example GUID 25599 is All Production Buildings. All Production Buildings is a group of buildings rom the template “ItemEffectTargetPool”. If you search for “25599” on a1800.net, you will see this is an asset from the template “ItemEffectTargetPool” and it has a specific structure, containing a list of different buildings. We will go over lists more in depth in this and later tutorials.
BuildingUpgrade
<BuildingUpgrade>
    <MaintenanceUpgrade>
        <Value>-20</Value>
        <Percental>1</Percental>
    </MaintenanceUpgrade>
    <WorkforceAmountUpgrade>
       <Value>20</Value>
       <Percental>1</Percental>
    </WorkforceAmountUpgrade>
</BuildingUpgrade>
With the BuildingUpgrade we can change maintenance costs of the building and the amount of workforce that is needed.
MaintenanceUpgrade
In the example above the maintenance cost is decreased by 20%. We can define a negative value here or a positive value of we want to increase the maintenance costs.
WorkforceAmountUpgrade
We also have workforce that is needed to let a building produce goods. With WorkforceAmountUpgrade we can change the amount that is needed. Again, this can be negative or positive as a value.
ResidenceUpgrade
<ResidenceUpgrade>
    <AdditionalHappiness>30</AdditionalHappiness>
    <GoodConsumptionUpgrade>
        <Item>
            <ProvidedNeed>114404</ProvidedNeed> <!-- Tapestries -->
            <AmountInPercent>-100</AmountInPercent>
        </Item>
        <Item>
            <ProvidedNeed>117698</ProvidedNeed> <!-- Illuminated Script -->
            <AmountInPercent>-80</AmountInPercent>
        </Item>
        <Item>
            <ProvidedNeed>117699</ProvidedNeed> <!-- Lanterns -->
            <AmountInPercent>-50</AmountInPercent>
        </Item>
    </GoodConsumptionUpgrade>
    <TaxModifierInPercent>-25</TaxModifierInPercent>
    <WorkforceModifierInPercent>30</WorkforceModifierInPercent>
</ResidenceUpgrade>

<ResidenceUpgrade>
    <NeedProvideNeedUpgrade>
        <Item>
            <ProvidedNeed>1010213</ProvidedNeed> <!-- Bread -->
            <SubstituteNeed>1010349</SubstituteNeed> <!-- Pub -->
        </Item>
        <Item>
            <ProvidedNeed>1010238</ProvidedNeed> <!-- Sausages -->
            <SubstituteNeed>1010349</SubstituteNeed> <!-- Pub -->
        </Item>
        <Item>
            <ProvidedNeed>1010200</ProvidedNeed> <!-- Fish -->
            <SubstituteNeed>1010349</SubstituteNeed> <!-- Pub -->
        </Item>
    </NeedProvideNeedUpgrade>
</ResidenceUpgrade>
With ResidenceUpgrade we can provide goods or services to houses. This is not really used for items for Trade Unions, but mostly for items for Town Halls.
AdditionalHappiness
Provide Happiness to people in the radius. Define a flat amount. This can be a positive or negative value.
GoodConsumptionUpgrade
This provides a % you define of a specific good to the people in that radius. In the above example 3 products are provides for the % of less consumption. The products are defined by their GUID. For easy checking use comments next to it to know which products.
TaxModifierInPercent
Let people pax more or less taxes. This amount can be positive and negative.
WorkforceModifierInPercent
Boost the amount of people in the houses. This can be a negative or positive value.
NeedProvideNeedUpgrade
A good or service can be used as a substitute for another good. In the above example the Pub is a substitute for bread, sausages and fish. When the citizen are provided with the pub they are also provided with bread, sausages and fish.
CultureUpgrade
Examples:
<CultureUpgrade>
    <AttractivenessUpgrade>
        <Value>10</Value>
    </AttractivenessUpgrade>
</CultureUpgrade>

<CultureUpgrade>
    <AttractivenessUpgrade>
        <Value>-20</Value>
        <Percental>1</Percental>
    </AttractivenessUpgrade>
</CultureUpgrade>
We can also change the Attractiveness with a flat amount or a percentage. See above examples as references.
ExpeditionAttribute
Example:
<ExpeditionAttribute>
    <BaseMorale>20</BaseMorale>
    <ExpeditionAttributes>
        <Item>
            <Attribute>PerkMale</Attribute>
            <Amount>1</Amount>
        </Item>
        <Item>
            <Attribute>Crafting</Attribute>
            <Amount>50</Amount>
        </Item>
        <Item>
            <Attribute>Melee</Attribute>
            <Amount>15</Amount>
        </Item>
        <Item>
            <Attribute>PerkMilitaryShip</Attribute>
            <Amount>1</Amount>
        </Item>
        <Item />
    </ExpeditionAttributes>
    <ItemDifficulties>Average;Hard</ItemDifficulties>
</ExpeditionAttribute>
Items can also be used for expeditions. We can define what the attributes should be for the item. There is a list for all types of attributes.
BaseMorale
Every expedition needs a good morale. You can provide a base amount of morale with the item. Define a flat amount.
Trait/Perk
For the perks we can add as much as we want combined with a amount value of 1.
- PerkMale (Male)
- PerkFemale (Female)
- PerkHypnotist (Hypnotist)
- PerkAnthropologist (Anthropologist)
- PerkMilitaryShip (Military ship)
- PerkSailingShip (Sailing ship)
- PerkSteamShip (Steam ship)
- PerkTradeShip (Trade ship)
- PerkFormerPirate (Pirate)
- PerkDiver (Diver)
- PerkJackOfAllTraits (Jack Of All Traits)
- PerkEntertainer (Entertainer)
- PerkPolyglot (Polyglot)
- PerkZoologist (Zoologist)
- PerkArcheologist (Archeologist)
Skills
For the skills we can also add as much as we want combined with the amount we want.
- Crafting
- Diplomacy
- Melee (Force)
- Might (Naval Power)
- Navigation
- Medicine
- Faith
- Hunting
ItemDifficulties
This can be:
- Easy
- Average
- Hard
Locked
<Locked>
    <DefaultLockedState>1</DefaultLockedState>
    <DLCDependency>410041</DLCDependency>
</Locked>
Using the <Locked> property can have different reasons.
DefaultLockedState
The first and most obvious reason is to lock the asset until it is the correct time in the game progression to make the item available for the user. For example, a lategame legendary item should only be available when reaching a certain stage in the game. We can then lock the item and make it not available until a certain point. Later in this tutorial we will see how we actually perform some additional actions to make this possible. But to lock the item, we set the <DefaultLockedState> property to “1”. If we want to make the item or asset available right from the start of the game, we can set this value to “0”.
DLCDependency
Another option here is to lock certain content, assets, items behind a certain content DLC. In case the player does not have purchased a certain DLC we can then make the content not available for them. Why would we do that? Well, if the user for example does not have certain DLC’s they would not have certain mechanics/buildings/goods which those assets need to actually work. An example of that is a specialists that changes the output of the post office, for example increasing the productivity of the post office. But, the post office is a building only available in the Empire of the Skies DLC. If the user does not have that DLC, there is no reason why this specialists should be availble for them.
You use the GUID of the DLC to define it. The example above is for the Botanica DLC.
List of Dependencies:
- 116630 - CDLC 01 - Holiday
- 410079 - CDLC 02 - Amusement Park
- 410081 - CDLC 03 - City Lights
- 319 - CDLC 04 - Vehicle Liveries
- 410100 - CDLC 05 - Pedestrian Zone
- 522 - CDLC 06 - Vibrant City
- 25149 - CDLC 07 - Seasonal Decorations
- 24964 - CDLC 08 - Industrial Zone
- 24965 - CDLC 09 - Old Town
- 10114 - CDLC 10 - Dragon Garden
- 21049 - CDLC 11 - Fiesta Time
- 23718 - CDLC 12 - National Park
- 23719 - CDLC 13 - Eldritch
- 33032 - CDLC 14 - Steampunk
- 41533 - CDLC 15 - Pirate
- 51147 - CDLC 16 - Celebration
- 410041 - DLC - Botanica
- 410070 - DLC - Bright Harvest
- 24331 - DLC - Charity Tree
- 410083 - DLC - Docklands
- 24962 - DLC - Empire of the Skies
- 410085 - DLC - HighLife
- 410071 - DLC - Land of Lions
- 24963 - DLC - New World Rising
- 24961 - DLC - Seeds of Change
- 410040 - DLC - Sunken Treasure
- 4100010 - DLC - The Anarchist
- 410059 - DLC - The Palace
- 410042 - DLC - The Passage
- 410084 - DLC - Tourism
ModuleOwnerUpgrade
<ModuleOwnerUpgrade>
    <ModuleLimitPercent>-10</ModuleLimitPercent>
</ModuleOwnerUpgrade>
Some buildings have fields. For example farms. You can reduce or increase the mount of fields needed for the buildings in range of the trade union where this item is used. You use a positive or negative % amount.
IncidentInfectableUpgrade
<IncidentInfectableUpgrade>
    <IncidentFireIncreaseUpgrade>
        <Value>-1</Value>
    </IncidentFireIncreaseUpgrade>
    <IncidentIllnessIncreaseUpgrade>
        <Value>-1</Value>
    </IncidentIllnessIncreaseUpgrade>
    <IncidentRiotIncreaseUpgrade>
        <Value>-1</Value>
    </IncidentRiotIncreaseUpgrade>
    <IncidentExplosionIncreaseUpgrade>
        <Value>-1</Value>
    </IncidentExplosionIncreaseUpgrade>
</IncidentInfectableUpgrade>
IncidentInfectableUpgrade reduces or increases the chance for one of the 4 possible incidents.
- Fire
- Illness
- Riots
- Explosions
Put a value inbetween 0 and 10 or 0 and -10. 1 is 10%, -5 is -50% and so on.
PopulationUpgrade
<PopulationUpgrade>
    <StressUpgrade>
        <Value>-35</Value>
        <Percental>1</Percental>
    </StressUpgrade>
    <ResidentsUpgrade>
        <Value>20</Value>
        <Percental>1</Percental>
    </ResidentsUpgrade>
    <InputBenefitModifier>
        <Item>
            <Product>114361</Product> <!-- Musicians' Court -->
            <AdditionalSupply>5</AdditionalSupply>
            <AdditionalMoney>10</AdditionalMoney>
        </Item>
        <Item>
            <Product>114414</Product> <!-- Clay Pipes -->
            <AdditionalSupply>5</AdditionalSupply>
            <AdditionalMoney>10</AdditionalMoney>
        </Item>
        <Item>
            <Product>1010353</Product> <!--University -->
            <AdditionalResearch>1</AdditionalResearch>
            <AdditionalHappiness>10</AdditionalHappiness>
        </Item>
    </InputBenefitModifier>
</PopulationUpgrade>
StressUpgrade
This can adapt the impact of working conditions. For example if you upped the workingconditions for your workforce you can mitigate this with this buff. Choose a negative percentage amount.
In the example above, the impact of working conditions is reduced by 35%.
ResidentsUpgrade
As far as I can see this does not do anything anymore and was replaced with InputBenefitModifier.
InputBenefitModifier
It defines for what good we get extra citizen for and how many.
In the example above, residences with the need of Musicians’ Court and Clay Pipes fullfilled get 5 more residences and 10 more coins. Also residences with the University need fullfilled are giving an additional 1 research point and an additional 10 happiness.
KontorUpgrade
<KontorUpgrade>
    <HappinessIgnoresMorale>1</HappinessIgnoresMorale>
    <BlockHostileTakeover>1</BlockHostileTakeover>
    <BlockBuyShare>1</BlockBuyShare>
</KontorUpgrade>
HappinessIgnoresMorale
Residences no longer lose happiness as a result of morale loss during island wars when value is set to 1.
BlockHostileTakeover
Prevents another party from taking ownership of your island when they possess all shares when setting value to 1.
BlockBuyShare
Locks the shares of your island, preventing another party from purchasing them when value is set to 1.
PassiveTradeGoodGenUpgrade
<PassiveTradeGoodGenUpgrade>
    <GenProbability>25</GenProbability>
    <GenPool>191637</GenPool> <!-- Protectionism Defender Pool 2 -->
</PassiveTradeGoodGenUpgrade>
Every time passive trade happens at the trading post, there is a chance of gaining the amount of goods you defined.
HeaterUpgrade (The Passage DLC)
<HeaterUpgrade>
    <HeatRangeUpgrade>
        <Value>20</Value>
        <Percental>1</Percental>
    </HeatRangeUpgrade>
</HeaterUpgrade>
Increase the range of heating provided by the heating building by % amount.
PowerplantUpgrade
<PowerplantUpgrade>
    <IndustrializationRangeUpgrade>
        <Value>10</Value>
    </IndustrializationRangeUpgrade>
</PowerplantUpgrade>
Increase the range of electricity provided by the power plant by % amount.
IrrigationUpgrade (Land Of Lions DLC)
<IrrigationUpgrade>
    <PipeCapacityUpgrade>
        <Value>20</Value>
    </PipeCapacityUpgrade>
</IrrigationUpgrade>
Increase the amount of canal tiles you can use for a water pump.
Let’s choose what we need
The only thing left for our mod is now to choose from all the possibilities mentioned above. If you went over all of them, you would realize that not all of those are actually meant for a GuildHouseItem. It is a wider overview of all the possible specialists which could also be specialists for the Town Hall or other buildings where we slot in specialists.
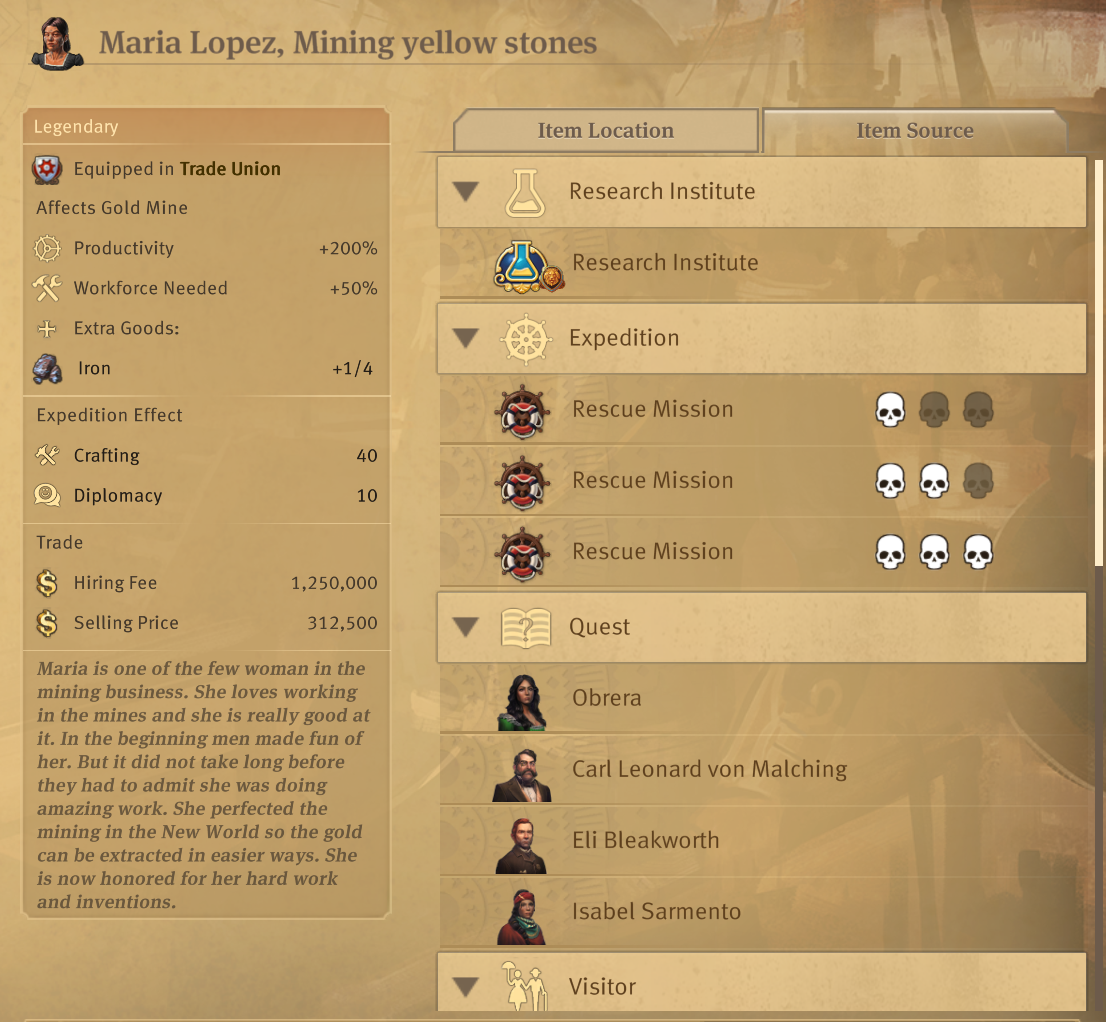
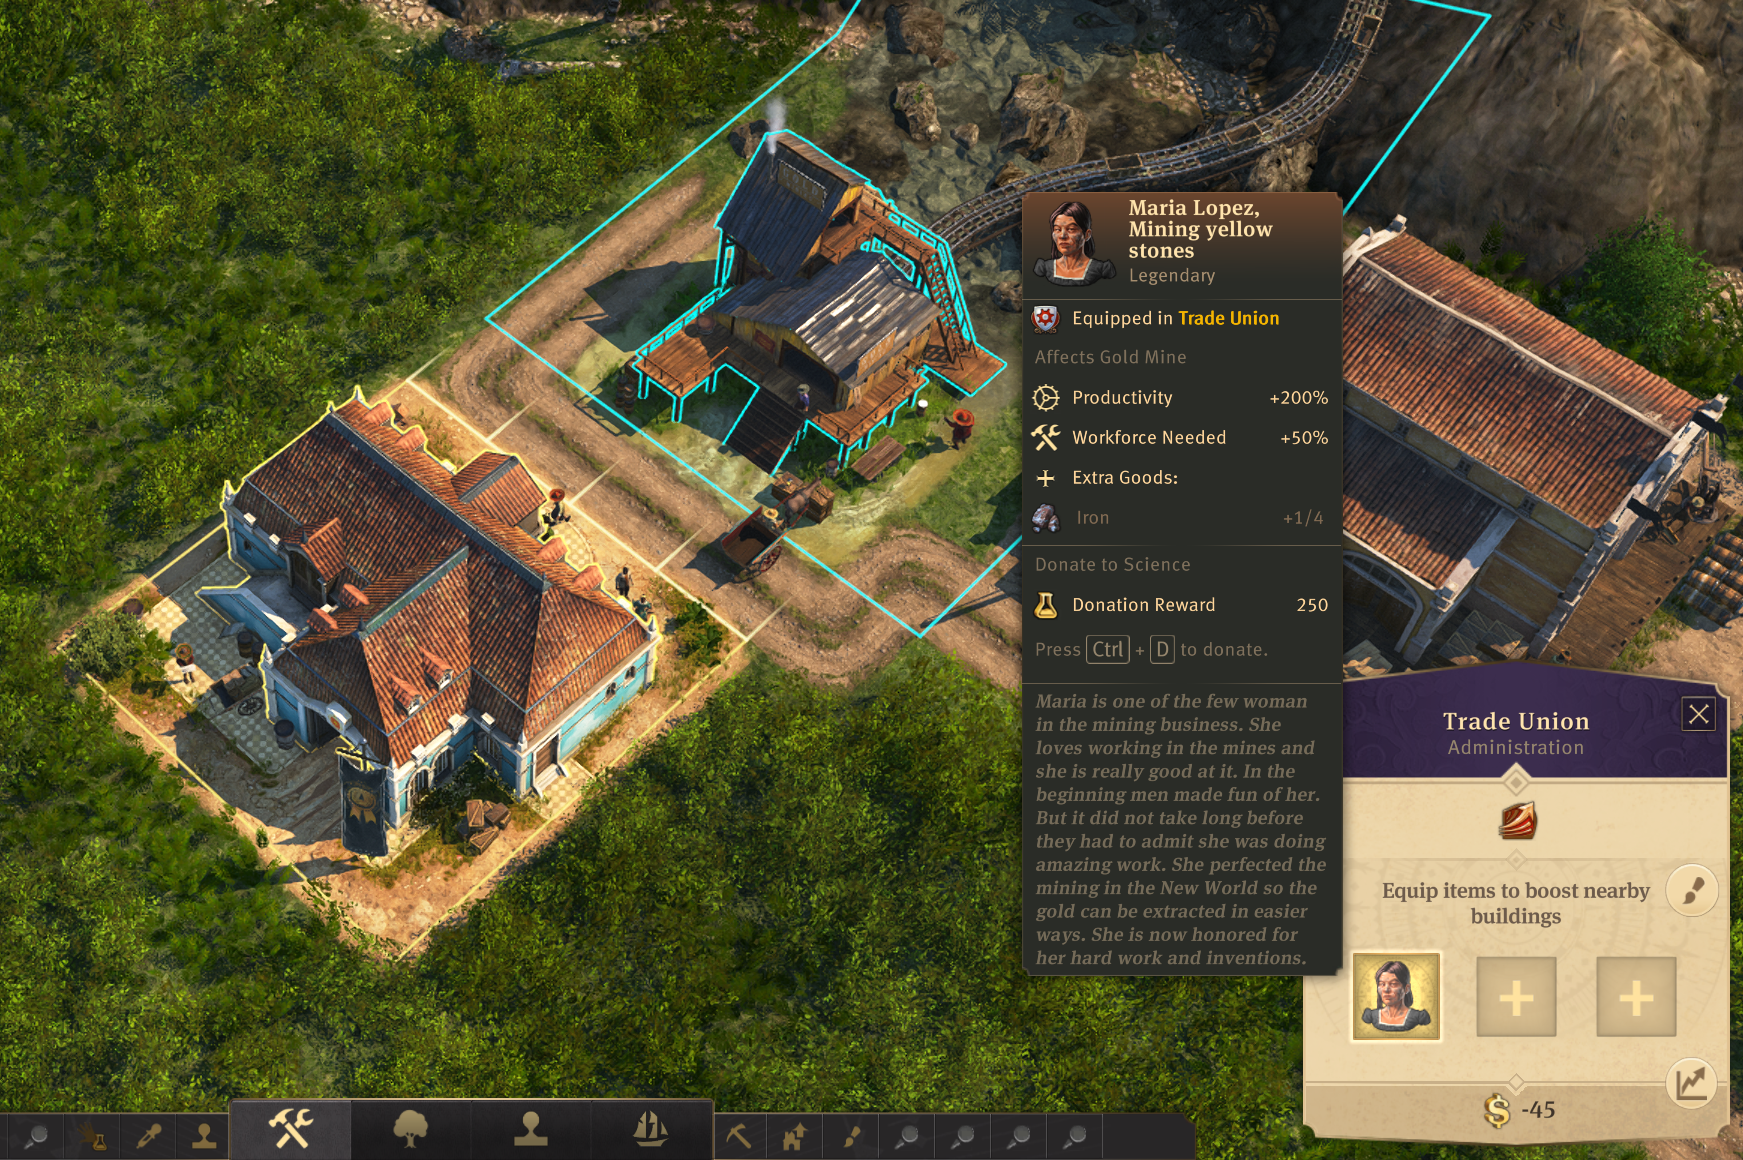
Maria will have an effect on the Gold Mine in the New World. To define this, we use the GUID of the Gold Mine which we can look for on a1800.net. This GUID is “101311”.
We wil choose a FactoryUpgrade with a ProductivityUpgrade of 200% and an AdditionalOutput of Iron every 4 cycles.
For ExpeditionAttribute we use the PerkFemale, with Crafting of 40 and Diplomacy of 10. With a ItemDifficulties of Hard.
For BuildingUpgrade we choose a WorkforceAmountUpgrade of +50%.
We will Lock this item and only make it available once we hit 1000 Obreros. How we make it available at that stage we will see later in this tutorial. But we have to lock it.
<ModOps>
    <ModOp GUID="191431" Type="addNextSibling">
        <Asset>
            <Template>GuildhouseItem</Template>
            <Values>
                <Standard>
                    <GUID>1742008800</GUID>
                    <Name>Maria Lopez, Mining yellow stones</Name>
                    <IconFilename>data/graphics/icons/icon_maria_lopez.png</IconFilename>
                    <InfoDescription>1742008801</InfoDescription>
                </Standard>
                <Text>
                    <LocaText>
                        <English>
                            <Text>Maria Lopez, Mining yellow stones</Text>
                            <Status>Exported</Status>
                            <ExportCount>1</ExportCount>
                        </English>
                    </LocaText>
                </Text>
                <Item>
                    <MaxStackSize>1</MaxStackSize>
                    <Rarity>Legendary</Rarity>
                    <ItemType>Specialist</ItemType>
                    <Allocation>GuildHouse</Allocation>
                    <TradePrice>1250000</TradePrice>
                    <TradePriceOnlineCurrency>1250000</TradePriceOnlineCurrency>
                </Item>
				<ItemEffect>
                    <EffectTargets>
                        <Item>
                            <GUID>101311</GUID> <!-- Gold Mine -->
                        </Item>
                    </EffectTargets>
                </ItemEffect>
                <FactoryUpgrade>
                    <ProductivityUpgrade>
                        <Value>200</Value>
                        <Percental>1</Percental>
                    </ProductivityUpgrade>
                    <AdditionalOutput>
                        <Item>
                            <Product>1010227</Product> <!-- Iron -->
                            <AdditionalOutputCycle>4</AdditionalOutputCycle>
                            <Amount>1</Amount>
                        </Item>
                    </AdditionalOutput>
                </FactoryUpgrade>
                <ExpeditionAttribute>
                    <BaseMorale>0</BaseMorale>
                    <ExpeditionAttributes>
                        <Item>
                            <Attribute>PerkFemale</Attribute>
                            <Amount>1</Amount>
                        </Item>
                        <Item>
                            <Attribute>Crafting</Attribute>
                            <Amount>40</Amount>
                        </Item>
                        <Item>
                            <Attribute>Diplomacy</Attribute>
                            <Amount>10</Amount>
                        </Item>
                    </ExpeditionAttributes>
                    <ItemDifficulties>Hard</ItemDifficulties>
                </ExpeditionAttribute>
                <BuildingUpgrade>
                    <WorkforceAmountUpgrade>
                        <Value>50</Value>
                        <Percental>1</Percental>
                    </WorkforceAmountUpgrade>
                </BuildingUpgrade>
            </Values>
        </Asset>
    </ModOp>
</ModOps>
Things we did not completly cover (yet)
We also have other places we can use specialists. For example Town Hall, Harbourmaster’s Office, Arctic Lodge and also in ships. We just made a specialist/item for the Trade Union but the possibilities above include some of the possiblilities for the other buildings. But that list is not complete! Dive a bit in the code of the assets.xml yourself to learn more about what is even more possible for other specialists/items. For example, ships have a completely different type of possibilities compared to buildings.
Some other possibilities:
- CraftableItem
- EcoSystemProviderUpgrade
- PierUpgrade
- WarehouseUpgrade
- ItemContainerUpgrade
- ResourceUpgrade
- VehicleUpgrade
- RepairCraneUpgrade
- AttackableUpgrade
- ProjectileUpgrade
- ShipyardUpgrade
- AttackerUpgrade
- VisitorHarborUpgrade
- ItemAction
- …
We have created our specialist, but we are not done yet with the mod.
Rewardpool/Itempool
A specialist or item can be received in a lot of different ways in the game. You can receive it as a quest reward, or can buy them at one of the traders. Some of them can be obtained via an expedition, or developed via the research institute. There are many ways of getting those items. But we all know not every item or specialists can be obtained in the same way. Some can only be bought at Eli, others can only be obtained with quests or from a specific AI, ect.
To get a specialist ingame we need to add that specialist to a Rewardpool or RewardItemPool. There are a lot of pools in the game. Every pool is a group of items with specific properties and purpose. For example, Eli has his own pools which determines which items he sells. Other pools of him determine which items you can get for completing quests of him, ect. That way, every AI, trader and type of mechanic has their own pools.
To give you an idea how much of a rabbithole Rewardpools are, there are 1185(!) rewardpools and 591(!) RewardItemPools at the moment. All with a specific reason. One of the hard things is that some pools contain other pools, which results in if you add your item to 2 pools but if one of the two actually contains the other pool, you get some side effects by giving that item a higher rate of appearing because it is in multiple places. What is the difference between the two types of pools?
Making a complete overview in this tutorial of all those pools would not be beneficial. Better is to go to a1800.net and have a look yourself.
RewardPool
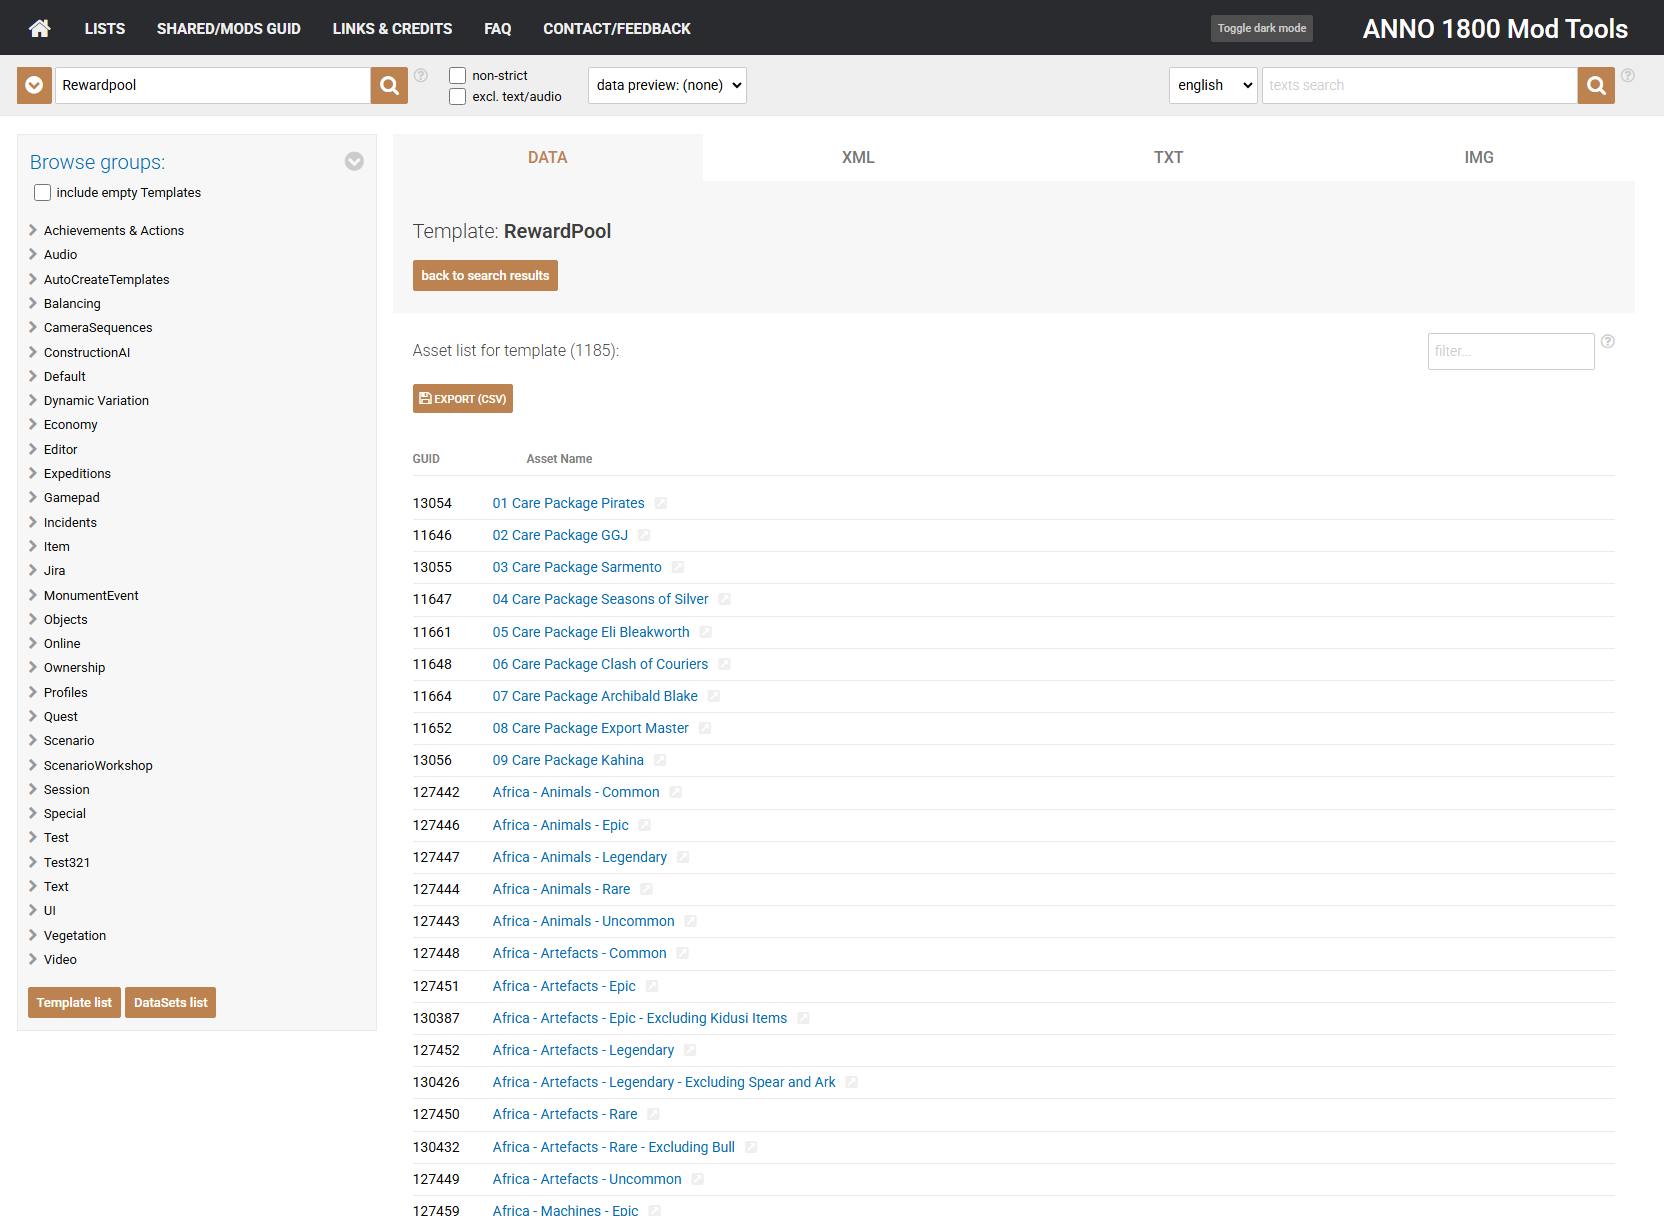
If we take a quick look at the complete list of Rewardpools, we can see a general overview of all types of different pools. Stretching from region related pools, to citizen related pools, type of item related pools, type of building related pools, type of DLC related pools, ect. For example, pools of all machines or consumable items. Or all cultural items, ect.
All of those pools are not related to a specific AI but more general.
RewardItemPool
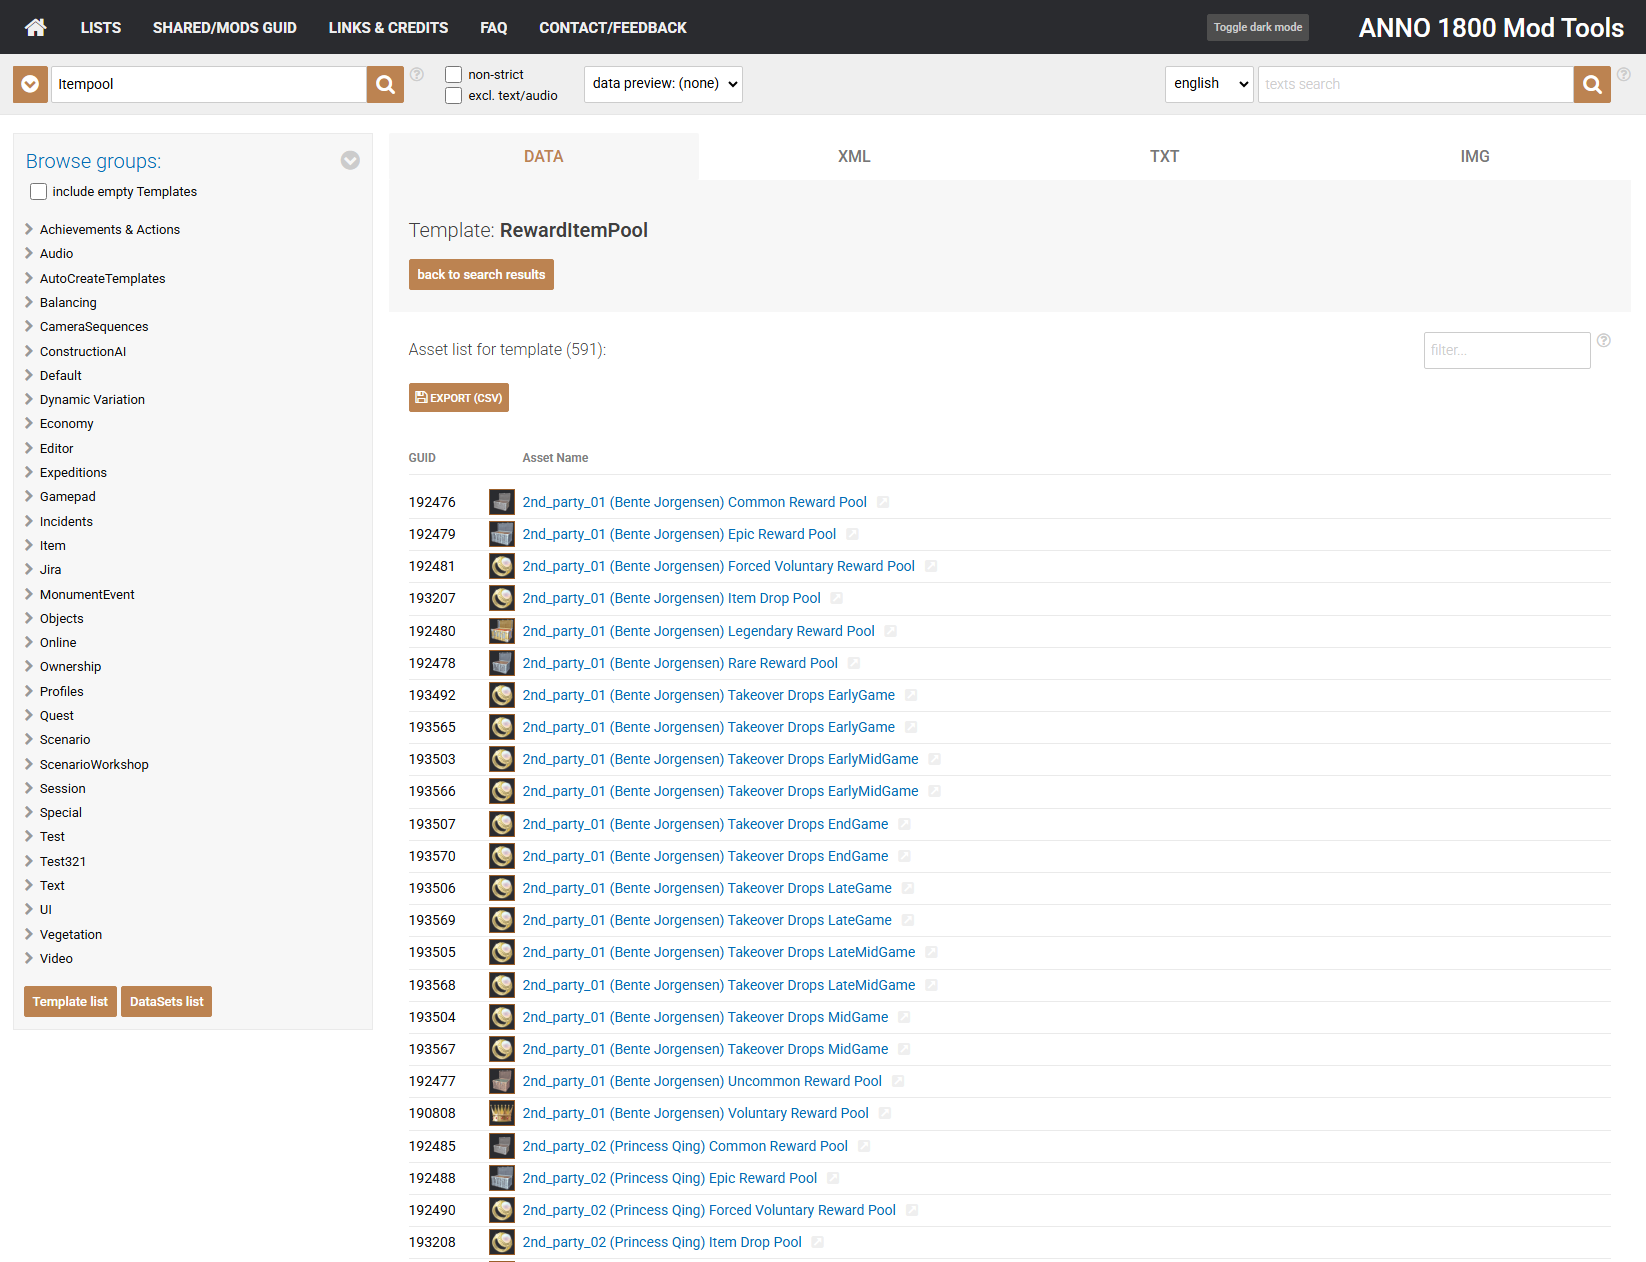
Compared to the RewardPool, the RewardItemPool is in almost all cases related to AI and NPC’s. This stretches from what they sell, what they drop when you destroy one of their ships, what you get for completing their quests, ect.
Which pools to choose?
To make a decision which pools you want to add your items to, you need to decide what type of specialist you want to make, and what kind of mod you want to make. For example, legendary specialists are not sold by traders in the game (some exceptions). Maybe you want to follow that logic, or maybe you do want to be able to buy that new item at Kahina or Archie. What you want decides in which pools you will be adding your item. I personally like to follow the logic of the game, so no legendary specialists to buy at traders for me.
What pools do we take then? The item we create is for the New World, so we could for example make it available to get from Isabel Sarmento when completing a quest for her. We could maybe also get it as a visitor on our island. Also, we want to make it available later in the game to research the item with the research institute.
Finding the right pool
Let’s start with the pool for Isabel Sarmento when completing a quest. We know from the previous part that pools for NPC’s traders and AI are located in the RewardItemPools. Let’s go to a1800.net and search for all RewardItemPools so we have the complete overview.
If we scroll down we do not see all the pools. Only a selection is show. At the bottom we can expand the list by clicking on “show more (541)”.

We now see the complete list of all 541 RewardItemPools where we can choose which ones we want.
If we do CTRL+F (Windows) / CMD+F (OSX) to search on the page and search for “Sarmento” we find 31 pools. If we have a look at those, we see a variety of types of pools of Isabel Sarmento.
Consumables, Machines, Specialists, Cultural, Common, Rare, Legendary, MidGame, LateGame, Endgame,… All those different types are referring to a different way of using the pools. If we make an item that is a specialist, it would be logical to add it in the “specialist” pool. Because it is a legendary specialists, then the logical place would be the “192904 - Sarmento Legendary Specialists”. We can open this pool to have a look what items are already in there.

We see this pool actually does not contain items, but it actually contains 2 other pools. A pool that contains the pool “Specialists - South American Goods - Legendary” and “Specialists - Europe and SA Goods - Legendary”.
Again, we can open one of the two pools to see what is in that pool by clicking on the GUID of that pool. Open “Specialists - South American Goods - Legendary”
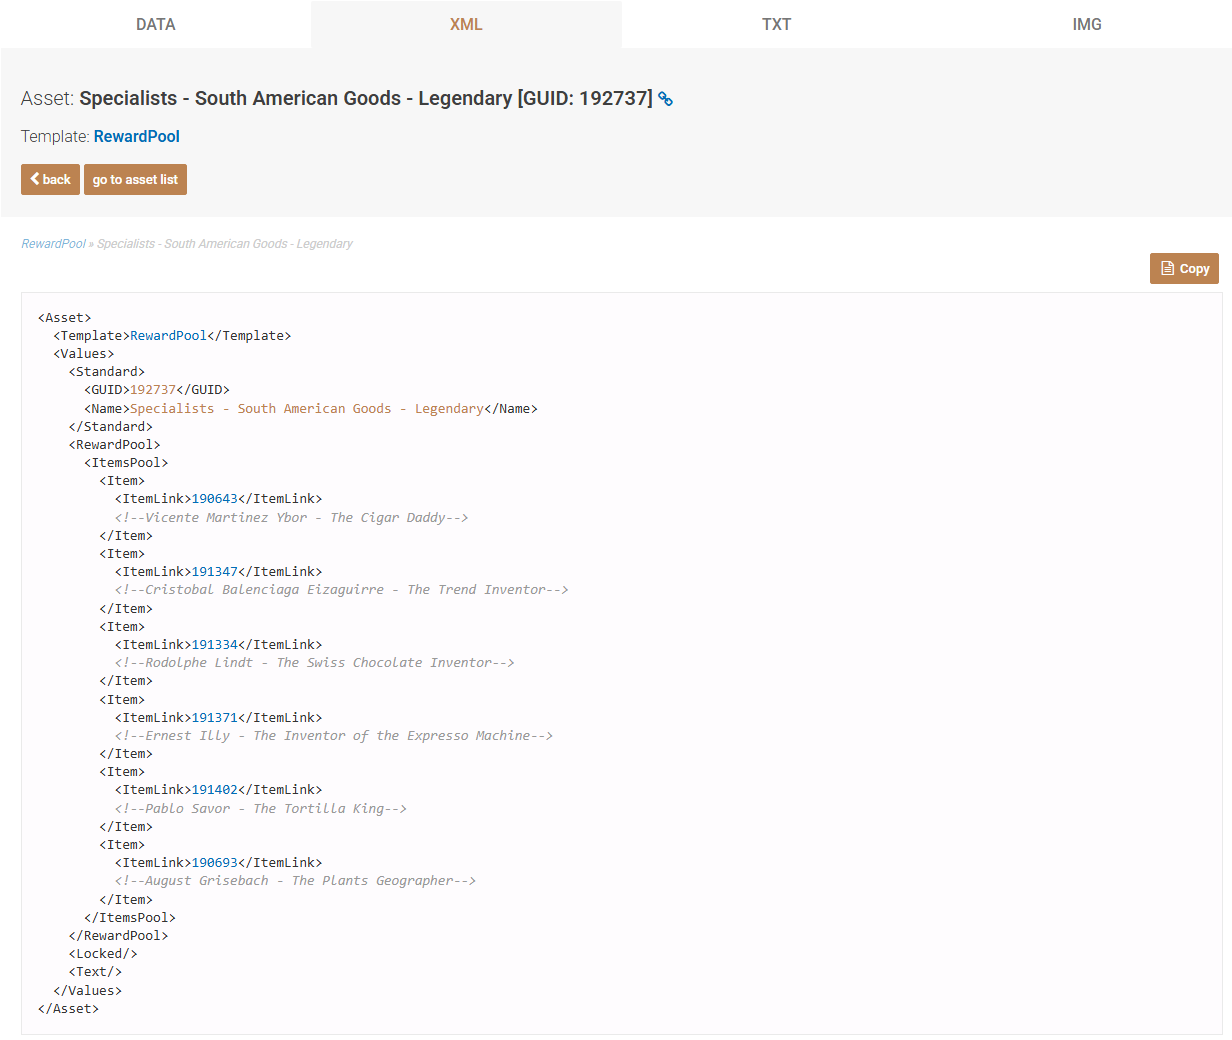
Here we actually do see a list of items which are indeed New World oriented like the title of this pool suggests.
This is the place we could actually add our new item to. If we add our item here it will be loaded via this child pool into the “Sarmento Legendary Specialists” pool.
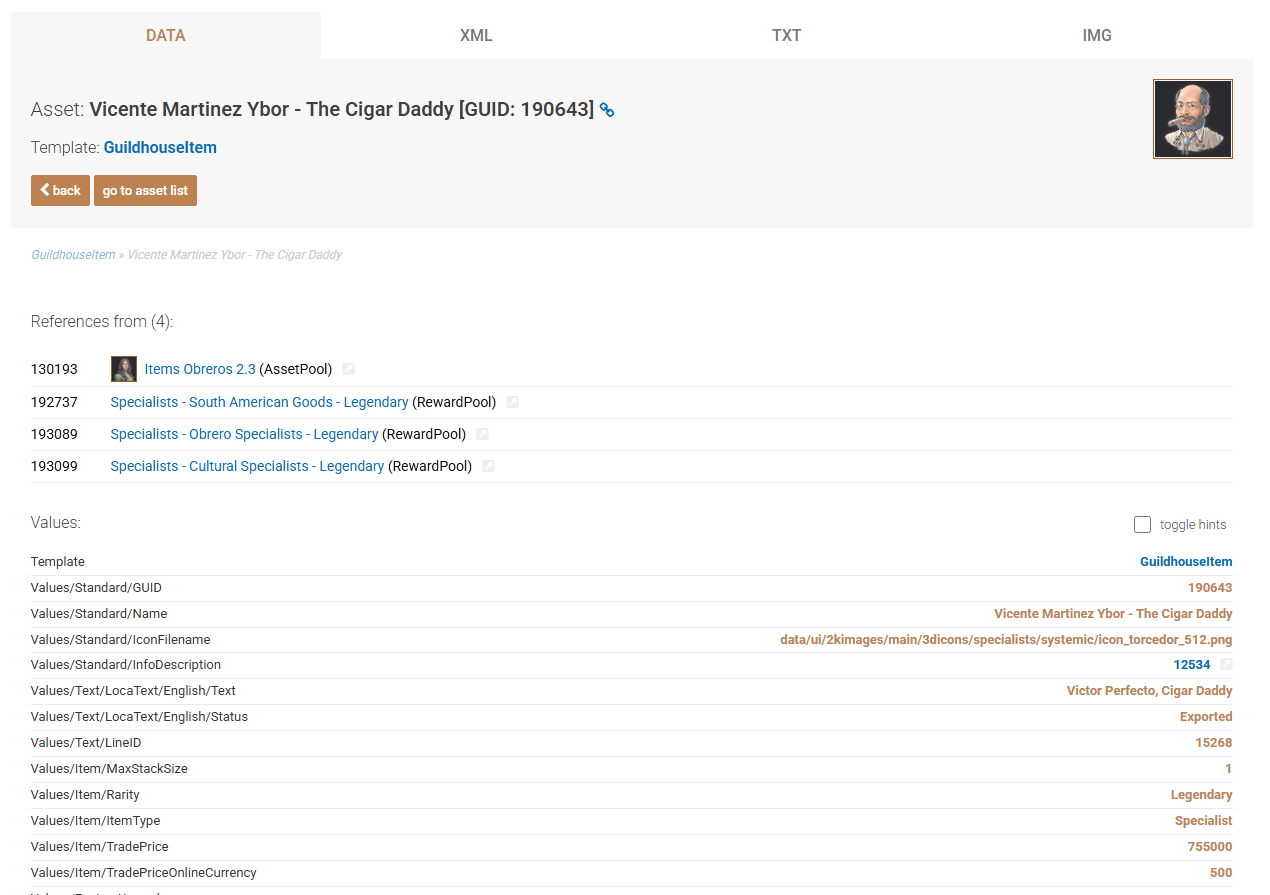
Let’s look for one of the items that are already in this pool and see where this item is available. Take “Vicente Martinez Ybor - The Cigar Daddy” as an example and open the item by clicking on his GUID in the pool.
If we stay in the DATA view, we can see the different references where this item is used/referenced.
We have an AssetPool (which we can ignore in this case), but also 3 rewardpools. Vicente is added to those 3 rewardpools which result in him being available in different locations. The 3th pool is maybe also not relevant in this case, because it is focused on cultural things. We will be focusing on the first 2 pools.
If you want to have an easier look and see how you can get this item, you can also have a look ingame in the item statistics screen and look for the item and select Item source.
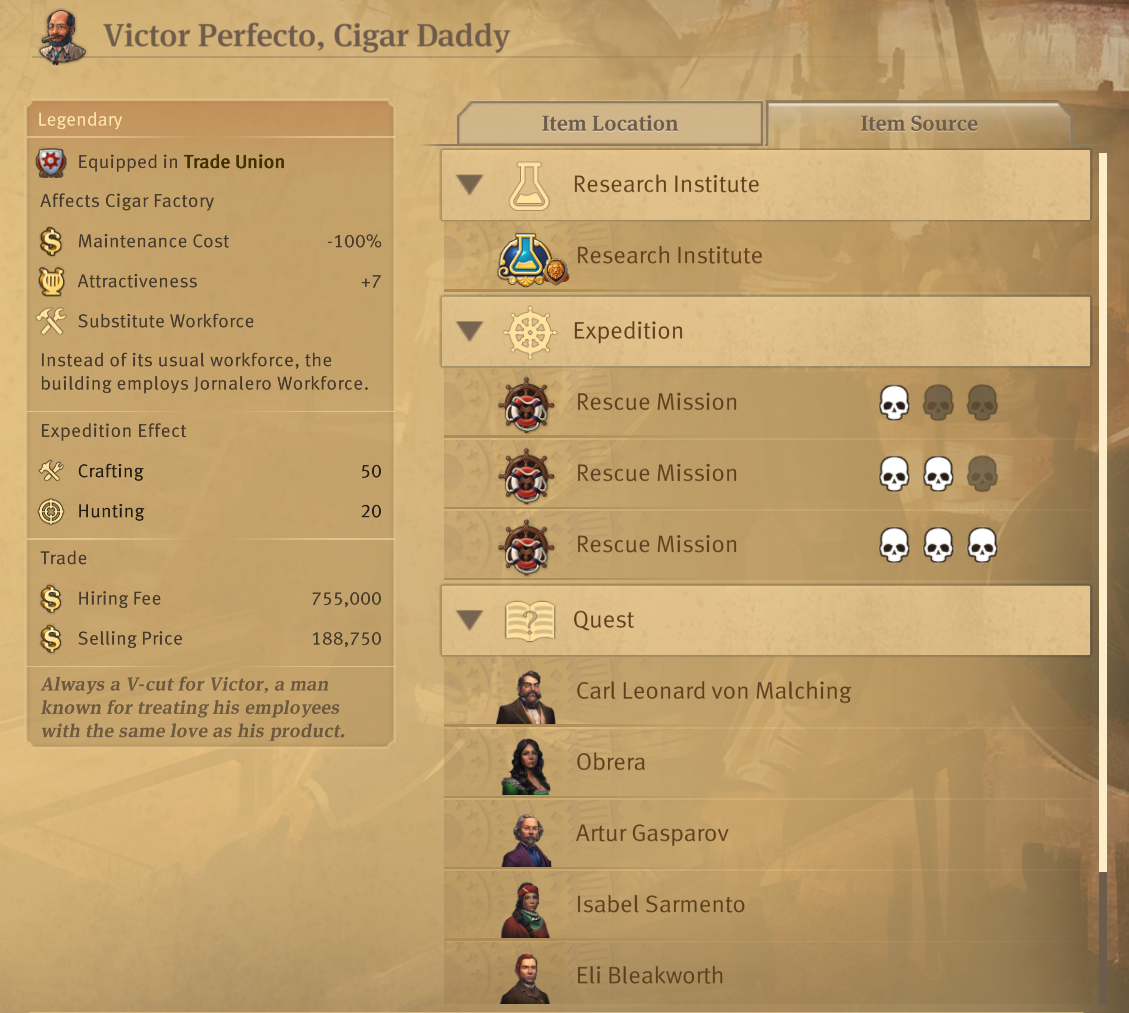
We see apart from quests from Isabel, he is also available via other quest givers, the research institure, expeditions,…
All the ways that we decided upfront are actually also included for this item. So, we could actually take over all the pools where this item is included in. We will take the risk of only using the first 2 pools, leaving out the cultural pool, but can always add it if we realise it is needed.
GOOD TO KNOW! A big tip I want to give you when making mods is that you do not always have to reinvent the wheel. Look for examples as inspiration. See how things are done in the game, have a look at how other people did things. We are an open and friendly modding community and we all want to help eachother so everyone can make amazing mods!
Adding our item to pools
Let’s first have another look at one of the 3 pools where we will be adding our item to.
<Asset>
	<Template>RewardPool</Template>
	<Values>
		<Standard>
			<GUID>192737</GUID>
			<Name>Specialists - South American Goods - Legendary</Name>
		</Standard>
		<RewardPool>
			<ItemsPool>
				<Item>
					<ItemLink>190643</ItemLink>
					<!--Vicente Martinez Ybor - The Cigar Daddy-->
				</Item>
				<Item>
					<ItemLink>191347</ItemLink>
					<!--Cristobal Balenciaga Eizaguirre - The Trend Inventor-->
				</Item>
				<Item>
					<ItemLink>191334</ItemLink>
					<!--Rodolphe Lindt - The Swiss Chocolate Inventor-->
				</Item>
				<Item>
					<ItemLink>191371</ItemLink>
					<!--Ernest Illy - The Inventor of the Expresso Machine-->
				</Item>
				<Item>
					<ItemLink>191402</ItemLink>
					<!--Pablo Savor - The Tortilla King-->
				</Item>
				<Item>
					<ItemLink>190693</ItemLink>
					<!--August Grisebach - The Plants Geographer-->
				</Item>
			</ItemsPool>
		</RewardPool>
		<Locked/>
		<Text/>
	</Values>
</Asset>
The pool is wrapped with an <Asset> and the <Template> is from the RewardPool.
The GUID of this RewardPool is “192737”. We will need this GUID when we will add our new item to this pool.
The other important part is <RewardPool> which then contains the <ItemsPool> which contains the different <Item> elements of all the different specialists in this pool.
To add our specialist to this pool we need to create a new mod operation (<ModOp>) where we add our new item to the <ItemsPool>.
Remember the previous tutorial where we looked at the path of Feras to understand where we needed to replace a specific value? This time it is somewhat the same.
Step by step
Let’s build the Mod operation together. We can create a new <ModOp> underneath the other <ModOp> we already created where we created our new specialist. Make sure it is still in the <ModOps> so it is not outside the container that wraps all our <ModOp> items, so before the </ModOps> closing tag. The type of operation we now will do is again, “add”.
<ModOp Type="add">

</ModOp>
The next step is the GUID we want to do this operation to. This was the GUID of the pool we previously looked at, “192737”. But apart from that pool, we also had the 2nd pool with the GUID “193089”. We can add both GUIDs in the same ModOp but only if those have the same structure. Because we will be defining a Path in our ModOp, those 2 pools need to have the same structure which corresponds with that path. If we look at a1800.net and compare the structure of those pools we see those are actually the same so this is all fine.
We can add multiple GUIDs in the same ModOp when we seperate them with a comma.
<ModOp Type="add" GUID="192737,193089">

</ModOp>
Now the next step is adding the Path to where we want to do the “add” operation. We look at one of the two pools and go down the structure until we are at the level where we will be including our new item.
<Asset>
	<Template>RewardPool</Template>
	<Values>
		<Standard>
			<GUID>192737</GUID>
			<Name>Specialists - South American Goods - Legendary</Name>
		</Standard>
		<RewardPool>
			<ItemsPool>
				<Item>
					<ItemLink>190643</ItemLink>
					<!--Vicente Martinez Ybor - The Cigar Daddy-->
				</Item>
				<Item>
					<ItemLink>191347</ItemLink>
					<!--Cristobal Balenciaga Eizaguirre - The Trend Inventor-->
				</Item>
				...
			</ItemsPool>
		</RewardPool>
		<Locked/>
		<Text/>
	</Values>
</Asset>
We see /Values/RewardPool/ItemsPool and then we have the level of the Item where we will be adding our new item. So we get:
<ModOp Type="add" GUID="192737,193089" Path="/Values/RewardPool/ItemsPool">

</ModOp>
Now we put what we want to add in the structure inside.
<ModOp Type="add" GUID="192975,192737,192840,193963,192904,192909" Path="/Values/RewardPool/ItemsPool">
    <Item>
        <ItemLink>1742008800</ItemLink> <!-- Maria Lopez -->
    </Item>
</ModOp>
We took another important step in making our new specialist!
Now you should have the following structure:
<ModOps>

    <ModOp GUID="191431" Type="addNextSibling">
        <Asset>
            <Template>GuildhouseItem</Template>
            <Values>
                <Standard>
                    <GUID>1742008800</GUID>
                    <Name>Maria Lopez, Mining yellow stones</Name>
                    <IconFilename>data/graphics/icons/icon_maria_lopez.png</IconFilename>
                    <InfoDescription>1742008801</InfoDescription>
                </Standard>
                <Text>
                    <LocaText>
                        <English>
                            <Text>Maria Lopez, Mining yellow stones</Text>
                            <Status>Exported</Status>
                            <ExportCount>1</ExportCount>
                        </English>
                    </LocaText>
                </Text>
                <Item>
                    <MaxStackSize>1</MaxStackSize>
                    <Rarity>Legendary</Rarity>
                    <ItemType>Specialist</ItemType>
                    <Allocation>GuildHouse</Allocation>
                    <TradePrice>1250000</TradePrice>
                    <TradePriceOnlineCurrency>1250000</TradePriceOnlineCurrency>
                </Item>
				<ItemEffect>
                    <EffectTargets>
                        <Item>
                            <GUID>101311</GUID> <!-- Gold Mine -->
                        </Item>
                    </EffectTargets>
                </ItemEffect>
                <FactoryUpgrade>
                    <ProductivityUpgrade>
                        <Value>200</Value>
                        <Percental>1</Percental>
                    </ProductivityUpgrade>
                    <AdditionalOutput>
                        <Item>
                            <Product>1010227</Product> <!-- Iron -->
                            <AdditionalOutputCycle>4</AdditionalOutputCycle>
                            <Amount>1</Amount>
                        </Item>
                    </AdditionalOutput>
                </FactoryUpgrade>
                <ExpeditionAttribute>
                    <BaseMorale>0</BaseMorale>
                    <ExpeditionAttributes>
                        <Item>
                            <Attribute>PerkFemale</Attribute>
                            <Amount>1</Amount>
                        </Item>
                        <Item>
                            <Attribute>Crafting</Attribute>
                            <Amount>40</Amount>
                        </Item>
                        <Item>
                            <Attribute>Diplomacy</Attribute>
                            <Amount>10</Amount>
                        </Item>
                    </ExpeditionAttributes>
                    <ItemDifficulties>Hard</ItemDifficulties>
                </ExpeditionAttribute>
                <BuildingUpgrade>
                    <WorkforceAmountUpgrade>
                        <Value>50</Value>
                        <Percental>1</Percental>
                    </WorkforceAmountUpgrade>
                </BuildingUpgrade>
            </Values>
        </Asset>
    </ModOp>

    <ModOp Type="add" GUID="192737,193089" Path="/Values/RewardPool/ItemsPool">
        <Item>
            <ItemLink>1742008800</ItemLink> <!-- Maria Lopez -->
        </Item>
    </ModOp>

</ModOps>
We are almost there! One last step.
Triggers
Some items, buildings or other things in the game are not available from the start. You have to unlock those by progressing in the game. For example, you have to start with farmers and work your way up to investors. To do that you have to unlock everything step by step.
Unlocking those possibilities is done with Triggers. A lot of the things in the game have triggers, and we also need those triggers to make our specialist available in the game at a certain stage.
More then just unlocking assets
A trigger is a action that is executed based on a certain condition. In this case, the trigger we will be using, is unlocking our item. But a trigger can do so much more. It is a really powerful tool where you can dive in so much deeper! But that is for another time.
Only 1 time executed
Those triggers also have their own GUID which needs to be unique.
It is important to know that triggers only execute 1 time. (There are exceptions, but the general rule is 1 time). If the trigger was executed and you save your game. That trigger can never be used again anymore because that GUID is now saved within the savegame. If for example you would make changes to your mod and add new things to that trigger, savegames where that trigger was already executed will not execute again and will not have those changes you added to that trigger. A solution could be renewing the GUID of that trigger, which will trigger a new execution of the trigger.
We have 1 trigger for our specialist mod which will use GUID 1742008802 for the trigger.
We will be adding our trigger after an already existing trigger as the next sibling. So, we choose Type=”addnextSibling” and then the GUID of that trigger. In this case “130248”.
Adding this trigger is again a new mod operation. Like the other mod operations we make sure this has their own opening and closing tag and it is inside the <ModOps> tags and before the </ModOps> closing tag.
The start of this trigger looks like this:
<ModOp Type="addnextSibling" GUID="130248">

</ModOp>
This template we are going to use now is a Trigger.
<ModOp Type="addnextSibling" GUID="130248">
    <Asset>
        <Template>Trigger</Template>
    </Asset>
</ModOp>
To see an example of a trigger template search for the GUID “130249” on https://a1800.net/ and have a look at the structure of that trigger asset.
<Asset>
	<Template>Trigger</Template>
	<Values>
		<Standard>
			<GUID>130249</GUID>
			<Name>intermediate moderate 1.1</Name>
			<IconFilename>data/ui/2kimages/main/profiles/resident_tier01.png</IconFilename>
		</Standard>
		<Trigger>
			<TriggerCondition>
				<Template>ConditionPlayerCounter</Template>
				<Values>
					<Condition/>
					<ConditionPlayerCounter>
						<PlayerCounter>PopulationByLevel</PlayerCounter>
						<Context>15000000</Context>
						<!--Moderate Population 1-->
						<CounterAmount>50</CounterAmount>
					</ConditionPlayerCounter>
				</Values>
			</TriggerCondition>
			<TriggerActions>
				<Item>
					<TriggerAction>
						<Template>ActionUnlockAsset</Template>
						<Values>
							<Action/>
							<ActionUnlockAsset>
								<UnlockAssets>
									<Item>
										<Asset>130056</Asset>
										<!--asset pool fish-->
									</Item>
									<Item>
										<Asset>130162</Asset>
										<!--Items Farmers 1.1-->
									</Item>
								</UnlockAssets>
								<UnhideAssets>
									<Item>
										<Asset>140028</Asset>
										<!--asset pool schnapps-->
									</Item>
									<Item>
										<Asset>130060</Asset>
										<!--asset pool basic clothes-->
									</Item>
									<Item>
										<Asset>1010344</Asset>
										<!--residence_tier02-->
									</Item>
								</UnhideAssets>
							</ActionUnlockAsset>
						</Values>
					</TriggerAction>
				</Item>
			</TriggerActions>
			<ResetTrigger>
				<IsBaseAutoCreateAsset>1</IsBaseAutoCreateAsset>
				<Values>
					<EmptyAutoCreateValue/>
				</Values>
			</ResetTrigger>
		</Trigger>
		<TriggerSetup/>
	</Values>
</Asset>
Let’s take over the parts we need.
Standard
We have our Standard part which do not need to much explanation. We use our new GUID here to give this trigger a unique identifier and give our trigger a name.
Trigger
TriggerCondition
As the name states, here we define what the condition will be for our trigger to go off, and make our item available in the game.
The ConditionPlayerCounter is a part we always will be using. It states that those triggers are specificly for the player. The values that it contains can change.
In this case we will use PopulationByLevel which states that the trigger will go off when we hit a certain population.
In the <Context> we put a GUID of a population tier which threshold we want to hit. Underneath we put the <CounterAmount> of that population. For this mod we will make our specialist available when hitting 500 Obrero citizen. So we need the GUID of the Obrero population. This is GUID 15000006. I searched for this on https://a1800.net/.
<ModOp Type="addnextSibling" GUID="130248">
    <Asset>
        <Template>Trigger</Template>
        <Values>
            <Standard>
                <GUID>1742008802</GUID>
                <Name>Specialist Trigger</Name>
            </Standard>
            <Trigger>
                <TriggerCondition>
                    <Template>ConditionPlayerCounter</Template>
                    <Values>
                        <Condition />
                        <ConditionPlayerCounter>
                            <PlayerCounter>PopulationByLevel</PlayerCounter>
                            <Context>15000006</Context>
                            <CounterAmount>500</CounterAmount>
                        </ConditionPlayerCounter>
                    </Values>
                </TriggerCondition>
            </Trigger>
            <TriggerSetup />
        </Values>
    </Asset>
</ModOp>
Almost the last step of our tutorial, adding the specialist to the trigger. Unlock it!
<ModOp Type="addnextSibling" GUID="130248">
    <Asset>
        <Template>Trigger</Template>
        <Values>
            <Standard>
                <GUID>1742008802</GUID>
                <Name>Specialist Trigger</Name>
            </Standard>
            <Trigger>
                <TriggerCondition>
                    <Template>ConditionPlayerCounter</Template>
                    <Values>
                        <Condition />
                        <ConditionPlayerCounter>
                            <PlayerCounter>PopulationByLevel</PlayerCounter>
                            <Context>15000006</Context>
                            <CounterAmount>500</CounterAmount>
                        </ConditionPlayerCounter>
                    </Values>
                </TriggerCondition>
                <TriggerActions>
                    <Item>
                        <TriggerAction>
                            <Template>ActionUnlockAsset</Template>
                            <Values>
                                <Action />
                                <ActionUnlockAsset>
                                    <UnlockAssets>
                                        <Item>
                                            <Asset>1742008800</Asset> <!-- Maria Lopez -->
                                        </Item>
                                    </UnlockAssets>
                                </ActionUnlockAsset>
                            </Values>
                        </TriggerAction>
                    </Item>
                </TriggerActions>
            </Trigger>
            <TriggerSetup />
        </Values>
    </Asset>
</ModOp>
We should now have the fantastic assets.xml like this:
<ModOps>

    <ModOp GUID="191431" Type="addNextSibling">
        <Asset>
            <Template>GuildhouseItem</Template>
            <Values>
                <Standard>
                    <GUID>1742008800</GUID>
                    <Name>Maria Lopez, Mining yellow stones</Name>
                    <IconFilename>data/graphics/icons/icon_maria_lopez.png</IconFilename>
                    <InfoDescription>1742008801</InfoDescription>
                </Standard>
                <Text>
                    <LocaText>
                        <English>
                            <Text>Maria Lopez, Mining yellow stones</Text>
                            <Status>Exported</Status>
                            <ExportCount>1</ExportCount>
                        </English>
                    </LocaText>
                </Text>
                <Item>
                    <MaxStackSize>1</MaxStackSize>
                    <Rarity>Legendary</Rarity>
                    <ItemType>Specialist</ItemType>
                    <Allocation>GuildHouse</Allocation>
                    <TradePrice>1250000</TradePrice>
                    <TradePriceOnlineCurrency>1250000</TradePriceOnlineCurrency>
                </Item>
				<ItemEffect>
                    <EffectTargets>
                        <Item>
                            <GUID>101311</GUID> <!-- Gold Mine -->
                        </Item>
                    </EffectTargets>
                </ItemEffect>
                <FactoryUpgrade>
                    <ProductivityUpgrade>
                        <Value>200</Value>
                        <Percental>1</Percental>
                    </ProductivityUpgrade>
                    <AdditionalOutput>
                        <Item>
                            <Product>1010227</Product> <!-- Iron -->
                            <AdditionalOutputCycle>4</AdditionalOutputCycle>
                            <Amount>1</Amount>
                        </Item>
                    </AdditionalOutput>
                </FactoryUpgrade>
                <ExpeditionAttribute>
                    <BaseMorale>0</BaseMorale>
                    <ExpeditionAttributes>
                        <Item>
                            <Attribute>PerkFemale</Attribute>
                            <Amount>1</Amount>
                        </Item>
                        <Item>
                            <Attribute>Crafting</Attribute>
                            <Amount>40</Amount>
                        </Item>
                        <Item>
                            <Attribute>Diplomacy</Attribute>
                            <Amount>10</Amount>
                        </Item>
                    </ExpeditionAttributes>
                    <ItemDifficulties>Hard</ItemDifficulties>
                </ExpeditionAttribute>
                <BuildingUpgrade>
                    <WorkforceAmountUpgrade>
                        <Value>50</Value>
                        <Percental>1</Percental>
                    </WorkforceAmountUpgrade>
                </BuildingUpgrade>
            </Values>
        </Asset>
    </ModOp>

    <ModOp Type="add" GUID="192737,193089" Path="/Values/RewardPool/ItemsPool">
        <Item>
            <ItemLink>1742008800</ItemLink> <!-- Maria Lopez -->
        </Item>
    </ModOp>

    <ModOp Type="addnextSibling" GUID="130248">
        <Asset>
            <Template>Trigger</Template>
            <Values>
                <Standard>
                    <GUID>1742008802</GUID>
                    <Name>Specialist Trigger</Name>
                </Standard>
                <Trigger>
                    <TriggerCondition>
                        <Template>ConditionPlayerCounter</Template>
                        <Values>
                            <Condition />
                            <ConditionPlayerCounter>
                                <PlayerCounter>PopulationByLevel</PlayerCounter>
                                <Context>15000006</Context>
                                <CounterAmount>500</CounterAmount>
                            </ConditionPlayerCounter>
                        </Values>
                    </TriggerCondition>
                    <TriggerActions>
                        <Item>
                            <TriggerAction>
                                <Template>ActionUnlockAsset</Template>
                                <Values>
                                    <Action />
                                    <ActionUnlockAsset>
                                        <UnlockAssets>
                                            <Item>
                                                <Asset>1742008800</Asset> <!-- Maria Lopez -->
                                            </Item>
                                        </UnlockAssets>
                                    </ActionUnlockAsset>
                                </Values>
                            </TriggerAction>
                        </Item>
                    </TriggerActions>
                </Trigger>
                <TriggerSetup />
            </Values>
        </Asset>
    </ModOp>

</ModOps>
Modinfo.json
Just like our first mod, we again need to create a modinfo.json file in the root of our mod folder. We can again keep this simple and make a barebone file with limited information.
{
    "Version": "1.0",
    "ModID": "tutorial_specialists",
    "Category": {
        "English": "Gameplay"
    },
    "ModName": {
        "English": "Tutorial Specialists"
    },
    "Description": {
        "English": "Create a new specialist and learn more about modding."
    },
    "CreatorName": "My name"
}
Check the mod ingame
Save all the files, make sure everything looks ok and the icon is in the right location.
Copy your mod to the modfolder and start the game.
You should be able to see this item in the statistics screen in the item menu when you search for it. Check the possibilities how you can get the item.
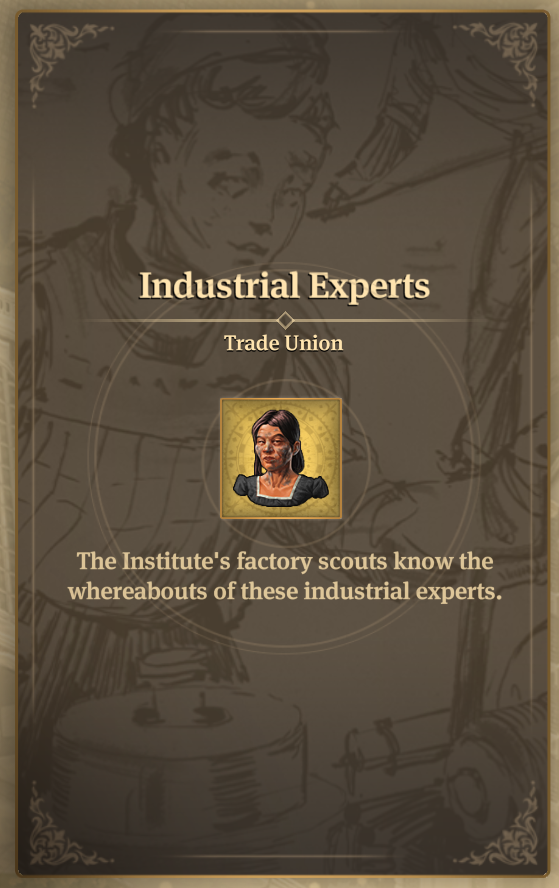
This looks good already! Now you can play to get the item to see if it works. If you are progressed enough, you should be able to identify the item in the research institute as an Industrial Expert.
After identifying you will be able to develop the item. Or you can use one of the other ways to get the item.
Once you have the item, put it inside the trade union next to a gold mine and see your newly created item in action!
Have fun! And now you can make as many items, specialists if you want!
Ready for the next one? Have fun and enjoy your Anno modding journey! Go check out the next tutorial where we make a new product and production chain.